Introduction
This guide will show you how to replace the bumper buttons on your GameSir X2 Pro controller.
If your bumpers have become unresponsive, sticky, or physically damaged, replacing them can restore proper functionality and responsiveness.
The process involves opening the controller and carefully removing and installing small internal components, so patience and attention to detail are important. With the right tools and this step-by-step guide, you’ll have your controller working like new again.
What you need
-
-
-
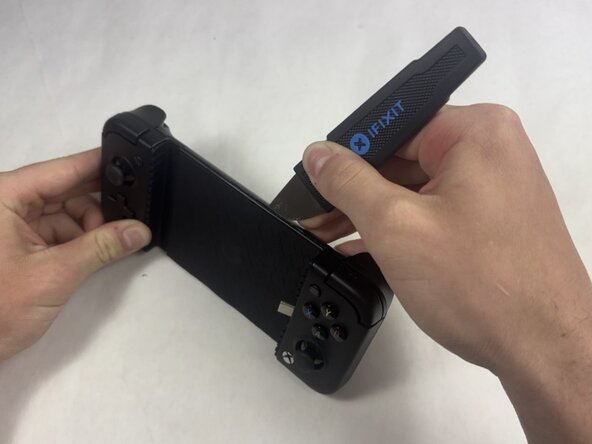
Insert the tip of the Jimmy between the rubber pad and the back of the controller, then slide it along the edge to loosen the adhesive and lift the pad away.
-
Gently remove the rubber pad.
 Ask FixBot
-
-
-
Use a Phillips #000 screwdriver to remove the four 4.5 mm screws under the rubber pad.
-
-
-
-
Flip the controller over so the back is facing up.
-
Remove the eight 6.0 mm T6 Torx screws from the back of the device.
-
-
-
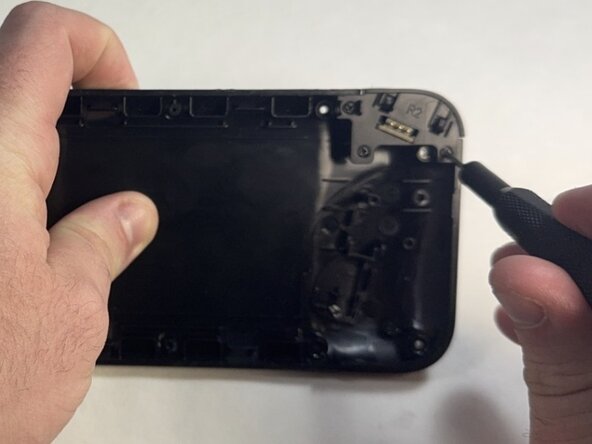
Use a Phillips #000 screwdriver to remove the three 4.5 mm screws from top right of the back panel.
-
-







To reassemble your device, follow these instructions in reverse order. Take your e-waste to an R2 or e-Stewards certified recycler.

Team

UMass Dartmouth, Team 5-2, Rioux Spring 2026 Member of UMass Dartmouth, Team 5-2, Rioux Spring 2026
UMASSD-RIOUX-S26S5G2
3 Members
60 Guides authored
