Free Shipping on Domestic Orders $75+

GameSir T4 Pro Action Buttons Replacement

What you need

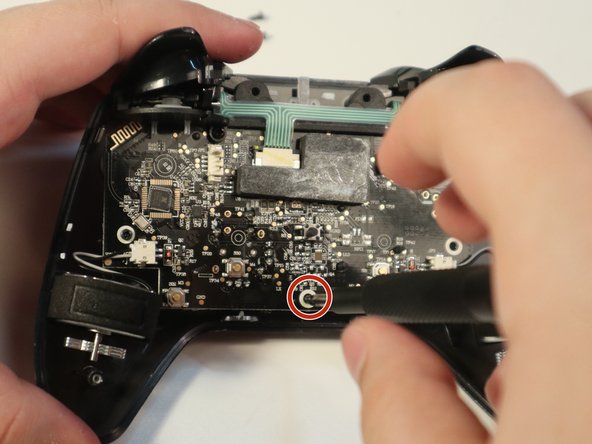
    1. GameSir T4 Pro Action Buttons Replacement, Battery: step 1, image 1 of 1
      • Using the Phillips 1 screwdriver, gently turn the screw to the left (repeat this step until all four screws are taken out).

      Ask FixBot

      Add Comment

    2. GameSir T4 Pro Action Buttons Replacement: step 2, image 1 of 1
      • Use your iFixit opening tool to break the seam of the back of your controller.

      • Be careful when pulling apart, as the charging port wires are connected to both sides of the controller.

      Ask FixBot

      Add Comment

    3. GameSir T4 Pro Action Buttons Replacement: step 3, image 1 of 1
      • Using the plastic spudger, wiggle the connection out of place.

      Ask FixBot

      Add Comment

    4. GameSir T4 Pro Action Buttons Replacement: step 4, image 1 of 1
      • Apply a slow, but consistent pull to the old 600 maH battery.

      • Attach new battery onto the pad.

      Ask FixBot

      Add Comment

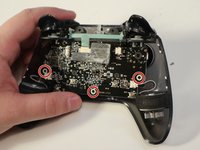
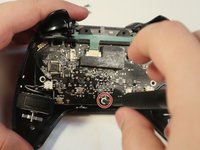
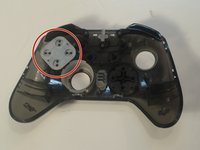
    1. GameSir T4 Pro Action Buttons Replacement, Action Buttons: step 5, image 1 of 2 GameSir T4 Pro Action Buttons Replacement, Action Buttons: step 5, image 2 of 2
      • Remove the three 5mm screws on the motherboard.

      Ask FixBot

      Add Comment

    2. GameSir T4 Pro Action Buttons Replacement: step 6, image 1 of 1
      • Disconnect all white connectors from the motherboard.

      Ask FixBot

      Add Comment

    3. GameSir T4 Pro Action Buttons Replacement: step 7, image 1 of 1
      • Carefully pull the motherboard away to reveal the front panel.

      Ask FixBot

      Add Comment

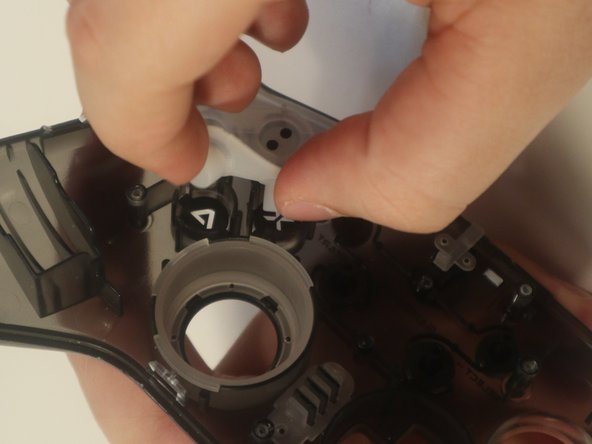
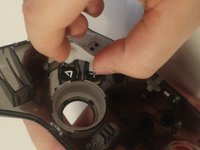
    4. GameSir T4 Pro Action Buttons Replacement: step 8, image 1 of 2 GameSir T4 Pro Action Buttons Replacement: step 8, image 2 of 2
      • Remove the white rubber panel to get access to the buttons.

      • Put a small dab of isopropyl alcohol on a cotton swab, and clean around the area of your sticky button.

      Ask FixBot

      Add Comment

Conclusion

To reassemble your device, follow these instructions in reverse order.

Cancel: I did not complete this guide.

5 other people completed this guide.

0 Guide Comments

Add Comment

View Statistics:

Past 24 Hours: 3

Past 7 Days: 37

Past 30 Days: 127

All Time: 6,143