
Free Shipping on Domestic Orders $75+

GameSir Nova Lite Action Buttons Replacement

What you need

  1. GameSir Nova Lite Action Buttons Replacement, Battery: step 1, image 1 of 3 GameSir Nova Lite Action Buttons Replacement, Battery: step 1, image 2 of 3 GameSir Nova Lite Action Buttons Replacement, Battery: step 1, image 3 of 3
    • Turn your controller so that the back of the controller is facing you.

    • Remove all six 9 mm-long Phillips #1 screws securing the back plate.

  2. GameSir Nova Lite Action Buttons Replacement: step 2, image 1 of 2 GameSir Nova Lite Action Buttons Replacement: step 2, image 2 of 2
    • Insert an opening tool in the seam between the back and front case.

    • Insert iFixit Opening Picks around the controller to help keep the front and separated.

    • Slowly slide the tool around the controller until the two halves of the controller come apart.

  3. GameSir Nova Lite Action Buttons Replacement: step 3, image 1 of 2 GameSir Nova Lite Action Buttons Replacement: step 3, image 2 of 2
    • Take the back shell off of the controller.

    • Hold the front part of the controller when taking the two halves apart.

  4. GameSir Nova Lite Action Buttons Replacement: step 4, image 1 of 2 GameSir Nova Lite Action Buttons Replacement: step 4, image 2 of 2
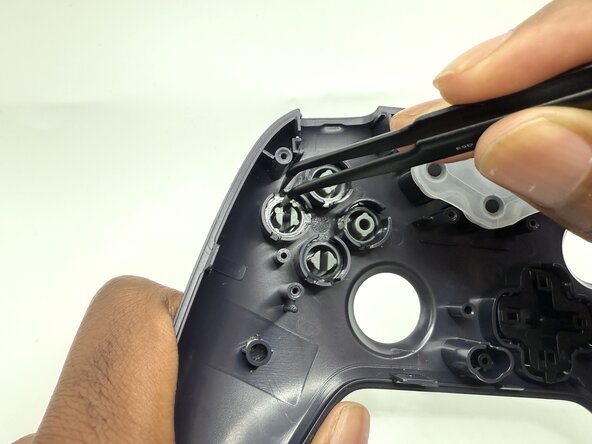
    • Lay the controller down so that the motherboard and battery are facing you.

    • Grasp the white battery connector with blunt tweezers, and gently pull it out of its socket.

  5. GameSir Nova Lite Action Buttons Replacement: step 5, image 1 of 2 GameSir Nova Lite Action Buttons Replacement: step 5, image 2 of 2
    • Use tweezers to carefully take the battery off the motherboard.

    • It’s ok if the adhesive strip that is stuck to the battery comes/doesn’t come off.

  6. GameSir Nova Lite Action Buttons Replacement, Action Buttons: step 6, image 1 of 1
    • Remove the four 6 mm-long screws securing the motherboard to the front case with a Phillips #2 screwdriver.

  7. GameSir Nova Lite Action Buttons Replacement: step 7, image 1 of 2 GameSir Nova Lite Action Buttons Replacement: step 7, image 2 of 2
    • Remove the motherboard and any components connected to it from the controller's front case.

  8. GameSir Nova Lite Action Buttons Replacement: step 8, image 1 of 1
    • After removing the motherboard, hold the front shell of the controller.

    • Do not flip the front shell of the controller to the front, or all the buttons will fall out.

  9. GameSir Nova Lite Action Buttons Replacement: step 9, image 1 of 2 GameSir Nova Lite Action Buttons Replacement: step 9, image 2 of 2
    • Use angled tweezers to take the action buttons outside of their sockets.

Conclusion

To reassemble your device, follow these instructions in reverse order.

2 other people completed this guide.

0 Guide Comments

Add Comment

View Statistics:

Past 24 Hours: 4

Past 7 Days: 13

Past 30 Days: 65

All Time: 362