Introduction
These instructions will show you how to remove the motherboard. You may have to take out the motherboard to replace certain components, like the control stick component.
What you need
-
-
Wedge the opening tool in-between the faceplate dent located at the top of the controller.
-
Lift the faceplate off the controller.
 Ask FixBot
-
-
-
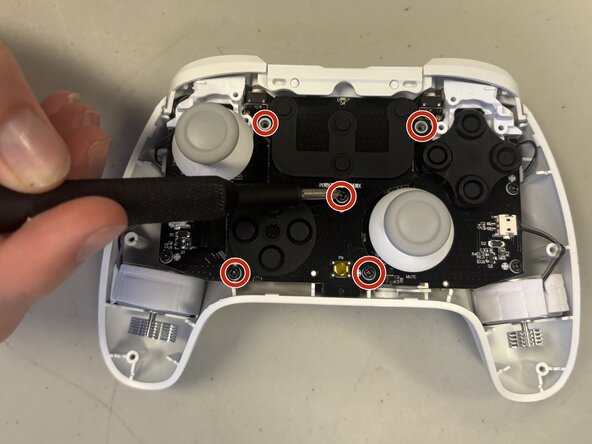
Remove the six 9.2 mm-long Phillips #0 screws located around the face of the controller.
-
-
-
-
Use an opening tool to flip up the locking flap securing the daughterboard ribbon cable.
-
-
-
Disconnect the rumble motors from the motherboard on the left and right side of the controller using tweezers.
-
-
-
Unscrew the four 4 mm-long Phillips screws securing the motherboard.
-
Lift the motherboard out of the controller base.
-


To reassemble your device, follow the above steps in reverse order.
Take your e-waste to an R2 or e-Stewards certified recycler.
Repair didn’t go as planned? Try some basic troubleshooting or ask our Answers community for help.

Team

University of North Texas, Team 8-6, Coppersmith Fall 2025 Member of University of North Texas, Team 8-6, Coppersmith Fall 2025
UNT-COPPERSMITH-F25S8G6
4 Members
4 Guides authored