Free Shipping on Domestic Orders $75+

GE Carescape R860 Touch Bezel Assembly Replacement

Medical Equipment
Neither iFixit nor this repair guide is endorsed by or affiliated with the medical device manufacturer.

What you need

  1. GE Carescape R860 Touch Bezel Assembly Replacement, GE Carescape R860 Display Unit Disassembly: step 1, image 1 of 1
    • Using an opening tool, gently pry the alarm light lens (boxed) from the display unit.

    Ask FixBot
  2. GE Carescape R860 Touch Bezel Assembly Replacement: step 2, image 1 of 1
    • Loosen the seven screws that hold the rear housing using a Phillips #0 screwdriver.

    • Remove the rear housing.

    Ask FixBot
  3. GE Carescape R860 Touch Bezel Assembly Replacement: step 3, image 1 of 1
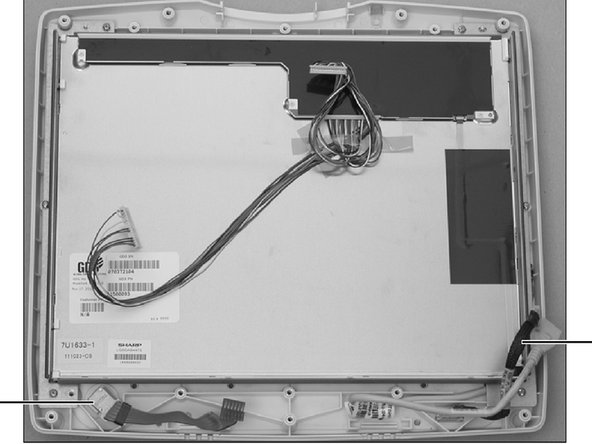
    • Cut the cable tie holding the two cables at the lower right side using scissors.

    Ask FixBot
  4. GE Carescape R860 Touch Bezel Assembly Replacement: step 4, image 1 of 1
    • Disconnect the touch controller cable.

    Ask FixBot
  5. GE Carescape R860 Touch Bezel Assembly Replacement: step 5, image 1 of 1
    • Disconnect the Keypad harness at the Carrier Board.

    Ask FixBot
  6. GE Carescape R860 Touch Bezel Assembly Replacement: step 6, image 1 of 1
    • Disconnect the encoder harness from the Carrier Board.

    Ask FixBot
  7. GE Carescape R860 Touch Bezel Assembly Replacement: step 7, image 1 of 1
    • Disconnect the speaker harness from the Carrier Board and set the speakers aside.

    Ask FixBot
  8. GE Carescape R860 Touch Bezel Assembly Replacement: step 8, image 1 of 1
    • Disconnect the alarm light harness from the Carrier Board.

    Ask FixBot
  9. GE Carescape R860 Touch Bezel Assembly Replacement: step 9, image 1 of 1
    • Loosen (do not remove) the five screws at the top edge of the shield just enough to raise it and slide the shield away with a Phillips #0 screwdriver.

    Ask FixBot
  10. GE Carescape R860 Touch Bezel Assembly Replacement: step 10, image 1 of 1
    • Loosen the four screws along each side of the shield with a Phillips #0 screwdriver.

    Ask FixBot
  11. GE Carescape R860 Touch Bezel Assembly Replacement: step 11, image 1 of 1
    • Remove the four screws at the bottom edge of the shield with a Phillips #0 screwdriver.

    Ask FixBot
  12. GE Carescape R860 Touch Bezel Assembly Replacement: step 12, image 1 of 1
    • Slide the shield down to disengage the touch controller harness connector.

    Ask FixBot
  13. GE Carescape R860 Touch Bezel Assembly Replacement, Touch Bezel Assembly: step 13, image 1 of 1
    • Remove rear housing and shield (refer to “Display Unit Disassembly”).

    Ask FixBot
  14. GE Carescape R860 Touch Bezel Assembly Replacement: step 14, image 1 of 1
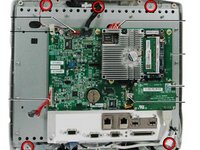
    • Disconnect the Blower fan cable (A); remove the p-clip (B) holding the harness to the Carrier board.

    Ask FixBot
  15. GE Carescape R860 Touch Bezel Assembly Replacement: step 15, image 1 of 1
    • Disconnect the Carrier board to LCD LVDS harness (22) - two connectors.

    Ask FixBot
  16. GE Carescape R860 Touch Bezel Assembly Replacement: step 16, image 1 of 1
    • Remove five LCD shield mounting screws (circled). Do not loosen any screws that are dabbed with sealing compound.

    Ask FixBot
  17. GE Carescape R860 Touch Bezel Assembly Replacement: step 17, image 1 of 2 GE Carescape R860 Touch Bezel Assembly Replacement: step 17, image 2 of 2
    • Remove the LCD shield and Carrier board assembly from the LCD Touch Bezel assembly.

    Ask FixBot
  18. GE Carescape R860 Touch Bezel Assembly Replacement: step 18, image 1 of 1
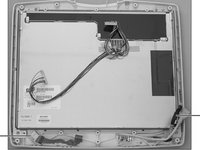
    • Transfer the Carrier Board to Keypad harness (23) and the Encoder assembly (15) to the new LCD Touch Bezel assembly.

    Ask FixBot
Conclusion

To reassemble your device, follow these instructions in reverse order.

Seth Deming

Member since: 04/09/20

133 Reputation

1 Guide authored

Team

Cal Poly, Team S7-G9, Paton Spring 2020 Member of Cal Poly, Team S7-G9, Paton Spring 2020

CPSU-PATON-S20S7G9

3 Members

4 Guides authored

0 Guide Comments

Add Comment

View Statistics:

Past 24 Hours: 2

Past 7 Days: 5

Past 30 Days: 30

All Time: 368