Introduction
If your Flydigi Vader 4 Pro needs a new faceplate, or if users need access to the inside of the console, this guide can be used to disassemble. The faceplate protects the inner parts of the console and allows firm grip. It is important to note that in Step 2 the faceplate seal may be difficult to open. Careful use of leverage while opening is important.
What you need
-
-
-
Remove the four 10 mm screws on the rear case using a Phillips #0 screwdriver.
 Ask FixBot
-
-
-
-
Insert an opening pick into the seam between the rear and front case.
-
Pry around the perimeter of the controller.
-
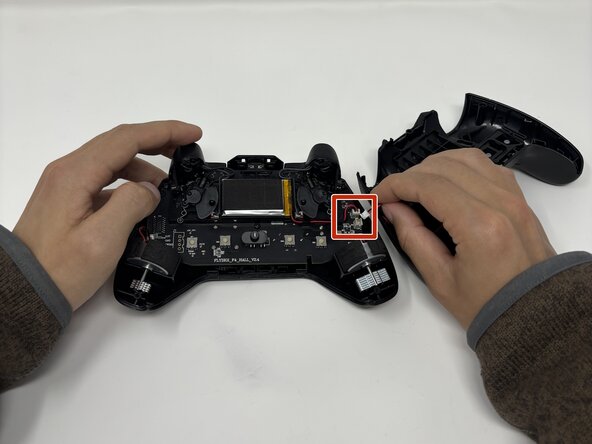
Remove the rear case and set it to the side of the front case, with care not to strain the connected cable.
-
-


To reassemble your device, follow these instructions in reverse order.
Cancel: I did not complete this guide.
One other person completed this guide.

Team

Utah Tech University, Team 1-2, McMurrin Spring 2026 Member of Utah Tech University, Team 1-2, McMurrin Spring 2026
UTAHTECH-MCMURRIN-S26S1G2
3 Members
72 Guides authored
