Introduction
Use this guide to replace the motherboard in a Flydigi Direwolf 2.
Caution: Many of the controller's plastic components may be fragile and subject to breaking upon excessive force. Exercise caution while dealing with plastic components.
What you need
-
-
-
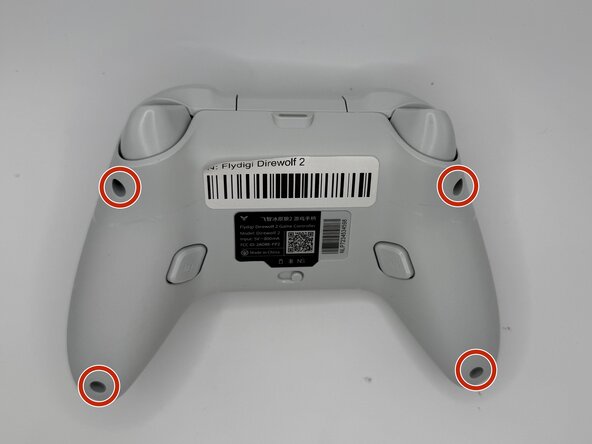
Remove the four 10 mm-long Phillips 10mm screws securing the rear case to the front case.
 Ask FixBot
-
-
-
Insert an opening pick into the seam between the rear and front case.
-
Slide the pick around the perimeter of the controller until the two halves of the controller release.
-
Remove the rear case.
-
-
-
-
-
-
Lift the battery connector directly out of its socket.
-
Slide an opening pick underneath the battery to sever the adhesive securing it.
-
Gently lift the battery out.
-
-
-
-
-
Use your fingernails to lift and disconnect each of the two rumble motor connectors.
-
Lift the rumble motors directly out of their housings.
-
-
-
-
-
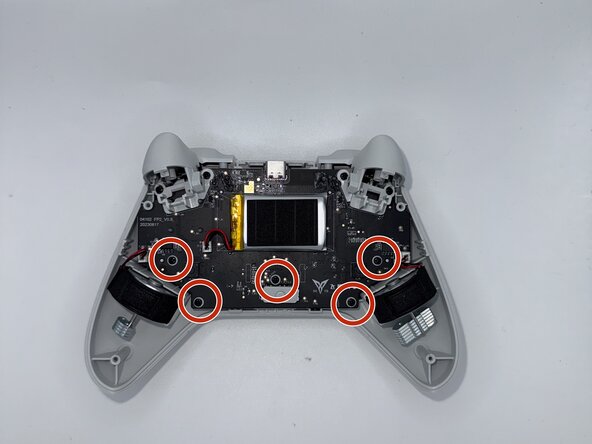
Remove the five 10 mm Phillips screws securing the motherboard.
-
Remove the four 10 mm Phillips securing the triggers.
-
-
-
Remove both of the triggers from the top of the controller.
-
Lift the motherboard by holding it from the top and bottom of the controller.
-
-




To reassemble your device, follow the above steps in reverse order.
Take your e-waste to an R2 or e-Stewards certified recycler.
Repair didn’t go as planned? Try some basic troubleshooting or ask our Answers community for help.
Cancel: I did not complete this guide.
2 other people completed this guide.

Team

University of North Texas, Team 1-2, Rea Spring 2026 Member of University of North Texas, Team 1-2, Rea Spring 2026
UNT-REA-S26S1G2
5 Members
60 Guides authored
