Introduction
If the controller is having trouble charging, it may be due to dust or dirt accumulating in the charging port. Over time, excessive use can cause the port to accumulate dust and debris. If your controller is unable to charge, cleaning the port before replacing could help. If that doesn't resolve the issue, then replacing the port will be needed.
To access the port the controller shell will need to be separated, and the motherboard will need to be removed.
This guide requires soldering. If you're unfamiliar with soldering, review the How to Solder and Desolder Connections guide and take appropriate precautions before beginning.
What you need
-
-
-
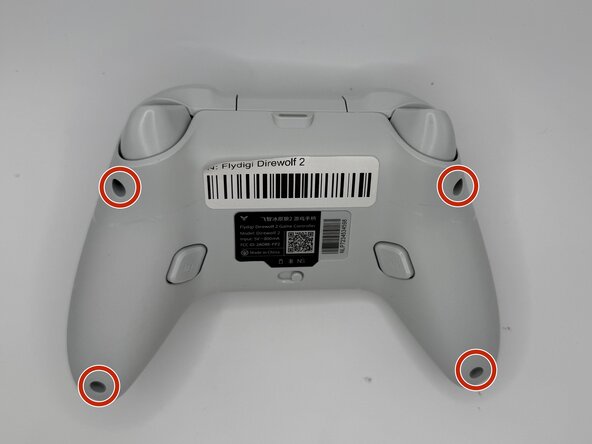
Remove the four 10 mm-long Phillips 10mm screws securing the rear case to the front case.
 Ask FixBot
-
-
-
Insert an opening pick into the seam between the rear and front case.
-
Slide the pick around the perimeter of the controller until the two halves of the controller release.
-
Remove the rear case.
-
-
-
-
-
Lift the battery connector directly out of its socket.
-
Slide an opening pick underneath the battery to sever the adhesive securing it.
-
Gently lift the battery out.
-
-
-
-
-
-
Use your fingernails to lift and disconnect each of the two rumble motor connectors.
-
Lift the rumble motors directly out of their housings.
-
-
-
-
-
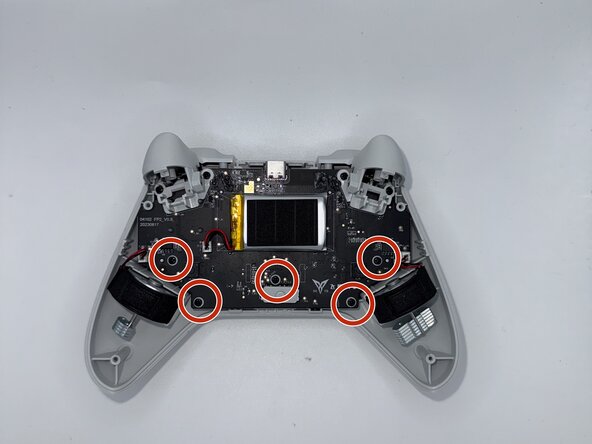
Remove the five 10 mm Phillips screws securing the motherboard.
-
Remove the four 10 mm Phillips securing the triggers.
-
-
-
Remove both of the triggers from the top of the controller.
-
Lift the motherboard by holding it from the top and bottom of the controller.
-
-
-




To reassemble your device, follow the above steps in reverse order.
Take your e-waste to an R2 or e-Stewards certified recycler.
Repair didn’t go as planned? Try some basic troubleshooting or ask our Answers community for help.

Team

University of North Texas, Team 1-2, Rea Spring 2026 Member of University of North Texas, Team 1-2, Rea Spring 2026
UNT-REA-S26S1G2
5 Members
60 Guides authored
