Introduction
If the controller is having trouble responding to input, it may be due to dust or dirt accumulating inside the controller shell. Over time, excessive use can cause the buttons to be very unresponsive. If your controller is experiencing a degree of unresponsiveness in the buttons, they will need to be replaced with new ones.
Before replacing the buttons, check the Flydigi Direwolf 2 troubleshooting page for possible solutions.
To access the buttons the controller shell will need to be separated, and the motherboard will need to be removed from there.
Caution: Many of the controller's plastic components may be fragile and subject to breaking upon excessive force. Exercise caution while dealing with plastic components.
What you need
-
-
-
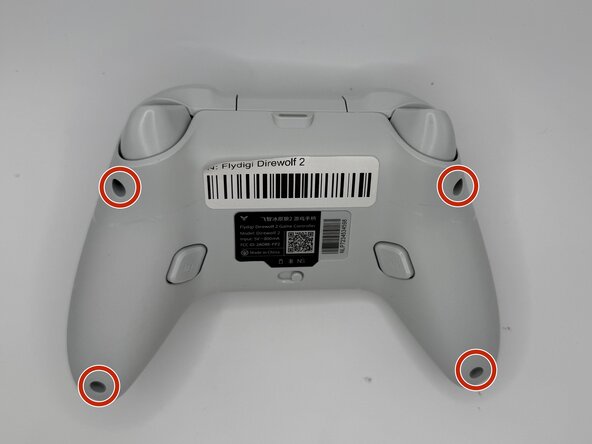
Remove the four 10 mm-long Phillips 10mm screws securing the rear case to the front case.
 Ask FixBot
-
-
-
Insert an opening pick into the seam between the rear and front case.
-
Slide the pick around the perimeter of the controller until the two halves of the controller release.
-
Remove the rear case.
-
-
-
-
-
Lift the battery connector directly out of its socket.
-
Slide an opening pick underneath the battery to sever the adhesive securing it.
-
Gently lift the battery out.
-
-
-
-
-
-
Use your fingernails to lift and disconnect each of the two rumble motor connectors.
-
Lift the rumble motors directly out of their housings.
-
-
-
-
-
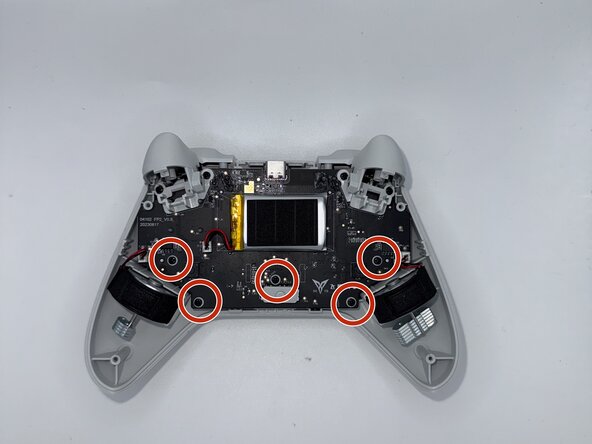
Remove the five 10 mm Phillips screws securing the motherboard.
-
Remove the four 10 mm Phillips securing the triggers.
-
-
-
Remove both of the triggers from the top of the controller.
-
Lift the motherboard by holding it from the top and bottom of the controller.
-
-
-




To reassemble your device, follow these instructions in reverse order.
Cancel: I did not complete this guide.
One other person completed this guide.

Team

University of North Texas, Team 1-2, Rea Spring 2026 Member of University of North Texas, Team 1-2, Rea Spring 2026
UNT-REA-S26S1G2
5 Members
60 Guides authored
