Introduction
If your Flydigi Apex 5 controller fails to provide haptic feedback during gameplay, the cause may be a failing vibration motor as motors can fail overtime from use. It is also common for the connections to the vibration motors to be jostled out of place over time.
Regardless of the source of the issue, it can be resolved by reinstalling or replacing the vibration motors.
Follow this guide to learn how to access the Flydigi Apex 5's vibration motors.
Warning: Lithium-Ion batteries can be a fire hazard. If the controller battery appears swollen, follow iFixit's guide on What to do with a swollen battery.
What you need
-
-
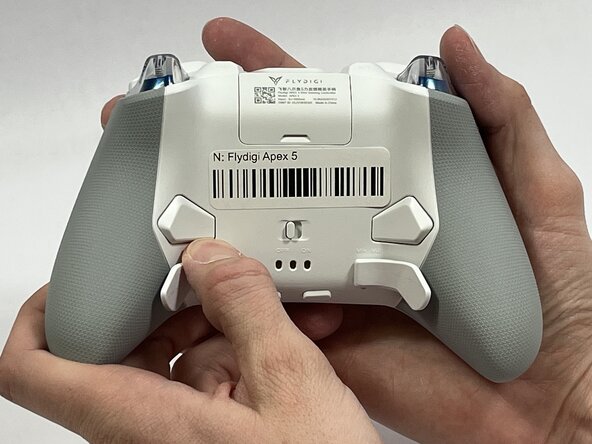
Orient the controller so that its back is facing you.
-
Apply firm downward pressure to remove both the M3 and M4 back paddles.
 Ask FixBot
-
-
-
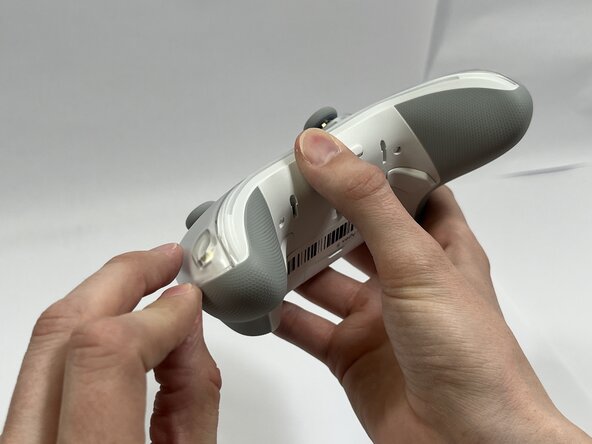
Turn the controller over so its front faces you.
-
Remove the D-pad by firmly pulling it away from the body of the controller.
-
-
-
Remove the clear, magnetically-adhered faceplate of the controller by firmly pulling it away from the body of the controller starting from the edge of the faceplate.
-
-
-
Remove the small cover from the rear of the controller by pushing it upward.
-
Remove the two 5.8mm screws behind the battery cover using a Phillips #0 screwdriver.
-
-
-
-
Turn the controller over so its front faces you.
-
Remove the six 10mm long screws from the front of the controller using a Torx T6 screwdriver.
-
-
-
Insert the plastic opening tool between the top and bottom plastic controller molds, then pry until the two pieces separate.
-
-
-
Carefully remove the back paddle ribbon cable with the angled tweezers or spudger.
-
-
-
Press a prong of each side of the angled tweezers under the lip of the power supply cable connector and pull the plastic connector out of its terminal.
-
Pull the power supply cable through the plastic cable guides.
-
-
-
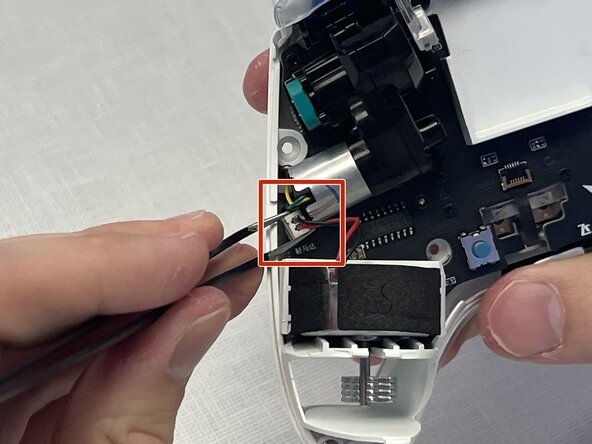
Press a prong of each side of the angled tweezers under the lip of the motor's power supply connector and pull the plastic connector out of its terminal.
-
Lift the motor directly upward out of its casing.
-
-
-
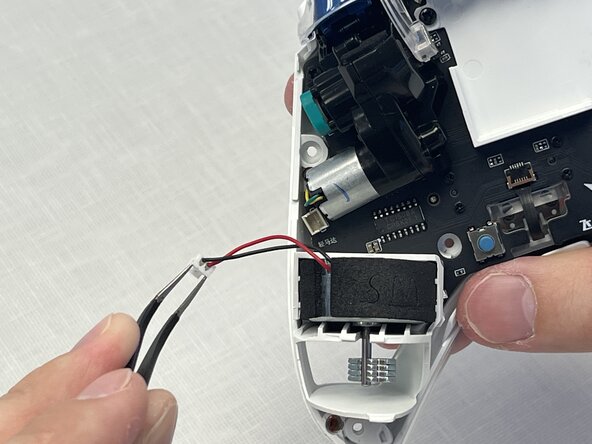
Press a prong of each side of the curved tip tweezers under the lip of the motor's power supply connector and pull the plastic connector out of its terminal.
-
Lift the motor directly upward out of its casing.
-






To reassemble your device, follow these instructions in reverse order.

Team

Idaho State University, Team 1-3, Watkins Spring 2026 Member of Idaho State University, Team 1-3, Watkins Spring 2026
ISU-WATKINS-S26S1G3
4 Members
5 Guides authored
