
Fitbit Charge HR Screen Replacement

Aekchanin Iamborisut and 3 other contributors
Last updated on May 23, 2022
Views: 1.3K
View statistics:
- Past 24 Hours:
- 4
- Past 7 Days:
- 20
- Past 30 Days:
- 80
- All Time:
- 1,295
Comments: 0
No one has left comments on this guide. Will you be first?
Go to guide commentsCompleted: 1 2
1 person has marked this guide "completed." Will you be next?
2 people have marked this guide "completed." Including you — great job!
Favorites: 0 1
No one has favorited (and subscribed to) this guide. Will you be the first?
1 person has favorited (and subscribed to) this guide — and that's you!
Incorrect Tools
Help make this guide better by using the correct tools in images and/or text.
Needs More Images
A few more images would make this guide's procedures crystal clear.
Introduction
Go to step 1 ↓The Fitbit Charge HR is a smart watch with an LED screen that tracks the health of its user. While engaging in physical activities, one might experience some wear and tear on their device that can cause an unresponsive screen. This guide will teach you how to replace the screen on a Fitbit Charge HR. These instructions require separating the screen from the motherboard, so remember to use ESD-safe opening tools.
What you need
Tools
-
Spudger4.9


-
-
-
Remove the four 2.9 mm screws from the back of the display using a Torx screwdriver.
-
Remove the back cover from the device.
 Ask FixBot
-
-
-
Remove the two 2.9 mm Torx screws holding the circuit board in place.
-
Carefully pry the board out using an opening tool.
-
-
-
Remove the motherboard assembly from the device.
-
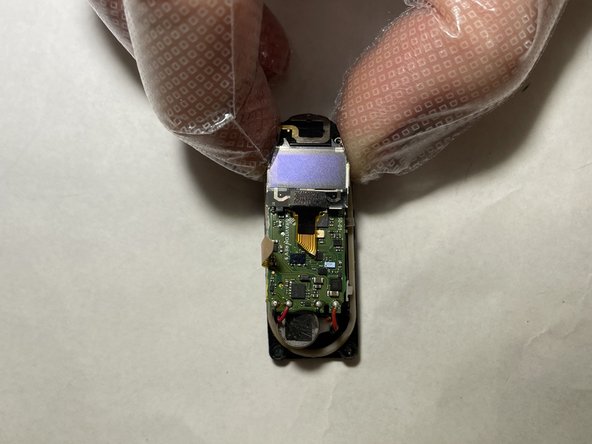
Flip the motherboard over so the screen is facing upwards.
-
-
-
-
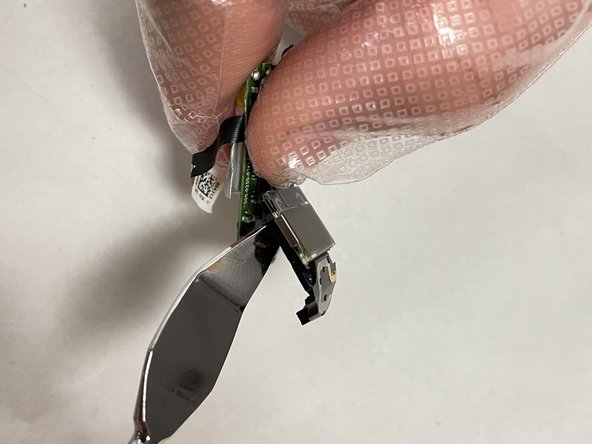
Wedge a nylon spudger between the screen and the motherboard.
-
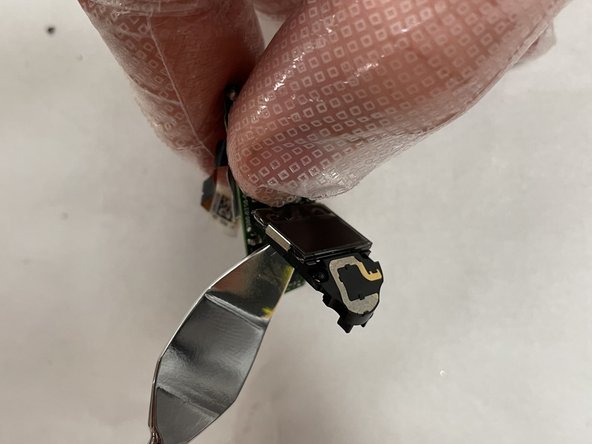
Gently pry the screen up and remove it from the motherboard.
-
-






To reassemble your device, follow these instructions in reverse order.
Cancel: I did not complete this guide.
One other person completed this guide.

Team

The Citadel Military College of South Carolina, Team 1-2, Eggleston Fall 2021 Member of The Citadel Military College of South Carolina, Team 1-2, Eggleston Fall 2021
CMCSC-EGGLESTON-F21S1G2
3 Members
24 Guides authored
