
Fitbit Blaze Display Frame Replacement

Adrian Borrego and one other contributor
Last updated on Jul 6, 2017
Views: 12K
View statistics:
- Past 24 Hours:
- 2
- Past 7 Days:
- 16
- Past 30 Days:
- 92
- All Time:
- 11,641
Comments: 1
1 comment on steps.
Completed: 3 4
3 people have marked this guide "completed." Will you be next?
4 people have marked this guide "completed." Including you — great job!
Favorites: 0 1
No one has favorited (and subscribed to) this guide. Will you be the first?
1 person has favorited (and subscribed to) this guide — and that's you!
Introduction
Go to step 1 ↓Would like to replace your damaged or worn out metal ring around your device? This guide will show you how to remove and replace the metal ring that holds the LCD screen in place.
What you need
Tools

-
-
-
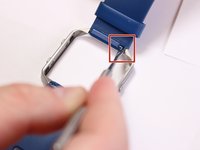
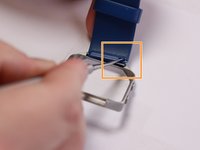
Locate the metal pin behind the wristband located on the edge of metal ring.
-
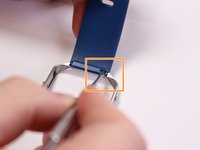
Insert the pointed end of the metal spudger into the pin hold and push it into the blue rectangle enclosure.
-
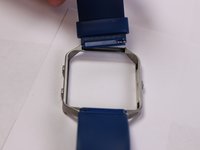
Remove wristband.
-
-
-
-
-
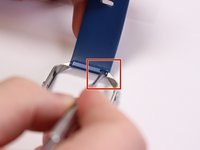
Locate the pin behind the second wristband located on the edge of metal ring.
-
Insert the pointed end of the metal spudger into the pin hold and push it into opposite direction.
-
Remove wristband.
-
-


 Ask FixBot




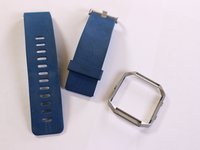
To reassemble your device, follow these instructions in reverse order.
Cancel: I did not complete this guide.
3 other people completed this guide.

Team

USF Tampa, Team S3-G3, Sullivan Spring 2017 Member of USF Tampa, Team S3-G3, Sullivan Spring 2017
USFT-SULLIVAN-S17S3G3
4 Members
60 Guides authored
