
Fan Blade Arm Replacement

Ricardo Ledesma Hernandez and 3 other contributors
Last updated on Jun 2, 2022
Views: 9.7K
View statistics:
- Past 24 Hours:
- 3
- Past 7 Days:
- 25
- Past 30 Days:
- 122
- All Time:
- 9,708
Comments: 5
1 comment on steps, 4 guide comments.
Go to guide commentsCompleted: 2 3
2 people have marked this guide "completed." Will you be next?
3 people have marked this guide "completed." Including you — great job!
Favorites: 0 1
No one has favorited (and subscribed to) this guide. Will you be the first?
1 person has favorited (and subscribed to) this guide — and that's you!
Needs Better Images
Better photos will improve this guide. Help out by taking, editing, or uploading new ones!
Introduction
Go to step 1 ↓Use this guide to replace the broken blade arm of a ceiling fan. A broken ceiling fan can reduce the comfort of your home, and it might make you utilize your home’s air conditioner (AC) more. A working ceiling fan will save money and potentially reduce greenhouse gases that hurt the earth.
Before using this guide, make sure you know where the circuit breaker is located and turn it off for safety reasons. A few necessary tools are needed, and no prior knowledge is required.
What you need
Tools

-
-
-
Make sure no power is flowing to the fan. Then begin by removing the metal light frame by twisting.
 Ask FixBot
-
-
-
Unscrew the finial (cover at the bottom of the glass globe). Then unscrew the hex nut and remove the rubber washer. This will allow the globe to be easily removed.
-
-
-
Remove lightbulbs to avoid damage when removing light pan. Then, remove all three fitter plate screws. This will cause the light pan to hang from the electrical wires.
-
-
-
Remove the three screws from the fitter plate. This will allow the plate to easily be separated from the fan.
-
-
-
-
Remove the two screws securing the broken blade arm. Then separate the broken component from the fan.
-
-
-
Replace the broken blade arm on the fan blade. There are two components that are placed on either side of the blade and secured together with screws.
-
-


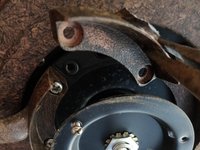


To reassemble your device, follow these instructions in reverse order.
Cancel: I did not complete this guide.
2 other people completed this guide.

Team

University of Memphis, Team S1-G10, Willis Fall 2019 Member of University of Memphis, Team S1-G10, Willis Fall 2019
UM-WILLIS-F19S1G10
3 Members
12 Guides authored
4 Guide Comments
Where did you bought the replacement for that specific fan I’m looking for the arm and blades with the star
I am as well and harbor breeze and Lowe's are absolutely no help!
Where can I find an exact replacement.
