Free Shipping on Domestic Orders $75+

Etekcity Lasergrip 1080 Screen Replacement

What you need

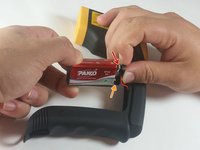
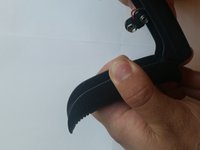
  1. Etekcity Lasergrip 1080 Screen Replacement, Battery: step 1, image 1 of 1
    • Pull the battery cover away from the handle by gripping near the thumb groove.

    Ask FixBot

    Add Comment

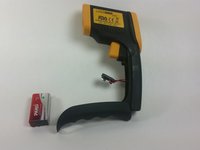
  2. Etekcity Lasergrip 1080 Screen Replacement: step 2, image 1 of 1
    • Gently pull the battery out of the handle.

    • Excessive force could damage wires.

    Ask FixBot

    Add Comment

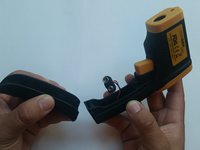
  3. Etekcity Lasergrip 1080 Screen Replacement: step 3, image 1 of 2 Etekcity Lasergrip 1080 Screen Replacement: step 3, image 2 of 2
    • Disconnect the battery by pulling the connector away from it.

    • Positive first

    • Negative second

    • When replacing the battery, this order is reversed.

    Ask FixBot

    Add Comment

  4. Etekcity Lasergrip 1080 Screen Replacement, Buttons: step 4, image 1 of 2 Etekcity Lasergrip 1080 Screen Replacement, Buttons: step 4, image 2 of 2
    • Remove the battery cover from the device by pulling it straight out.

    Ask FixBot

    Add Comment

  5. Etekcity Lasergrip 1080 Screen Replacement: step 5, image 1 of 2 Etekcity Lasergrip 1080 Screen Replacement: step 5, image 2 of 2
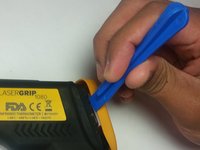
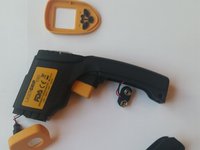
    • Using the plastic opening tool remove the front and rear yellow covers.

    • When removing the back cover, be careful not to lose the buttons as they are not connected.

    Ask FixBot

    Add Comment

  6. Etekcity Lasergrip 1080 Screen Replacement: step 6, image 1 of 1
    • Remove the two 3.1 mm Phillips #0 screws.

    Ask FixBot

    Add Comment

  7. Etekcity Lasergrip 1080 Screen Replacement: step 7, image 1 of 2 Etekcity Lasergrip 1080 Screen Replacement: step 7, image 2 of 2
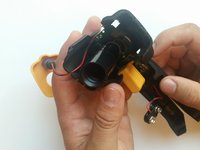
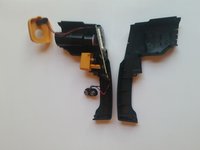
    • Pull the two halves apart.

    • Be careful not to lose any components on the inside.

    Ask FixBot

    Add Comment

  8. Etekcity Lasergrip 1080 Screen Replacement: step 8, image 1 of 1
    • Realign the buttons with the button terminals.

    • Red terminal to red button.

    • Orange terminal to orange button.

    • Yellow terminal to yellow button.

    Ask FixBot

    Add Comment

  9. Etekcity Lasergrip 1080 Screen Replacement, Etekcity Lasergrip 1080 Trigger Replacement: step 9, image 1 of 2 Etekcity Lasergrip 1080 Screen Replacement, Etekcity Lasergrip 1080 Trigger Replacement: step 9, image 2 of 2
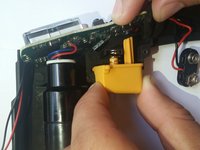
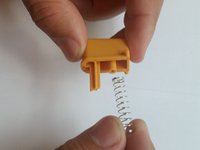
    • Carefully pull the trigger out.

    • The trigger is spring loaded, so be careful that you do not lose the spring as you pull the trigger out.

    • To put the trigger back in, align the peg with the hole in the handle and align the shaft with the button terminal.

    Ask FixBot

    Add Comment

  10. Etekcity Lasergrip 1080 Screen Replacement, Screen: step 10, image 1 of 1
    • Carefully pull the motherboard out of its slot in the body of the device.

    Ask FixBot

    Add Comment

  11. Etekcity Lasergrip 1080 Screen Replacement: step 11, image 1 of 2 Etekcity Lasergrip 1080 Screen Replacement: step 11, image 2 of 2
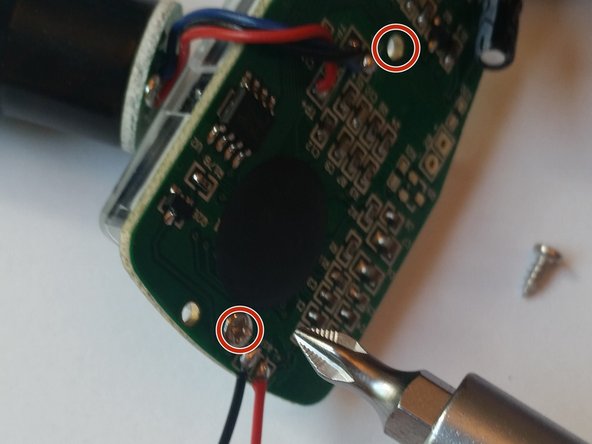
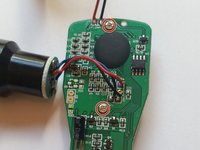
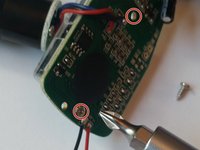
    • Unscrew the two 3.4 mm screws on the motherboard.

    Ask FixBot

    Add Comment

  12. Etekcity Lasergrip 1080 Screen Replacement: step 12, image 1 of 1
    • Take off the cover and separate the parts.

    • All of these parts are fragile and mishandling them may cause damage.

    Ask FixBot

    Add Comment

Conclusion

To reassemble your device, follow these instructions in reverse order.

Cancel: I did not complete this guide.

Carlos Pineda

Member since: 08/27/15

195 Reputation

1 Guide authored

Team

USF Tampa, Team 5-1, Blackwell Fall 2015 Member of USF Tampa, Team 5-1, Blackwell Fall 2015

USFT-BLACKWELL-F15S5G1

3 Members

9 Guides authored

0 Guide Comments

Add Comment

View Statistics:

Past 24 Hours: 1

Past 7 Days: 2

Past 30 Days: 11

All Time: 1,313