
Epson Powerlite 460 Lamp Replacement

Heide Tyvan and 3 other contributors
Last updated on Jun 21, 2022
Views: 768
View statistics:
- Past 24 Hours:
- 1
- Past 7 Days:
- 9
- Past 30 Days:
- 60
- All Time:
- 768
Comments: 0
No one has left comments on this guide. Will you be first?
Go to guide commentsCompleted: 0 1
No one has marked this guide "completed." Will you be the first?
1 person has marked this guide "completed." It's you — great job!
Favorites: 0 1
No one has favorited (and subscribed to) this guide. Will you be the first?
1 person has favorited (and subscribed to) this guide — and that's you!
Featured Student Guide
This guide has been the hard work of our awesome students and is found to be exceptionally cool by the iFixit staff.
Introduction
Go to step 1 ↓Use this guide to replace an old or damaged lamp inside of the Epson Powerlite 460 projector.
The lamp creates light that produces vivid image displays from the projector. When the lamp exceeds its lifespan or is damaged, the image display can be dim or distorted. In some cases, no image display will appear at all.
Make sure to review the troubleshooting guide; sometimes a distorted image is caused by another issue and does not require the lamp's replacement.
When you are disposing of your old lamp, make sure to check your state’s requirements for disposal of the lamp since it does contain mercury.
Once you have installed the new lamp, remember to reset the lamp timer in the menu.
What you need
Tools

-
-
-
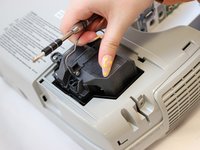
Remove the 13.3 mm lamp cover screw using a Phillips #2 screwdriver.
-
Slide the cover off.
 Ask FixBot
-
-
-


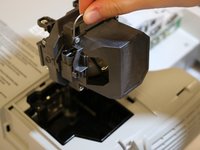
To reassemble your device, follow these instructions in reverse order.

Team

Eastern Washington University, Team 1-1, Carnegie Spring 2022 Member of Eastern Washington University, Team 1-1, Carnegie Spring 2022
EWU-CARNEGIE-S22S1G1
3 Members
60 Guides authored
