Free Shipping on Domestic Orders $75+

Entry Door Weatherstripping Replacement

What you need

    1. Entry Door Weatherstripping Replacement, Weatherstripping: step 1, image 1 of 2 Entry Door Weatherstripping Replacement, Weatherstripping: step 1, image 2 of 2
      • Use the putty knife to loosen the weatherstripping from the groove.

      • Push outwards from the groove using the putty knife, so the groove doesn't get damaged.

      • The groove is located behind the exterior of the door frame

      Ask FixBot

      Add Comment

    2. Entry Door Weatherstripping Replacement: step 2, image 1 of 3 Entry Door Weatherstripping Replacement: step 2, image 2 of 3 Entry Door Weatherstripping Replacement: step 2, image 3 of 3
      • Pull out the Weatherstripping from the groove

      • Use the putty knife if assistance is needed by pushing the weatherstripping outward from the groove

      Ask FixBot

      Add Comment

    3. Entry Door Weatherstripping Replacement: step 3, image 1 of 1
      • After removing the weatherstripping, measure the door frame using the measuring tape.

      Ask FixBot

      Add Comment

    4. Entry Door Weatherstripping Replacement: step 4, image 1 of 2 Entry Door Weatherstripping Replacement: step 4, image 2 of 2
      • After measuring the door use a pen to mark the new weatherstrip and cut it with the scissors.

      • Be careful when handling scissors.

      Ask FixBot

      Add Comment

    5. Entry Door Weatherstripping Replacement: step 5, image 1 of 2 Entry Door Weatherstripping Replacement: step 5, image 2 of 2
      • Using the putty knife, push the new weatherstripping into the door groove.

      Ask FixBot

      Add Comment

    6. Entry Door Weatherstripping Replacement: step 6, image 1 of 3 Entry Door Weatherstripping Replacement: step 6, image 2 of 3 Entry Door Weatherstripping Replacement: step 6, image 3 of 3
      • Repeat the process from steps 1-5 for the weatherstrip for the top and left of the doorframe.

      Ask FixBot

      Add Comment

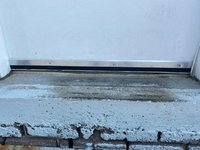
    7. Entry Door Weatherstripping Replacement: step 7, image 1 of 1
      • Now measure the door’s width using the measuring tape.

      Ask FixBot

      Add Comment

    8. Entry Door Weatherstripping Replacement: step 8, image 1 of 2 Entry Door Weatherstripping Replacement: step 8, image 2 of 2
      • Install the Door Sweep by drilling it in using a cordless drill.

      • Drill can be hazardous if not handled with care

      Ask FixBot

      Add Comment

Conclusion

To reassemble your device, follow these instructions in reverse order.

Cancel: I did not complete this guide.

One other person completed this guide.

0 Guide Comments

Add Comment

View Statistics:

Past 24 Hours: 6

Past 7 Days: 95

Past 30 Days: 331

All Time: 10,056