Free Shipping on Domestic Orders $75+

Emerson Ceiling Fan Flywheel Replacement

Views: 5.4K

View statistics:

Past 24 Hours:
3
Past 7 Days:
24
Past 30 Days:
116
All Time:
5,440
Comments: 0

No one has left comments on this guide. Will you be first?

Go to guide comments
Completed: 2

2 people have marked this guide "completed." Will you be next?

Favorites: 0

No one has favorited (and subscribed to) this guide. Will you be the first?

Time Required: 10 minutes
Difficulty: Moderate
Missing Steps

Oops! This guide is currently missing one or more important steps.

Emerson Ceiling Fan  Flywheel Replacement

Introduction

Go to step 1 ↓

If your Emerson ceiling fan is humming but the blades are not spinning, you most likely have a broken flywheel. It is a lot easier and cheaper to replace the flywheel yourself, rather than the whole fan.

Before using this guide, make sure you check to fan has power going to it. Check to make sure the circuit breaker is not flipped.

Replacing your flywheel is inexpensive and possible for most ceiling fan brands. If you do not know the brand of your fan, measure the flywheel once you remove it. Note the inside and outside diameter, and the locations and spaces between bracket and screw holes.

You will want to make sure power is turned off to the fan before you start to work on anything.

What you need

Tools

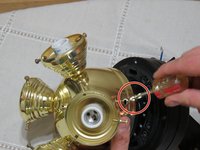
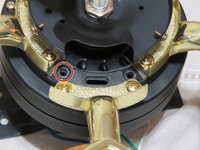
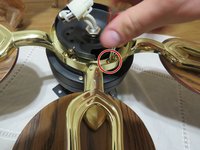
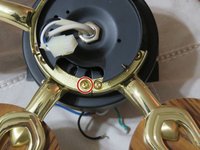
    1. Emerson Ceiling Fan  Flywheel Replacement, Remove Ceiling Fan Blades: step 1, image 1 of 3 Emerson Ceiling Fan  Flywheel Replacement, Remove Ceiling Fan Blades: step 1, image 2 of 3 Emerson Ceiling Fan  Flywheel Replacement, Remove Ceiling Fan Blades: step 1, image 3 of 3
      • Make sure power to the ceiling fan is off!

      • Use a Phillips #0 screwdriver to remove the ten 12.7 mm screws from the ceiling fan blades.

      • It is easier to work on the ceiling fan if you remove the motor.

      Ask FixBot

      Add Comment

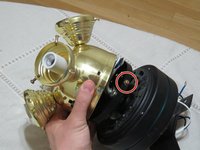
    2. Emerson Ceiling Fan  Flywheel Replacement, Open Switch Housing: step 2, image 1 of 2 Emerson Ceiling Fan  Flywheel Replacement, Open Switch Housing: step 2, image 2 of 2
      • Remove light bulbs before working on switch housing.

      • Open the switch housing using a Phillips #0 screwdriver to remove the three 7.9 mm screws.

      Ask FixBot

      Add Comment

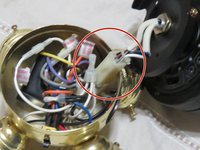
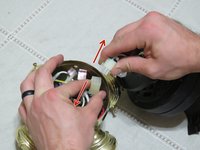
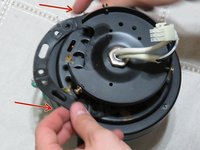
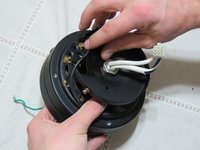
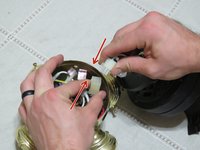
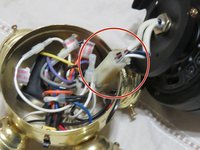
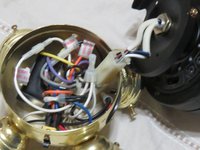
    3. Emerson Ceiling Fan  Flywheel Replacement, Disconnect Wires: step 3, image 1 of 2 Emerson Ceiling Fan  Flywheel Replacement, Disconnect Wires: step 3, image 2 of 2
      • Disconnect wires that are attached to the switch housing and the motor.

      • Make sure you know where to reconnect them.

      Ask FixBot

      Add Comment

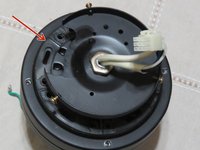
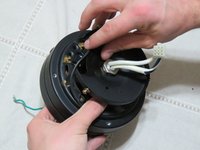
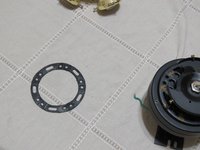
    4. Emerson Ceiling Fan  Flywheel Replacement, Remove Broken Flywheel: step 4, image 1 of 3 Emerson Ceiling Fan  Flywheel Replacement, Remove Broken Flywheel: step 4, image 2 of 3 Emerson Ceiling Fan  Flywheel Replacement, Remove Broken Flywheel: step 4, image 3 of 3
      • Remove the broken flywheel.

      • Make note of its exact placement on the shaft.

      • It may be a good idea to mark the location with a marker.

      Ask FixBot

      Add Comment

    5. Emerson Ceiling Fan  Flywheel Replacement, Attach New Flywheel: step 5, image 1 of 3 Emerson Ceiling Fan  Flywheel Replacement, Attach New Flywheel: step 5, image 2 of 3 Emerson Ceiling Fan  Flywheel Replacement, Attach New Flywheel: step 5, image 3 of 3
      • Slide the new flywheel into place making sure all the holes line up.

      • Place any wires through the same holes as they were before

      • Replace any other parts you removed during the process.

      Ask FixBot

      Add Comment

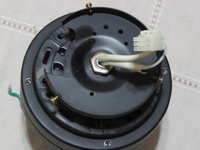
    6. Emerson Ceiling Fan  Flywheel Replacement, Reconnect Wires: step 6, image 1 of 2 Emerson Ceiling Fan  Flywheel Replacement, Reconnect Wires: step 6, image 2 of 2
      • Reconnect the wires from the switch housing to the motor.

      • Make sure you connect the wires to the correct match.

      Ask FixBot

      Add Comment

    7. Emerson Ceiling Fan  Flywheel Replacement, Close Switch Housing: step 7, image 1 of 3 Emerson Ceiling Fan  Flywheel Replacement, Close Switch Housing: step 7, image 2 of 3 Emerson Ceiling Fan  Flywheel Replacement, Close Switch Housing: step 7, image 3 of 3
      • Screw back on the three 7.9 mm screws to the switch housing using a Phillips #0 screwdriver.

      • Screw the light bulbs back in.

      Ask FixBot

      Add Comment

    8. Emerson Ceiling Fan  Flywheel Replacement, Reconnect Ceiling Fan Blades: step 8, image 1 of 3 Emerson Ceiling Fan  Flywheel Replacement, Reconnect Ceiling Fan Blades: step 8, image 2 of 3 Emerson Ceiling Fan  Flywheel Replacement, Reconnect Ceiling Fan Blades: step 8, image 3 of 3
      • Using a Phillips #0 screwdriver, reconnect ceiling fan blades by re-screwing on ten 12.7 mm Phillip screws.

      • If you removed the motor, reconnect it after blades are on.

      Ask FixBot

      Add Comment

Conclusion

Test your fan. It should be running quietly with no problems. If something is wrong make sure to double check you hooked the wires up correctly.

Cancel: I did not complete this guide.

2 other people completed this guide.

Tanner Brook

Member since: 10/21/19

199 Reputation

1 Guide authored

0 Guide Comments

Add Comment

View Statistics:

Past 24 Hours: 3

Past 7 Days: 24

Past 30 Days: 116

All Time: 5,440