Introduction
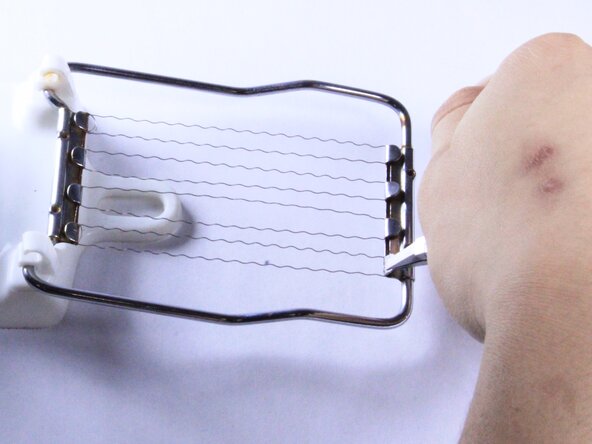
The following guide will help you replace any flimsy or loose wires on your kitchen egg slicer.
For an egg slicer to work properly, it depends on the tension of the wires, as it is what cuts the egg. A flimsy or loose wire cannot cut your egg properly and will not serve its purpose. Fixing the wire is a relatively simple fix that brings many benefits, such as extending the life of your egg slicer and reducing plastic waste.
Before starting this repair guide, you will need a measuring tape, small needle nose pliers, flathead pliers, and a new wire that matches the gauge of your old wire. In addition, it is recommended that you utilize your experience and knowledge in handling small tools and parts.
It is advised that you adjust your grip to comfortably hold the wire to prevent any injuries. In addition, it is recommended that you do not excessively bend any components, as this may cause further damage to your egg slicer.
What you need
-
-
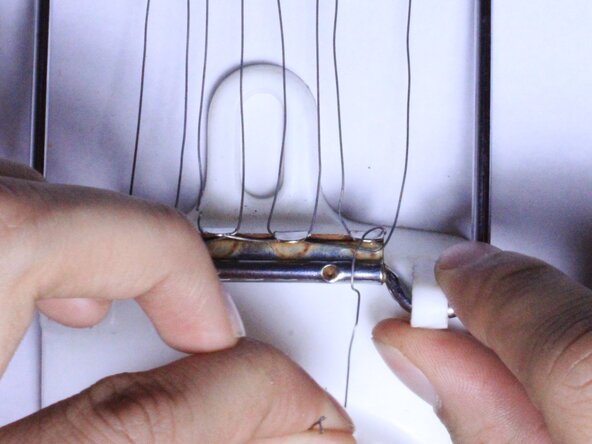
Using the flat nosed pliers, pry the clamp open.
-
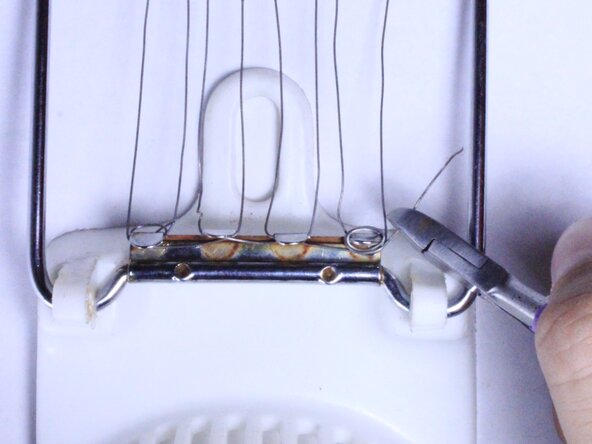
Grip the clamp and bend to a 90 degree angle.
-
Repeat this step for every clamp.
 Ask FixBot
-
-
-
Take the old wire and extend it out as much as possible.
-
Place your old wire at the 0 mark of the measuring tape.
-
Take the measurement of your old wire and take note of its length.
-
Use the length you recorded to cut a new wire and put it to the side.
-
-
-
-
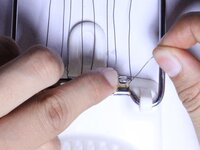
Take the new wire, and anchor it by tying it in a loop around one of the clamp.
-
Pull the wire as tight as possible to the right side of clamp.
-
-
-
Loop the wire tightly around the clamp.
-
Rotate the wire in a counterclockwise direction.
-
When you reach the clamp across from it, loop it around the clamp, and pull the wire to clamp to the right of it.
-
Repeat these steps until you reach the final clamp.
-
-
-
Once at the final clamp repeat step 4.
-
Anchor the loop by looping the wire as tight as possible.
-
-
-
With the flat nosed pliers, clamp down all the clamps.
-
Cut any excess wire so you have a sturdy fit for your new wire.
-


Cancel: I did not complete this guide.
One other person completed this guide.

Team

UC Davis, Team 2-6, Andersen Winter 2025 Member of UC Davis, Team 2-6, Andersen Winter 2025
UCD-ANDERSEN-W25S2G6
3 Members
12 Guides authored