Dyson DC56 Cyclone Replacement

John Czerkawski and 4 other contributors
Last updated on Jan 4, 2018
Views: 1.5K
View statistics:
- Past 24 Hours:
- 3
- Past 7 Days:
- 17
- Past 30 Days:
- 95
- All Time:
- 1,514
Comments: 1
1 guide comment.
Go to guide commentsCompleted: 1 2
1 person has marked this guide "completed." Will you be next?
2 people have marked this guide "completed." Including you — great job!
Favorites: 0 1
No one has favorited (and subscribed to) this guide. Will you be the first?
1 person has favorited (and subscribed to) this guide — and that's you!
Action Shots
Be an action hero! This guide needs images that better demonstrate how to perform specific actions.
Introduction
Go to step 1 ↓The cyclone is a method of separating particles from the air within the vacuum. If something goes wrong with the cyclone it could cause issues with suction or even prevent the vacuum from working at all.
What you need
Tools

-
-
-
Push the red lever, pull the back up and away from the dust bin to separate them.
-
-
-
-
Use a T8-Torque screwdriver to remove the 18mm screw from the back of the Cyclone.
-
-
-
-
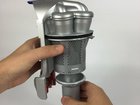
Remove the bottom of the cyclone screen by twisting it to the left and pulling down.
-
-
-
Locate and take out the six 26mm screws with a T-8 Torque screwdriver.
-
Once you have removed the screws you can remove the rest of the Cyclone.
-
-

 Ask FixBot


To reassemble your device, follow these instructions in reverse order.
Cancel: I did not complete this guide.
One other person completed this guide.

Team

USF Tampa, Team S10-G1, Thompson Fall 2017 Member of USF Tampa, Team S10-G1, Thompson Fall 2017
USFT-THOMPSON-F17S10G1
4 Members
60 Guides authored
