Introduction
Four years have passed since the release of the Dyson Cyclone V10 Absolute. At this point there will be probably be some with motor and battery problems, such as reduced suction power, odor, reduced range or even those that have stopped functioning altogether.
If your Dyson Cyclone V10 Absolute has stopped working, use this guide to replace the battery or motor.
The motor relies on battery power so a problem with the battery may prevent the vacuum cleaner from working properly.
Before using this guide, you may want to clear the bin of debris.
Please do not remove and install the screws vigorously, otherwise there is a chance that damage to the screws may occur. Refer to the Screwdriver Best Practices guide to avoid stripping screws.
Prior to beginning this repair, remove all of the accessories from the vacuum, and the external battery.
What you need
-
-
Remove the extra parts of the vacuum, including the filter and the bin.
-
Press the red arrow under the bin and pull it out.
-
Remove the filter by turning it counterclockwise.
 Ask FixBot
-
-
-
Use a Phillips #1 screwdriver to remove the one 16.5 mm screw on the back of the handle and two 16.5 mm screws under the battery.
-
Pull the battery downward to remove.
-
-
-
-
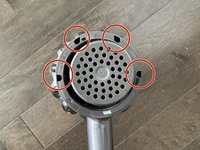
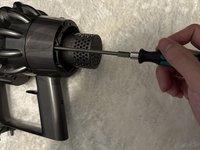
Use a Phillips #1 screwdriver to remove the four 16.5 mm screws on the back of the vacuum.
-
-
-
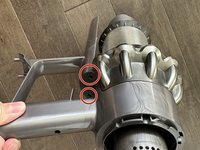
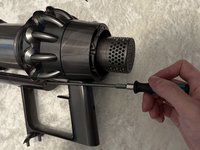
Use a Phillips #1 screwdriver to remove the two 16.5 mm screws under the middle of the vacuum, in front of the handle.
-
-
-
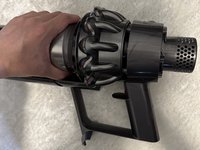
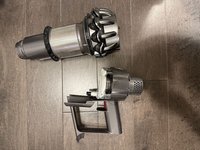
To separate the body of the vacuum from the motor assembly, gently pull them apart.
-


To reassemble your device, follow these instructions in reverse order.
Cancel: I did not complete this guide.
4 other people completed this guide.
Team

York University, Team A-6, Morris Fall 2022 Member of York University, Team A-6, Morris Fall 2022
YORK-MORRIS-F22SAG6
3 Members
3 Guides authored
4 Guide Comments
Hi I didnt realize u cant vaccum up flour and i vaccumed up quite a bit that spilled. When i went to clean the unit the actual motorhead. After removing the sliding case i stood the motorhead ip and talled the end and all kinds of flour came out the end tube of the motorhead. I kept tapping and more and more flour came out. Is it possible to take apart motorhead or should i take it to repair shop. Please advise
blow it out with an air compressor to get the flour all out...
Are you sure that the screws are Philips #1? They look like a torx?
what is the replacement motor assembly part number?