
Dymo LabelManager 280 Screen Replacement

Steven Nguyen and 5 other contributors
Last updated on Jan 12, 2026
Views: 5.1K
View statistics:
- Past 24 Hours:
- 4
- Past 7 Days:
- 34
- Past 30 Days:
- 155
- All Time:
- 5,103
Comments: 2
1 comment on steps, 1 guide comment.
Go to guide commentsCompleted: 1 2
1 person has marked this guide "completed." Will you be next?
2 people have marked this guide "completed." Including you — great job!
Favorites: 0 1
No one has favorited (and subscribed to) this guide. Will you be the first?
1 person has favorited (and subscribed to) this guide — and that's you!
Action Shots
Be an action hero! This guide needs images that better demonstrate how to perform specific actions.
Introduction
Go to step 1 ↓Dymo LabelManager 280 is an electronic label maker with a screen that previews the text before printing.
Please refer to the dymo and ifixit troubleshoot page before confirming the screen must be replaced.
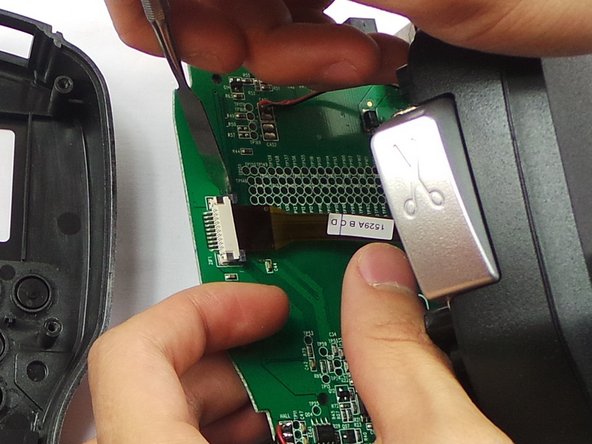
The screen may need to be removed if the screen display is blank or damaged. This guide will help how to safely remove the display on the Dymo LabelManager 280.
What you need
Tools
-
Spudger4.9


-
-
-
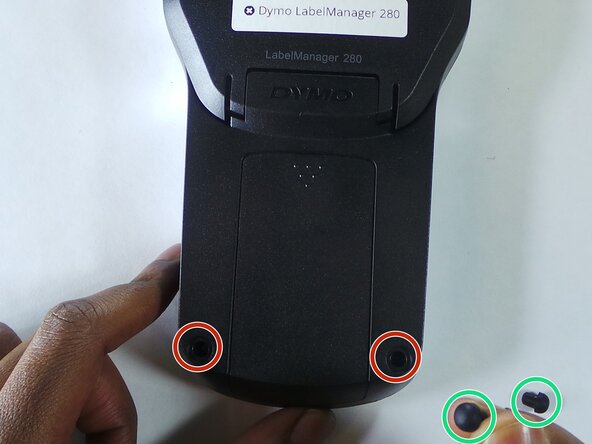
Remove the two rubber feets
-
Remove the 6 screws in the indicated places. These particular screws are 2mm x 8mm Phillips #0 head
-
-
-
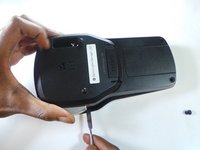
Use the spudger to take apart the device by insterting it as shown in the picture and twisting it. This should be done all around the device to ensure the two parts split correctly.
-
-


 Ask FixBot



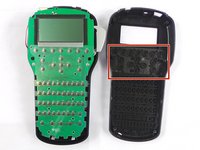



To reassemble your device, follow these instructions in reverse order.
Cancel: I did not complete this guide.
One other person completed this guide.

Team

USF Tampa, Team 6-5, Eyestone Spring 2016 Member of USF Tampa, Team 6-5, Eyestone Spring 2016
USFT-EYESTONE-S16S6G5
3 Members
36 Guides authored
1 Guide Comment
Hi, thak you for the tutorial, it seems pretty simple. Do you know where to find the LCD screen, or whats the specs, maybe I can find it at AliExpress.
