Free Shipping on Domestic Orders $75+

Ducky x Varmilo MIYA Pro Panda Keycaps Replacement

What you need

  1. Ducky x Varmilo MIYA Pro Panda Keycaps Replacement, Keycaps: step 1, image 1 of 1
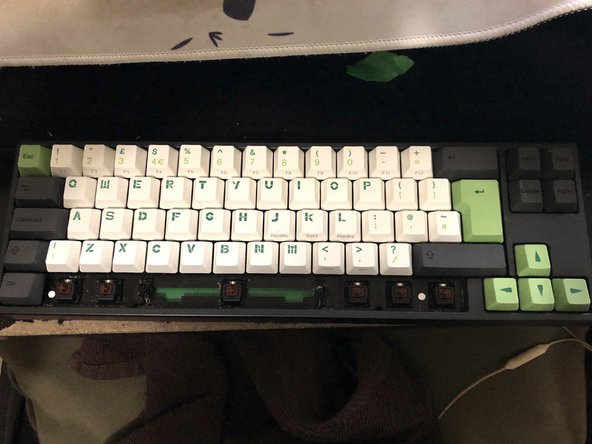
    • Take a picture of the layout of your keyboard to remember where each keycap is located for reassembly.

    Ask FixBot

    Add Comment

  2. Ducky x Varmilo MIYA Pro Panda Keycaps Replacement: step 2, image 1 of 3 Ducky x Varmilo MIYA Pro Panda Keycaps Replacement: step 2, image 2 of 3 Ducky x Varmilo MIYA Pro Panda Keycaps Replacement: step 2, image 3 of 3
    • Turn the keyboard off.

    • Unplug the USB-C cable connecting the computer to the keyboard.

    Ask FixBot

    Add Comment

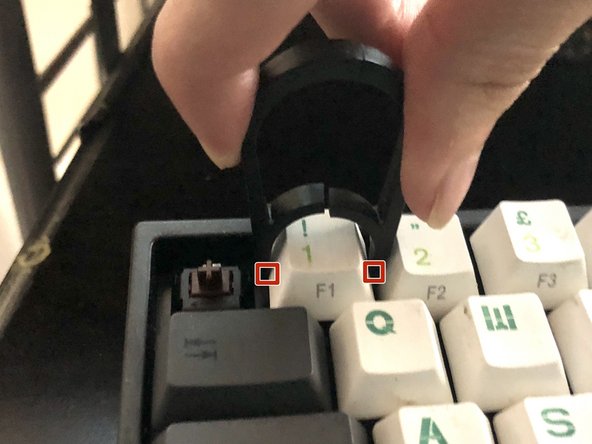
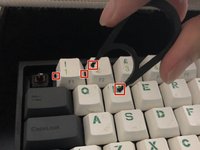
  3. Ducky x Varmilo MIYA Pro Panda Keycaps Replacement: step 3, image 1 of 3 Ducky x Varmilo MIYA Pro Panda Keycaps Replacement: step 3, image 2 of 3 Ducky x Varmilo MIYA Pro Panda Keycaps Replacement: step 3, image 3 of 3
    • Place the two latches on the keycap puller under each side of the keycap.

    • Pull vertically up to remove the keycap.

    • Only pull vertically up when removing any keycap as any other direction will damage your keyboard.

    • Continue to remove the rest of the keys on the top row of the keyboard.

    • For bigger keycaps such as a spacebar, place one finger under each side of the spacebar to remove it.

    Ask FixBot

    Add Comment

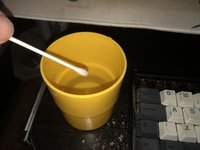
  4. Ducky x Varmilo MIYA Pro Panda Keycaps Replacement: step 4, image 1 of 3 Ducky x Varmilo MIYA Pro Panda Keycaps Replacement: step 4, image 2 of 3 Ducky x Varmilo MIYA Pro Panda Keycaps Replacement: step 4, image 3 of 3
    • Dampen a cotton swab with water and run it between each key to pick up any debris.

    • Make sure the cotton swab is damp, not soaking, as too much water may damage the keyboard.

    Ask FixBot

    Add Comment

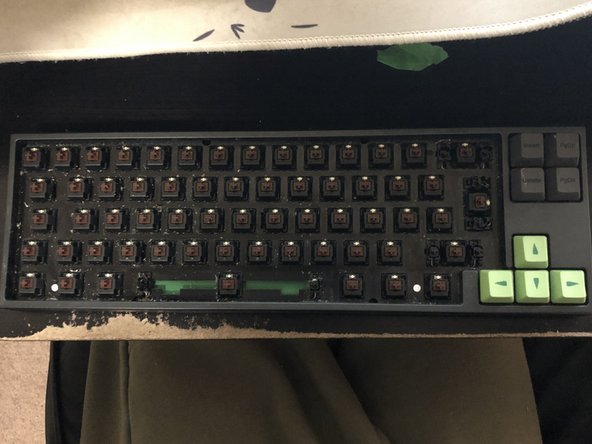
  5. Ducky x Varmilo MIYA Pro Panda Keycaps Replacement: step 5, image 1 of 2 Ducky x Varmilo MIYA Pro Panda Keycaps Replacement: step 5, image 2 of 2
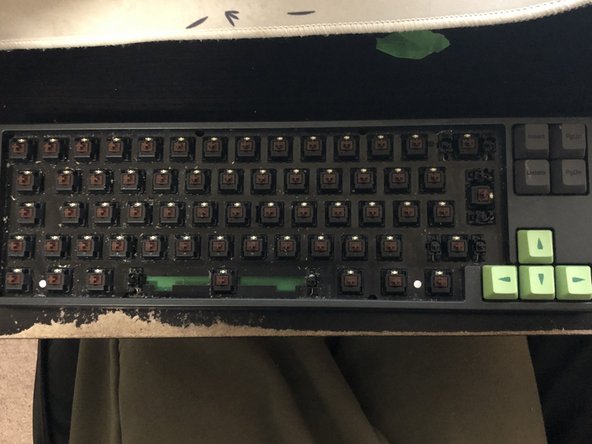
    • Repeat Steps 3 and 4 until all keycaps are removed and the debris in between the keys has been cleaned.

    Ask FixBot

    Add Comment

  6. Ducky x Varmilo MIYA Pro Panda Keycaps Replacement: step 6, image 1 of 2 Ducky x Varmilo MIYA Pro Panda Keycaps Replacement: step 6, image 2 of 2
    • If you have replacement keycaps, skip to Step 9.

    • If you are reusing your current keycaps, proceed to the next step.

    Ask FixBot

    Add Comment

  7. Ducky x Varmilo MIYA Pro Panda Keycaps Replacement: step 7, image 1 of 3 Ducky x Varmilo MIYA Pro Panda Keycaps Replacement: step 7, image 2 of 3 Ducky x Varmilo MIYA Pro Panda Keycaps Replacement: step 7, image 3 of 3
    • Submerge all the keycaps in a bowl of room temperature water.

    • Add a few drops of dish detergent and mix the solution around.

    • Let the keycaps soak in the water solution for 10-15 minutes.

    Ask FixBot

    Add Comment

  8. Ducky x Varmilo MIYA Pro Panda Keycaps Replacement: step 8, image 1 of 3 Ducky x Varmilo MIYA Pro Panda Keycaps Replacement: step 8, image 2 of 3 Ducky x Varmilo MIYA Pro Panda Keycaps Replacement: step 8, image 3 of 3
    • Remove the keycaps from the water solution and place them on a towel.

    • Scrub each keycap gently with a dry towel until each keycap is dry.

    • Air dry the keycaps for 30 minutes to dry up any excess moisture.

    Ask FixBot

    Add Comment

  9. Ducky x Varmilo MIYA Pro Panda Keycaps Replacement: step 9, image 1 of 3 Ducky x Varmilo MIYA Pro Panda Keycaps Replacement: step 9, image 2 of 3 Ducky x Varmilo MIYA Pro Panda Keycaps Replacement: step 9, image 3 of 3
    • Place each keycap in its original position.

    • Push vertically down once the shape under the keycaps align with the placeholder.

    • Do not use too much force as it may damage your keyboard and the keycap.

    • You should hear a click to signal that your keycap has been placed correctly.

    • Be sure to reference the picture you took at Step 1 to place each keycap in its correct position.

    Ask FixBot

    Add Comment

  10. Ducky x Varmilo MIYA Pro Panda Keycaps Replacement: step 10, image 1 of 3 Ducky x Varmilo MIYA Pro Panda Keycaps Replacement: step 10, image 2 of 3 Ducky x Varmilo MIYA Pro Panda Keycaps Replacement: step 10, image 3 of 3
    • Repeat Step 9 until all keycaps are in their correct positions.

    Ask FixBot

    Add Comment

Conclusion

Refer to step 10 to reassemble your keyboard. After following all the steps in this repair guide your keyboard should feel brand new and the responsiveness of your keys should be faster than ever.

Cancel: I did not complete this guide.

Justin Huynh

Member since: 01/17/22

230 Reputation

1 Guide authored

0 Guide Comments

Add Comment

View Statistics:

Past 24 Hours: 0

Past 7 Days: 8

Past 30 Days: 43

All Time: 2,331