Introduction
This guide is to replace a damaged battery on the Motorola Droid XT 1080. It is important because your phone will not charge or turn on if the battery needs to be replaced.
What you need
-
-
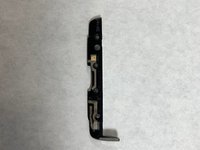
Remove the SIM card tray from the side of the device using a plastic opening tool.
 Ask FixBot
-
-
-
After properly removing the SIM card tray take your spudger and press it in between the plastic case and the frame of the device until you hear a snap.
-
Work your way from the top and the other side to confirm all the clips are disconnected.
-
-
-
Remove the five screws on top of the device with a T5 Torx.
-
Remove the single screw holding the camera with a T4 Torx.
-
Remove the two screws on the bottom of the device with a T5 Torx.
-
-
-
-
After the top and bottom screws are removed remove the top and bottom plastic pieces that were secured to the device.
-
-
-
Begin to gently pry up the battery from the frame with a plastic opening tool to release it from its adhesive securing.
-
-
-
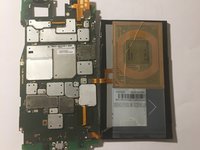
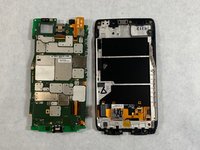
Disconnect the LCD cable with a spudger from the motherboard by gently lifting up the two connectors.
-


To reassemble your device, follow these instructions in reverse order.
Cancel: I did not complete this guide.
3 other people completed this guide.
Team

UMass Dartmouth, Team S3-G8, Peak Fall 2018 Member of UMass Dartmouth, Team S3-G8, Peak Fall 2018
UMASSD-PEAK-F18S3G8
3 Members
10 Guides authored