
Dremel 8220 Motor Replacement

Shailing Santiago and 6 other contributors
Last updated on May 7, 2024
Views: 6.1K
View statistics:
- Past 24 Hours:
- 4
- Past 7 Days:
- 26
- Past 30 Days:
- 129
- All Time:
- 6,078
Comments: 3
3 guide comments.
Go to guide commentsCompleted: 5 6
5 people have marked this guide "completed." Will you be next?
6 people have marked this guide "completed." Including you — great job!
Favorites: 0 1
No one has favorited (and subscribed to) this guide. Will you be the first?
1 person has favorited (and subscribed to) this guide — and that's you!
Slice and Dice
The steps in this guide should be split up and made into a series of prerequisite guides.
Introduction
Go to step 1 ↓This guide will show you how to replace a defective motor. With a few steps and a some tools, you will be able to open up the device and gain access to the motor. The motor can then be easily swapped out for a new one so that it can start working again.
What you need
Tools

-
-
-
Locate the battery at the back of your Dremel. Firmly grasp the battery on both sides and pull. It should easily come out of the battery well.
 Ask FixBot
-
-
-
Remove the ring located around the speed selector switch by pulling apart on either side. (This should require very minimal force.)
-
-
-
Remove the collar wrench by pushing the gear lock button. Continue to hold this button as you rotate the wrench counter-clockwise until it is removed.
-
-
-
Remove the metal clasp from the battery well. This piece helps hold the plastic shell of the device together. Pry it out by gently applying some force with a spudger.
-
-
-
Tool used on this step:Tweezers$4.99
-
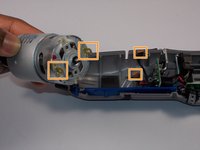
Remove broken motor. Lift out the motor until you can see the wires that connect to it.
-
Remove the clips where the wires connect with the motor. This can be done with your fingers of a pair of tweezers.
-
-


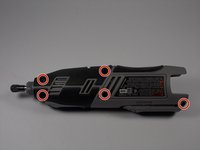
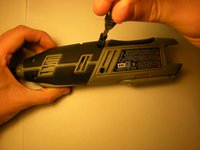
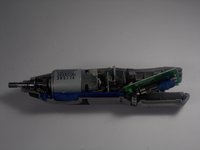


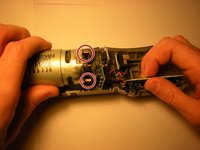
To reassemble your device, follow these instructions in reverse order.
Cancel: I did not complete this guide.
5 other people completed this guide.

Team

UMass Dartmouth, Team 2-8, Isaacson Spring 2016 Member of UMass Dartmouth, Team 2-8, Isaacson Spring 2016
UMASSD-ISAACSON-S16S2G8
3 Members
60 Guides authored
3 Guide Comments
Have you ever taken apart the motor? If so how?
Is there polarity correctness of the motor connections?
Yes cal, the +ve (red) wire connects to the spade marked with a red dot.
