
Door And Window Ball Latch Replacement

Paxton Grow and one other contributor
Last updated on Aug 10, 2026
Views: 414
View statistics:
- Past 24 Hours:
- 8
- Past 7 Days:
- 53
- Past 30 Days:
- 179
- All Time:
- 414
Comments: 0
No one has left comments on this guide. Will you be first?
Go to guide commentsCompleted: 0 1
No one has marked this guide "completed." Will you be the first?
1 person has marked this guide "completed." It's you — great job!
Favorites: 0 1
No one has favorited (and subscribed to) this guide. Will you be the first?
1 person has favorited (and subscribed to) this guide — and that's you!
Introduction
Go to step 1 ↓If your pantry door will not stay closed, the ball latch may be worn, damaged, or missing. Use this guide to replace the ball latch and strike plate so the door latches properly again.
A ball latch is a spring-loaded latch installed in the top edge of a door. When the door closes, the ball engages with a strike plate mounted on the door frame to help keep the door shut. Over time, the ball, spring, or housing can wear out, causing the door to pop open or fail to latch securely.
Before using this guide, inspect the ball latch and strike plate for visible damage. If the ball is missing, does not extend properly, or the strike plate is bent or loose, replacement may be necessary. You should also check that the door hinges are tight and that the door is properly aligned, as misalignment can cause similar symptoms.
This guide covers removing the old ball latch assembly, installing a replacement ball latch, replacing the strike plate, and adjusting the latch for proper operation.
If the pantry door is still attached to its hinges, you may need a ladder to access the top of the door. Use caution when climbing and working from a ladder, especially if you are not steady on your feet. Have someone hold the ladder steady and secure it, if possible. Do not attempt the repair if you cannot safely maintain your balance while on the ladder.
What you need
Parts
-
-
-
×2
Tools


-
-
-
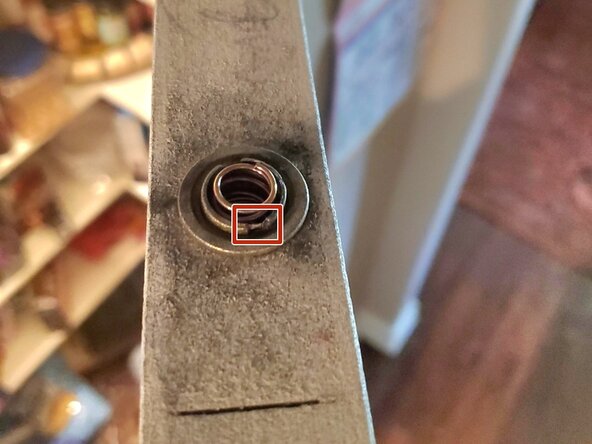
Insert the tip of a pair of tweezers into one of the notches on the retaining spring.
-
Turn the spring counterclockwise to loosen it.
-
Remove the spring from the door opening.
-
-
-
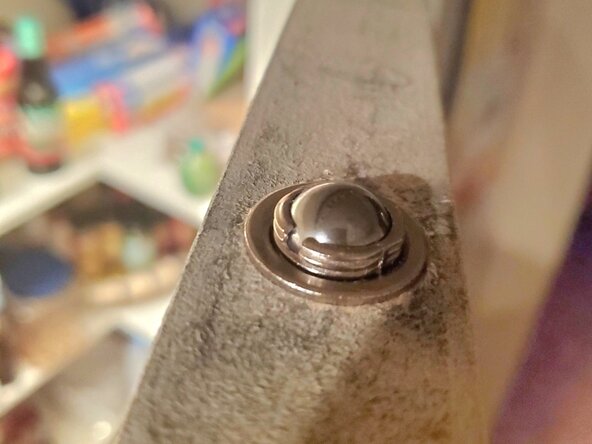
Pull up on the retaining ring.
-
If the ring is stuck, place a metal spudger under the edge of the ring and gently pry it upward.
-
Remove the retaining ring completely so the hole in the door is empty.
-
Discard the old ball latch assembly.
-
-
-
Insert the tip of a pair of tweezers or a metal spudger into one of the adjustment notches around the new ball latch.
-
Turn the adjustment ring clockwise to raise the ball.
-
Turn the adjustment ring counterclockwise to lower the ball.
-
Adjust the ball so it extends slightly beyond the surface of the retaining ring.
-
-
-
Test the fit of the replacement ball latch by pressing it into the hole by hand.
-
Insert the new ball latch into the opening at the top of the door.
-
Press down firmly until the faceplate sits flush against the surface of the door.
-
-
-
Use a Phillips screwdriver to remove the screws securing the strike plate to the door frame.
-
Remove the strike plate from the frame.
-
Discard the old strike plate.
-
-
-
-
Position the new strike plate on the door frame and align it with the ball latch.
-
Install the screws and tighten them with a Phillips screwdriver.
-


 Ask FixBot




To reassemble your device, follow these instructions in reverse order.

Team

Austin Community College, Team 34-5, Kapoor Summer 2026 Member of Austin Community College, Team 34-5, Kapoor Summer 2026
AUSTINCC-KAPOOR-SU26S34G5
1 Member
12 Guides authored
