
Disassembling Rival 16131 Toaster Shell

Naomi Willis and 13 other contributors
Last updated on Apr 25, 2024
Views: 4.9K
View statistics:
- Past 24 Hours:
- 3
- Past 7 Days:
- 20
- Past 30 Days:
- 112
- All Time:
- 4,855
Comments: 0
No one has left comments on this guide. Will you be first?
Go to guide commentsCompleted: 9 10
9 people have marked this guide "completed." Will you be next?
10 people have marked this guide "completed." Including you — great job!
Favorites: 1 2
1 person has favorited (and subscribed to) this guide. Will you be next?
2 people have favorited (and subscribed to) this guide — including you!
Needs More Images
A few more images would make this guide's procedures crystal clear.
Introduction
Go to step 1 ↓Toasters are categorized as heating appliances. Their function is to develop sufficient heat to heat and toast a slice of bread. Breakfast certainly wouldn't be the same without the toasters.
To inspect, repair or replace any internal parts, including the heating elements, you will need to disassemble the toaster.
Here is a complete guide with a detailed description, steps and pictures to facilitate you on how to disassemble the Rival 16131 Toaster Shell.
What you need
Tools

-
-
-
Use a Phillips #2 screwdriver to remove four 12 mm screws at the base of the toaster shell.
-
-
-
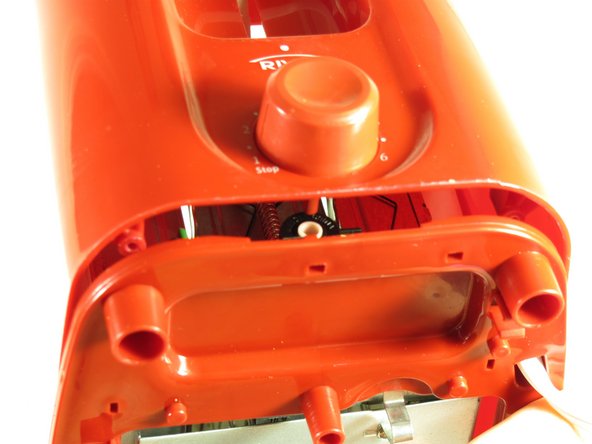
With the dial facing you, push the toaster base up and away until the base is just over the lip of the shell. This will disconnect the browning dial from the rest of the toaster.
-
-
-
-
Reach into the shell and grab the back white part of the lever.
-
Hold the grey lever with both your index finger and middle finger. Next, pull it.
-
Remove the shell.
-


 Ask FixBot



To reassemble your device, follow these instructions in reverse order.
Cancel: I did not complete this guide.
9 other people completed this guide.

Team

Cal Poly, Team 2-8, Propen Fall 2012 Member of Cal Poly, Team 2-8, Propen Fall 2012
CPSU-PROPEN-F12S2G8
5 Members
72 Guides authored
