Free Shipping on Domestic Orders $75+

Disassembling PlayStation Vita Screen & Digitizer (Video Tutorial/Guide)

What you need

Video Overview

  1. Disassembling PlayStation Vita Screen & Digitizer (Video Tutorial/Guide), Case Separation: step 1, image 1 of 2 Disassembling PlayStation Vita Screen & Digitizer (Video Tutorial/Guide), Case Separation: step 1, image 2 of 2
    • Power off and remove the memory card.

    • Using a Phillips #00 screwdriver, remove the four 6.4mm screws on the back casing.

    Ask FixBot

    Add Comment

  2. Disassembling PlayStation Vita Screen & Digitizer (Video Tutorial/Guide): step 2, image 1 of 3 Disassembling PlayStation Vita Screen & Digitizer (Video Tutorial/Guide): step 2, image 2 of 3 Disassembling PlayStation Vita Screen & Digitizer (Video Tutorial/Guide): step 2, image 3 of 3
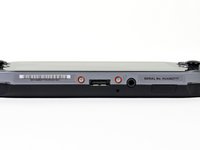
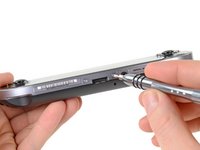
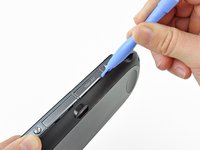
    • Using your fingernail or a spudger, pry open the accessory port cover on the top of the device.

    • Using a Phillips #00 screwdriver, remove the two 5.4mm screws hidden beneath the accessory port cover.

    Ask FixBot

    Add Comment

  3. Disassembling PlayStation Vita Screen & Digitizer (Video Tutorial/Guide): step 3, image 1 of 2 Disassembling PlayStation Vita Screen & Digitizer (Video Tutorial/Guide): step 3, image 2 of 2
    • Remove the two 5.4mm Phillips #00 screws on the bottom of the device near the charging port.

    Ask FixBot

    Add Comment

  4. Disassembling PlayStation Vita Screen & Digitizer (Video Tutorial/Guide): step 4, image 1 of 3 Disassembling PlayStation Vita Screen & Digitizer (Video Tutorial/Guide): step 4, image 2 of 3 Disassembling PlayStation Vita Screen & Digitizer (Video Tutorial/Guide): step 4, image 3 of 3
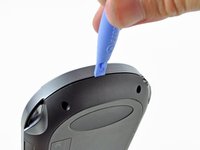
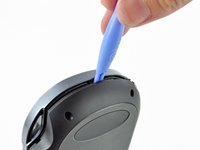
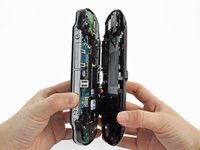
    • Beginning at the sides of the device, use a plastic opening tool to separate the front and rear cases.

    • Continue working your way around the device gently prying it open.

    • There are still wires holding the front and rear cases together. You may damage the connections if you yank the cases completely apart.

    Ask FixBot

    Add Comment

  5. Disassembling PlayStation Vita Screen & Digitizer (Video Tutorial/Guide): step 5, image 1 of 2 Disassembling PlayStation Vita Screen & Digitizer (Video Tutorial/Guide): step 5, image 2 of 2
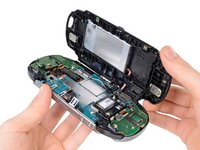
    • Gently separate the two cases, minding the battery and the touch screen controller connectors holding the two cases together.

    Ask FixBot

    Add Comment

  6. Disassembling PlayStation Vita Screen & Digitizer (Video Tutorial/Guide): step 6, image 1 of 1
    • Using a spudger, free the touch screen controller flex cable by gently prying up the connection.

    Ask FixBot

    Add Comment

  7. Disassembling PlayStation Vita Screen & Digitizer (Video Tutorial/Guide): step 7, image 1 of 1
    • Free the battery cable by gently prying up on the connection with a spudger.

    Ask FixBot

    Add Comment

  8. Disassembling PlayStation Vita Screen & Digitizer (Video Tutorial/Guide): step 8, image 1 of 1
    • Separate the front and rear cases.

    Ask FixBot

    Add Comment

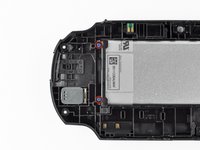
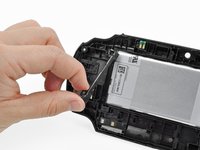
  9. Disassembling PlayStation Vita Screen & Digitizer (Video Tutorial/Guide), Battery: step 9, image 1 of 2 Disassembling PlayStation Vita Screen & Digitizer (Video Tutorial/Guide), Battery: step 9, image 2 of 2
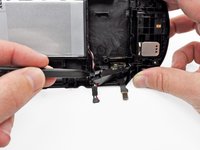
    • With the help of a spudger, gently pry off and remove the battery cable retainer on the back casing assembly.

    • The easiest access to the battery cable retainer is where the battery cable comes out.

    • You can also use the two small tabs on the side of the cable retainer. Locate the tabs and release one at a time. Be a little careful not to push the cover in and re-lock it.

    Ask FixBot

    Add Comment

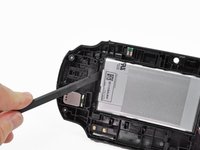
  10. Disassembling PlayStation Vita Screen & Digitizer (Video Tutorial/Guide): step 10, image 1 of 2 Disassembling PlayStation Vita Screen & Digitizer (Video Tutorial/Guide): step 10, image 2 of 2
    • Using a Phillips #00 screwdriver, remove the two 5.0mm blue battery case screws.

    • Remove the plastic battery retaining bar.

    Ask FixBot

    Add Comment

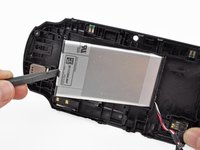
  11. Disassembling PlayStation Vita Screen & Digitizer (Video Tutorial/Guide): step 11, image 1 of 3 Disassembling PlayStation Vita Screen & Digitizer (Video Tutorial/Guide): step 11, image 2 of 3 Disassembling PlayStation Vita Screen & Digitizer (Video Tutorial/Guide): step 11, image 3 of 3
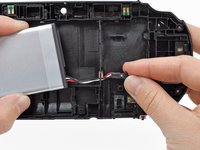
    • Using your finger or a spudger, lift the battery out and remove it.

    • Guide the battery wires through the hole in the back casing as you remove the battery.

    Ask FixBot

    Add Comment

Conclusion

To reassemble your device, follow these instructions in reverse order.

Cancel: I did not complete this guide.

7 other people completed this guide.

djgodmandj

Member since: 10/24/14

302 Reputation

1 Guide authored

1 Guide Comment

So is there any chance that this could be used as a modding possibility, where we could install a higher resolution /quality screen?

TheHeavy - Reply Share

Add Comment

View Statistics:

Past 24 Hours: 8

Past 7 Days: 53

Past 30 Days: 237

All Time: 10,023