
Disassembling Nokia 6236i Display

Erik Lindahl and 5 other contributors
Last updated on Oct 6, 2022
Views: 2.2K
View statistics:
- Past 24 Hours:
- 3
- Past 7 Days:
- 20
- Past 30 Days:
- 103
- All Time:
- 2,159
Comments: 0
No one has left comments on this guide. Will you be first?
Go to guide commentsCompleted: 2 3
2 people have marked this guide "completed." Will you be next?
3 people have marked this guide "completed." Including you — great job!
Favorites: 0 1
No one has favorited (and subscribed to) this guide. Will you be the first?
1 person has favorited (and subscribed to) this guide — and that's you!
Action Shots
Be an action hero! This guide needs images that better demonstrate how to perform specific actions.
Incorrect Tools
Help make this guide better by using the correct tools in images and/or text.
Introduction
Go to step 1 ↓This guide helps you remove the display from the phone.
What you need
Tools

-
-
-
Using your thumb, apply pressure to the battery casing (below the camera). Firmly pull towards the bottom of the phone.
-
Lift the battery case off of the phone.
 Ask FixBot
-
-
-
Use your thumb to get underneath the battery and pull up and out from the bottom of the battery tray.
-
The battery should lift out with minimal resistance.
-
-
-
-
-
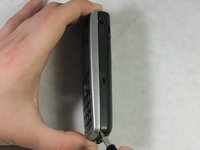
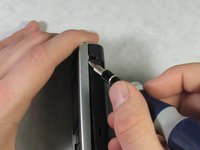
Insert a spudger into the indention on the bottom right side of the device.
-
Slide the spudger upward to a second indention at the top of the phone.
-
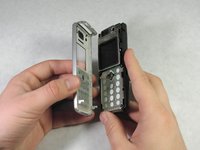
The front casing will detach from the phone.
-
-
-
-
-
-
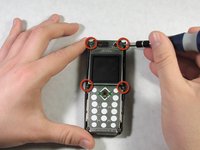
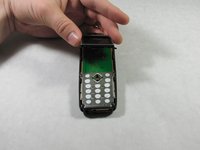
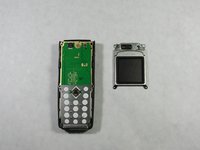
Use the flathead screwdriver to remove four screws on the upper half of the phone.
-
Lift the LCD up and off.
-
-




To reassemble your device, follow these instructions in reverse order.
Cancel: I did not complete this guide.
2 other people completed this guide.

Team

Cal Poly, Team 10-46, Garner Spring 2010 Member of Cal Poly, Team 10-46, Garner Spring 2010
CPSU-GARNER-S10S10G46
4 Members
60 Guides authored
