Free Shipping on Domestic Orders $75+

Disassembling Nokia 3560 Microphone

Views: 2.3K

View statistics:

Past 24 Hours:
2
Past 7 Days:
9
Past 30 Days:
27
All Time:
2,332
Comments: 0

No one has left comments on this guide. Will you be first?

Go to guide comments
Completed: 0

No one has marked this guide "completed." Will you be the first?

Favorites: 0

No one has favorited (and subscribed to) this guide. Will you be the first?

Time Required: 10 - 15 minutes
Difficulty: Moderate
Incorrect Tools

Help make this guide better by using the correct tools in images and/or text.

Missing Prerequisites

This guide is missing information on how to start the process. Make a prerequisite guide!

Disassembling Nokia 3560 Microphone

Introduction

Go to step 1 ↓

This guide will show you how to remove the microphone from the Nokia 3560.

What you need

Tools

    1. Disassembling Nokia 3560 Microphone, Back Cover: step 1, image 1 of 2 Disassembling Nokia 3560 Microphone, Back Cover: step 1, image 2 of 2
      • Press down on the release latch on the bottom of the cover.

      • Once the latch is released, lift the cover from the phone.

      Ask FixBot

      Add Comment

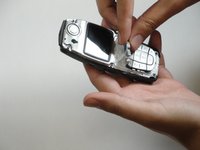
    1. Disassembling Nokia 3560 Microphone, Disassembling Nokia 3560 Keypad: step 2, image 1 of 1
      • Lift the front case off of the phone body.

      Ask FixBot

      Add Comment

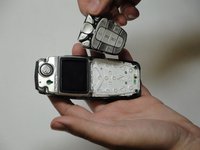
    2. Disassembling Nokia 3560 Microphone: step 3, image 1 of 2 Disassembling Nokia 3560 Microphone: step 3, image 2 of 2
      • Lift the keypad off of the phone.

      Ask FixBot

      Add Comment

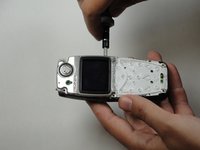
    1. Disassembling Nokia 3560 Microphone, Disassembling Nokia 3560 LCD Display: step 4, image 1 of 1
      • The screen is held to the body by six screws.

      Ask FixBot

      Add Comment

    2. Disassembling Nokia 3560 Microphone: step 5, image 1 of 1
      • Unscrew the six screws with a Torx screwdriver (six-pointed star shaped bit).

      Ask FixBot

      Add Comment

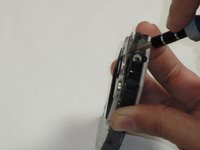
    3. Disassembling Nokia 3560 Microphone: step 6, image 1 of 2 Disassembling Nokia 3560 Microphone: step 6, image 2 of 2
      • Insert a flat screwdriver between the black body and plastic layer.

      Ask FixBot

      Add Comment

    4. Disassembling Nokia 3560 Microphone: step 7, image 1 of 1
      • Pry the layers apart. The LCD and plastic layer will lift out as one piece.

      Ask FixBot

      Add Comment

    1. Disassembling Nokia 3560 Microphone, Disassembling Nokia 3560 Logic Board: step 8, image 1 of 1
      • With the screws removed, the logic board can then be lifted out of the body by hand.

      Ask FixBot

      Add Comment

    1. Disassembling Nokia 3560 Microphone, Microphone: step 9, image 1 of 1
      Tool used on this step:
      Tweezers
      $4.99
      Buy
      • Use tweezers to securely grip the microphone, then pull.

      • Be careful not to remove the metal prongs.

      Ask FixBot

      Add Comment

Conclusion

To reassemble your device, follow these instructions in reverse order.

Cancel: I did not complete this guide.

Sam Ryan

Member since: 04/18/10

37 Reputation

8 Guides authored

Team

Cal Poly, Team 30-39, Garner Spring 2010 Member of Cal Poly, Team 30-39, Garner Spring 2010

CPSU-GARNER-S10S30G39

5 Members

96 Guides authored

0 Guide Comments

Add Comment

View Statistics:

Past 24 Hours: 2

Past 7 Days: 9

Past 30 Days: 27

All Time: 2,332