
Disassembling HKC P886A Overall Device Disassembly

Cassidy and 7 other contributors
Last updated on Oct 29, 2018
Views: 572
View statistics:
- Past 24 Hours:
- 0
- Past 7 Days:
- 2
- Past 30 Days:
- 25
- All Time:
- 572
Comments: 0
No one has left comments on this guide. Will you be first?
Go to guide commentsCompleted: 0 1
No one has marked this guide "completed." Will you be the first?
1 person has marked this guide "completed." It's you — great job!
Favorites: 0 1
No one has favorited (and subscribed to) this guide. Will you be the first?
1 person has favorited (and subscribed to) this guide — and that's you!
Introduction
Go to step 1 ↓This prerequisite guide sets up for all other replacement and repair guides for the HKC P886A 8" tablet. This guide will explain how to take apart the device without damaging internal components.
What you need
Tools
-
-
Spudger4.9


-
-
-
Insert the flat tip of the metal spudger into the seam between the back panel and the screen.
-
Slide the spudger across the perimeter of the device and gently pry apart at each corner.
-
After the pressure clamps are released orient the device so that the speaker is to the right and the screen is tilted away from you.
 Ask FixBot
-
-
-
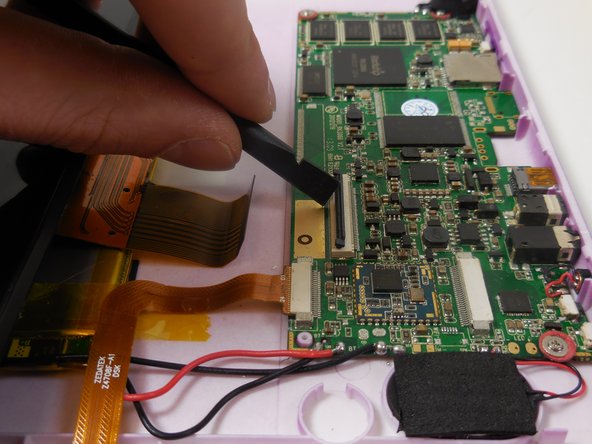
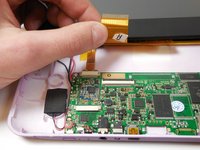
Locate the shorter ribbon cable and the black pressure tabs that hold the ribbon cable in place.
-
Use the plastic spudger to gently slide the tabs about 2mm away from connector.
-
-
-
-
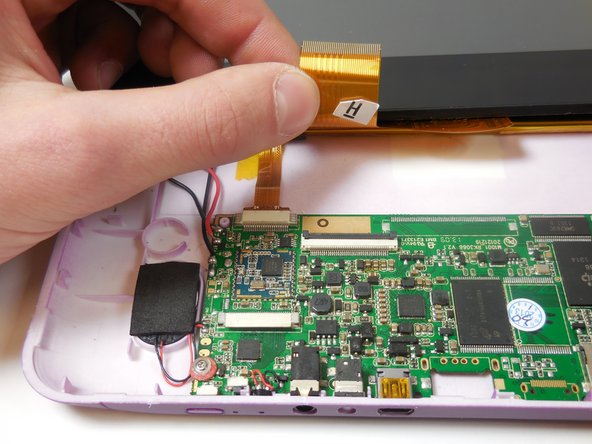
Locate the longer ribbon cable and the pressure clamp that holds the cable in the connection port.
-
Using the plastic spudger, flip the black locking clip up.
-
Once the clip is unlocked, the cable should slide out without resistance
-
-


To reassemble your device, follow these instructions in reverse order.

Team

Colorado Springs, Team 5-2, Panko Spring 2015 Member of Colorado Springs, Team 5-2, Panko Spring 2015
UCCS-PANKO-S15S5G2
3 Members
48 Guides authored
