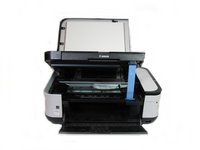
Free Shipping on Domestic Orders $75+

Disassembling Canon Pixma MP480 Rear and Side Panel

What you need

  1. Disassembling Canon Pixma MP480 Rear and Side Panel, Rear and Side Panel: step 1, image 1 of 2 Disassembling Canon Pixma MP480 Rear and Side Panel, Rear and Side Panel: step 1, image 2 of 2
    • Remove the two 7.9 mm screws using a Phillips #1 screwdriver.

    Ask FixBot

    Add Comment

  2. Disassembling Canon Pixma MP480 Rear and Side Panel: step 2, image 1 of 1
    • Lift up the back cover to remove it.

    • You may need to lift firmly as it requires quite a bit of force.

    Ask FixBot

    Add Comment

  3. Disassembling Canon Pixma MP480 Rear and Side Panel: step 3, image 1 of 1
    • Open the front tray.

    Ask FixBot

    Add Comment

  4. Disassembling Canon Pixma MP480 Rear and Side Panel: step 4, image 1 of 2 Disassembling Canon Pixma MP480 Rear and Side Panel: step 4, image 2 of 2
    • Open the scanner compartment.

    • Make sure the blue lever locks into place to keep the compartment open.

    Ask FixBot

    Add Comment

  5. Disassembling Canon Pixma MP480 Rear and Side Panel: step 5, image 1 of 2 Disassembling Canon Pixma MP480 Rear and Side Panel: step 5, image 2 of 2
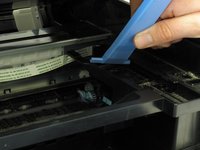
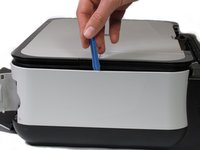
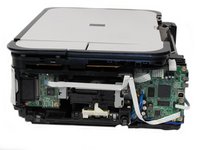
    • Remove the blue lever from its slot by pushing it back and twisting clockwise.

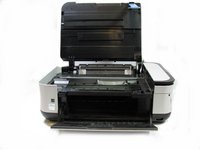
    • Close the scanner compartment and cover.

    Ask FixBot

    Add Comment

  6. Disassembling Canon Pixma MP480 Rear and Side Panel: step 6, image 1 of 2 Disassembling Canon Pixma MP480 Rear and Side Panel: step 6, image 2 of 2
    • Pry open the side cover with the plastic opening tool.

    Ask FixBot

    Add Comment

  7. Disassembling Canon Pixma MP480 Rear and Side Panel: step 7, image 1 of 2 Disassembling Canon Pixma MP480 Rear and Side Panel: step 7, image 2 of 2
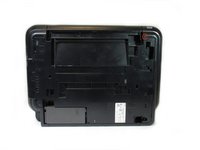
    • Flip the printer over so that the bottom of the printer is facing you.

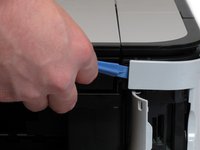
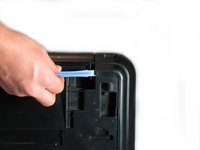
    • Use the plastic opening tool to remove the corner of the side panel from the plastic pin.

    Ask FixBot

    Add Comment

  8. Disassembling Canon Pixma MP480 Rear and Side Panel: step 8, image 1 of 2 Disassembling Canon Pixma MP480 Rear and Side Panel: step 8, image 2 of 2
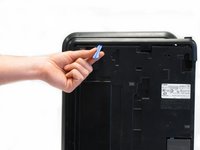
    • Use the plastic opening tool to loosen the side panel from the bottom of the printer.

    Ask FixBot

    Add Comment

Conclusion

To reassemble your device, follow these instructions in reverse order.

Cancel: I did not complete this guide.

6 other people completed this guide.

Kevin Cole

Member since: 01/17/13

116 Reputation

1 Guide authored

Team

Cal Poly, Team 19-41, Regan Winter 2013 Member of Cal Poly, Team 19-41, Regan Winter 2013

CPSU-REGAN-W13S19G41

4 Members

6 Guides authored

2 Guide Comments

Good job!!!!

lhitvietnam - Reply Share

Where is the rest of disassembly?

bill roberts - Reply Share

Add Comment

View Statistics:

Past 24 Hours: 2

Past 7 Days: 17

Past 30 Days: 52

All Time: 21,826