
Disassembling Canon EOS 60D Removing Back Panel

Eric D and 2 other contributors
Last updated on Aug 6, 2024
Views: 6K
View statistics:
- Past 24 Hours:
- 2
- Past 7 Days:
- 20
- Past 30 Days:
- 119
- All Time:
- 5,951
Comments: 0
No one has left comments on this guide. Will you be first?
Go to guide commentsCompleted: 4 5
4 people have marked this guide "completed." Will you be next?
5 people have marked this guide "completed." Including you — great job!
Favorites: 5 6
5 people have favorited (and subscribed to) this guide. Will you be next?
6 people have favorited (and subscribed to) this guide — including you!
Community-Contributed Guide
An awesome member of our community made this guide. It was not created by iFixit staff.
Needs More Images
A few more images would make this guide's procedures crystal clear.
Introduction
Go to step 1 ↓This is a fairly straight-forward process. You may be able to get away without removing the rear rubber grip.
What you need
Tools
-
Spudger4.9


-
-
-
Removing the eyepiece is easy. There are two methods, you can do it yourself, or put it in your camera bag a dozen times and at least once, it will fall off.
-
Grip the eyepiece by the sides firmly (index finger and thumb). Wiggle it upwards until it is off.
 Ask FixBot
-
-
-
Open the battery door
-
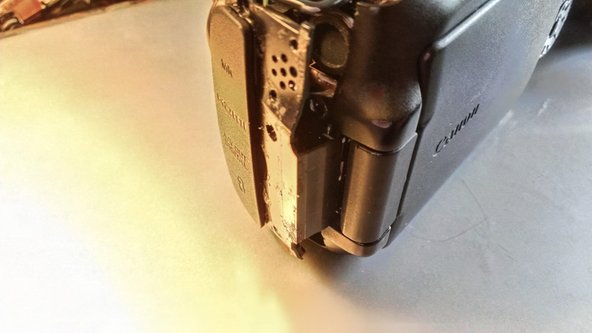
Rotate the door so the one side of the hinge pops out (see photo #2)
-
Slide other pin out (it pops out the same, but this is easier)
-
-
-
-
-
Use a thin piece of plastic, spudger, or fingernail (if you have them) to lift up the edge of the grip, and pull up slowly.
-
Repeat for the other two grips
-
Remove the adhesive like you would rubber cement, just rub your finger against it, it will come off.
-
Optionally throw the balled up adhesive at people pretending its a booger :)
-
-
-
-
-
Using a Spudger, fingernail, or other thin plastic tool to wedge the panel off of the camera
-
Start at the camera's front. Pulling on the rubber av-cover may be enough to get it to move off the body
-
Only pull about 1/4" (3-5mm). There is a tab that will need to slide out
-
-
-
-
At this point, the only thing holding on is the dust-cover is hooked onto the front panel
-
Slide down to remove without damaging the cover. (see photo with cover removed)
-
You can see how the cover, and side piece fit together in the second image.
-




To reassemble your device, follow these instructions in reverse order.
Cancel: I did not complete this guide.
4 other people completed this guide.

