
Direct-Drive Turntable Cartridge and Needle Replacement

Dylan Udhesister and 3 other contributors
Last updated on Oct 31, 2024
Views: 2K
View statistics:
- Past 24 Hours:
- 7
- Past 7 Days:
- 61
- Past 30 Days:
- 232
- All Time:
- 2,049
Comments: 1
1 guide comment.
Go to guide commentsCompleted: 3 4
3 people have marked this guide "completed." Will you be next?
4 people have marked this guide "completed." Including you — great job!
Favorites: 1 2
1 person has favorited (and subscribed to) this guide. Will you be next?
2 people have favorited (and subscribed to) this guide — including you!
Introduction
Go to step 1 ↓If the music being played on your direct-drive turntable does not sound as clear as usual, the needle and cartridge might need to be replaced. This guide can be used to illustrate and explain how the needle and cartridge replacement can be done at home. A needle and cartridge which are not in need of replacement will allow music to sound crisp and clear with no sounds of static. However, if this is not the case for the music being played on your direct-drive turntable, it is likely that the needle is worn. Furthermore, if you notice that the cartridge is touching the vinyl record you are playing, this indicates that the needle is also worn and must be changed.
Before consulting this guide, double check that there is not dust on your needle, since an accumulation of dust on the needle can also lead to the music sounding distorted. If there is no dust on the needle and sound has not returned to normal quality, this guide should be used and a replacement should be done on the cartridge and needle. Continuing to play vinyl record with an old needle and cartridge will result in scratches and bumps on the surface of your records, which can result in lasting damage to the record. Before beginning the replacement, ensure that you disconnect the direct-drive turntable from the power source.
What you need
Tools

-
-
-
Check the needle and cartridge to see if they need to be replaced.
-
If the cartridge is touching your vinyl, it must be replaced.
-
Additionally, if you can hear scraping when playing the record, or if you see new scratch marks on the vinyl, it is time to change the cartridge and needle.
 Ask FixBot
-
-
-
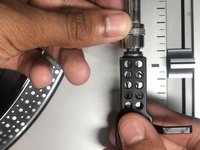
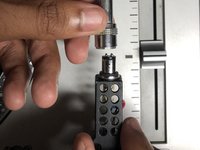
Manually unscrew the bulb on the tone arm from the headshell.
-
Pull out the headshell once it is completely unscrewed from the tone arm.
-
-
Tool used on this step:Flathead 3/32" or 2.5 mm Screwdriver$5.49
-
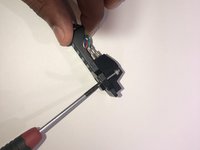
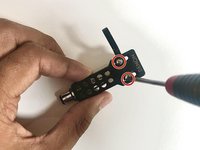
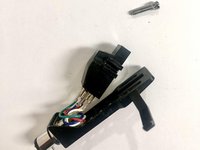
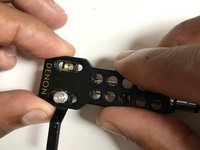
Use a 2.5 mm flathead screwdriver to remove both screws from the headshell.
-
-
-
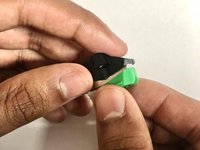
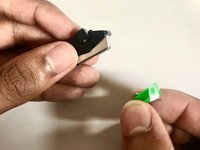
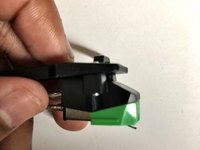
Pull the needle off of the new cartridge to ensure it does not get damaged during installation.
-
-
-
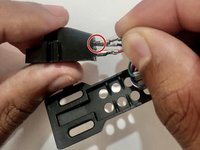
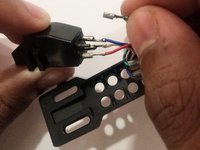
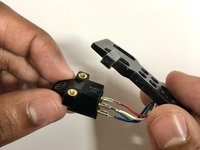
Connect the wires on the headshell to the new cartridge by matching the colors of the wires to the pins on the cartridge.
-
Place the headshell back onto the cartridge, being sure to line up the holes for the screws.
-
Place the screws back into the holes connecting the headshell and the new cartridge.
-
-
-
Screw the screws in using a 2.5 mm flathead screwdriver. Ensure the headshell is securely attached to the cartridge.
-
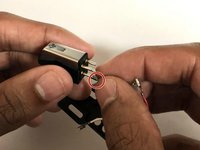
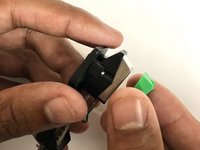
Slide the new needle back onto the cartridge.
-
-
-
-
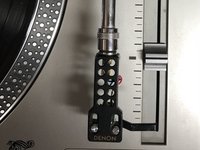
Attach the headshell to the tone arm and screw the headshell in from the tip of the tone arm.
-
Ensure that the headshell is secured in the tone arm and that there is no movement in the headshell when connected to the tone arm.
-
-
-
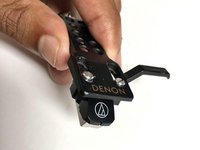
Place the needle onto a vinyl record and ensure that only the tip of the needle is touching the record and not the cartridge.
-
-
-
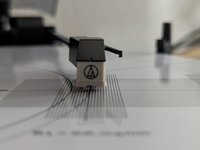
For good sound the needle has to fit parallel into the record groove. Othrewise the sound isn't leveled between left and right channel.
-
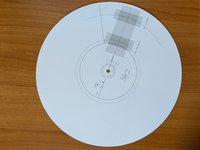
Therefore templates are available to buy or to print. They got orthogonal lines on the area where the needle is setting in and where it is setting off.
-
The needle should be parallel to the lines on the template at R120,9 mm. If not, the screws shown in step 3 can be loosened and the cartridge can be adjusted. After adjusting tight the screws up again.
-
-















Cancel: I did not complete this guide.
3 other people completed this guide.

Team

York University, Team S3-G64, Melo-Thaiss Fall 2020 Member of York University, Team S3-G64, Melo-Thaiss Fall 2020
YORK-MELO-THAISS-F20S3G64
1 Member
12 Guides authored
1 Guide Comment
I couldn't believe it was so easy to understand. Thank You
