Free Shipping on Domestic Orders $75+

Digital2 D2-861G Charging Port Replacement

What you need

    1. Digital2 D2-861G Charging Port Replacement, Motherboards: step 1, image 1 of 1
      • Working on your device while powered on may result in electric shock. Make sure to unplug and power down your device before you begin.

      • Place your device on a soft cloth to avoid scratching the screen.

      • Flip your device over so back panel is facing upwards.

      Ask FixBot

      Add Comment

    2. Digital2 D2-861G Charging Port Replacement: step 2, image 1 of 1
      • Do not use a lot of force as it can break the clips or the back panel.

      • Insert spudger in the slot below the micro SD card.

      • You should hear clips releasing as you pry along the edges.

      • With the spudger tool, run along the edges of the backing undoing 20 plastic clips.

      Ask FixBot

      Add Comment

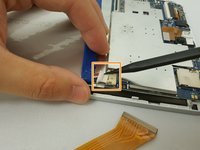
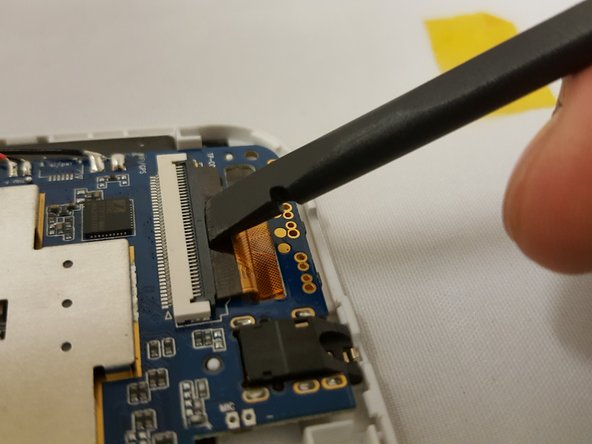
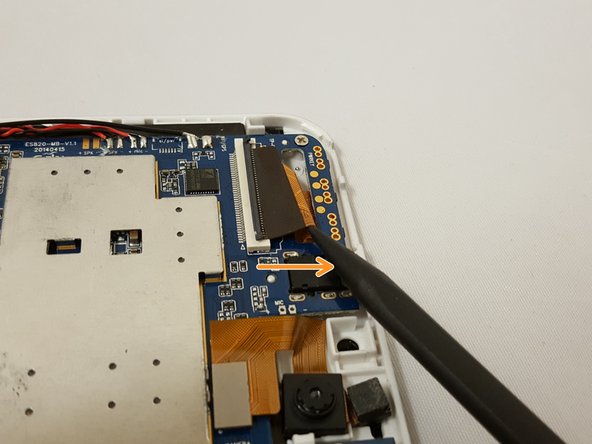
    3. Digital2 D2-861G Charging Port Replacement: step 3, image 1 of 3 Digital2 D2-861G Charging Port Replacement: step 3, image 2 of 3 Digital2 D2-861G Charging Port Replacement: step 3, image 3 of 3
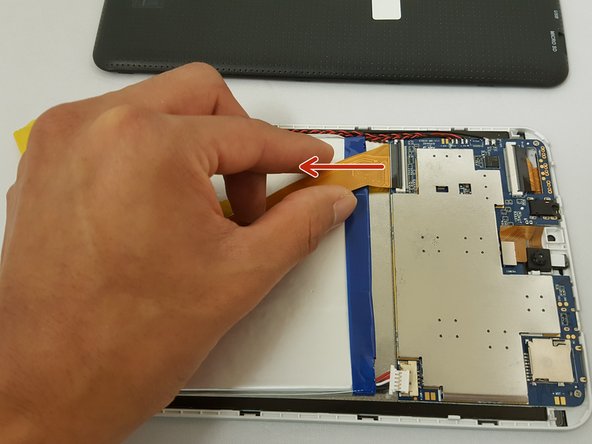
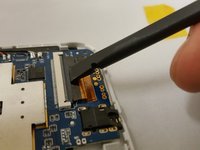
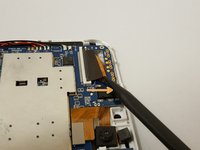
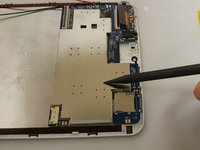
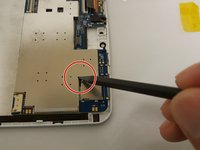
      • Locate the gold colored ZIF (Zero insertion force) connector and disconnect it from the motherboard.

      • To disconnect the ZIF connector, go under the black tab and lift up. Then pull the connector out.

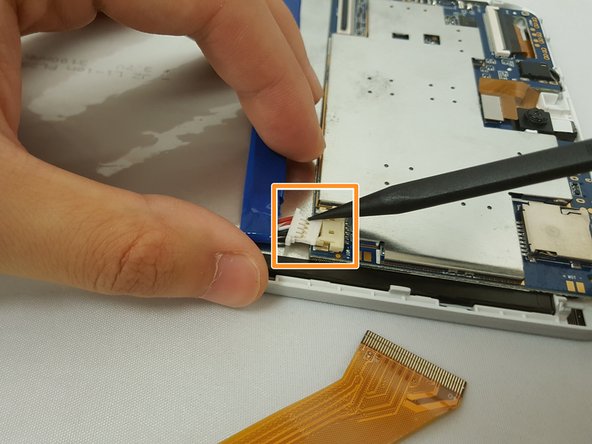
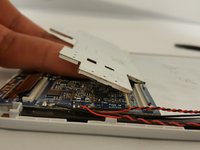
      • Locate the bundled cable connector and disconnect it by simply pulling it gently or using a spudger.

      • Disconnecting the bundled cable connector helps avoid short circuiting anything on the device.

      Ask FixBot

      Add Comment

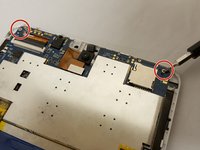
    4. Digital2 D2-861G Charging Port Replacement: step 4, image 1 of 3 Digital2 D2-861G Charging Port Replacement: step 4, image 2 of 3 Digital2 D2-861G Charging Port Replacement: step 4, image 3 of 3
      • Make sure to have your magnetic board to hold your screws.

      • Remove two 3.51mm screws that are located on the top corners with your Phillips #00 screwdriver.

      • Next, unplug the ZIF connector by going under the black tab and simply lift up.

      • Slide the connector out with the pointed side of the spudger.

      Ask FixBot

      Add Comment

    5. Digital2 D2-861G Charging Port Replacement: step 5, image 1 of 3 Digital2 D2-861G Charging Port Replacement: step 5, image 2 of 3 Digital2 D2-861G Charging Port Replacement: step 5, image 3 of 3
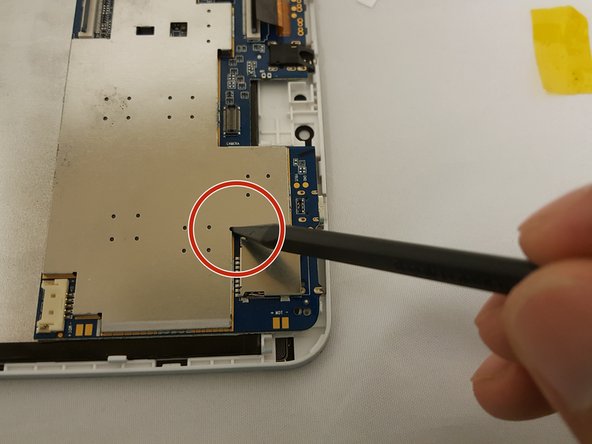
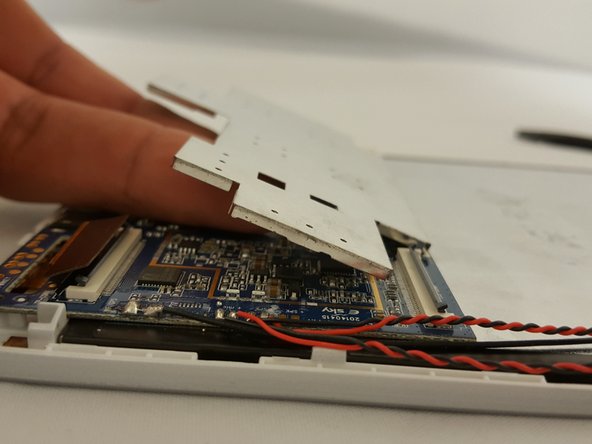
      • This step is optional if you want to remove the metal casing.

      • Insert the pointed side of the spudger in the corner and gently lift.

      • Once one side is lifted, use your fingers and with little force, lift up to remove the case.

      Ask FixBot

      Add Comment

    6. Digital2 D2-861G Charging Port Replacement: step 6, image 1 of 1
      • Use little force or else you risk breaking the motherboard.

      • Watch out for the ZIF connector!

      • There is a white clip holding the motherboard.

      • To remove the motherboard, grab the component on the top left and gently lift while pushing or pulling to the right.

      Ask FixBot

      Add Comment

    1. Digital2 D2-861G Charging Port Replacement, Charging Port: step 7, image 1 of 1
      Ask FixBot

      Add Comment

Conclusion

To reassemble your device, follow these instructions in reverse order.

Cancel: I did not complete this guide.

0 Guide Comments

Add Comment

View Statistics:

Past 24 Hours: 0

Past 7 Days: 4

Past 30 Days: 22

All Time: 629