Introduction
When working on replacing the Digiland DL1168A motherboard, it is important to keep in mind when working with electronics, it's important to choose a tool that's ESD-safe to avoid accidental damage to the device. Common reasons for motherboard failure include excessive electrical shocks, increased heat, or physical damage to the device.
What you need
-
-
-
Using an opening tool, begin softly prying open device by first inserting it in between the front and back panels.
-
Continue prying the edges while moving around the device's perimeter until the back can be easily removed.
 Ask FixBot
-
-
-
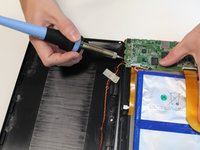
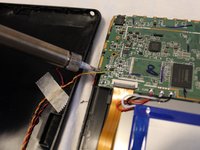
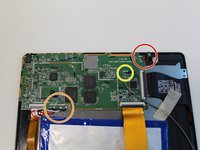
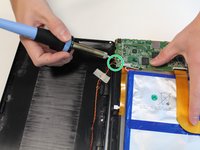
Desolder the four wires connecting the rear case to the motherboard.
-
Disconnect the wires from the motherboard.
-
Remove the rear case from the device.
-
-
-
-
-
Tool used on this step:Tweezers$4.99
-
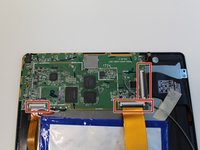
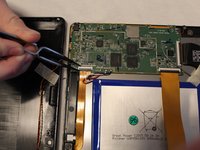
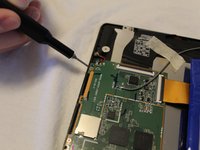
Using a pair of tweezers, carefully lift the three zero insertion force connectors (ZIF) attached to the motherboard.
-
-
-
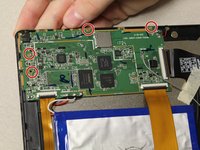
Using the soldering iron, desolder all eight wires connected to the motherboard.
-
Removing the red wire then the black wire (2 wires).
-
Desolder the three wires and remove them.
-
Remove the single grey wire.
-
Remove the yellow and red twisted wires and black and red twisted wires connected to the speakers.
-
-









To reassemble your device, follow these instructions in reverse order.

Team

Grand Valley State University, Team S1-G1, DeVasto Fall 2019 Member of Grand Valley State University, Team S1-G1, DeVasto Fall 2019
GVSU-DEVASTO-F19S1G1
4 Members
48 Guides authored
