Free Shipping on Domestic Orders $75+

Dell XPS 7590 SSD Replacement

What you need

    1. Dell XPS 7590 SSD Replacement, Flip laptop around: step 1, image 1 of 1
      • Flip your device the other way around

      • Don't be confused that this device is black, its a skin

      Ask FixBot

      Add Comment

    2. Dell XPS 7590 SSD Replacement, Remove 10 Torx T5: step 2, image 1 of 3 Dell XPS 7590 SSD Replacement, Remove 10 Torx T5: step 2, image 2 of 3 Dell XPS 7590 SSD Replacement, Remove 10 Torx T5: step 2, image 3 of 3
      • Grab your T5 Torx and identify the 10 torx screws

      • Make sure that this is a T5, to not strip the screws. They can be very difficult to remove

      • Careful there are more screws, do not try to open yet!

      Ask FixBot

      Add Comment

    3. Dell XPS 7590 SSD Replacement, Remove Flap Screws: step 3, image 1 of 1
      • Open the flap on the back of the laptop

      • There are two screws that need to be removed, please use a Philips 0 screwdriver

      Ask FixBot

      Add Comment

    4. Dell XPS 7590 SSD Replacement, Remove Backplate: step 4, image 1 of 1
      • The backplate might not be easy to open

      • You can use a soft prytool to open the laptop easier

      • Don't insert the tool too deep or you might break the mainboard

      • Now, you should be able to remove the backplate

      Ask FixBot

      Add Comment

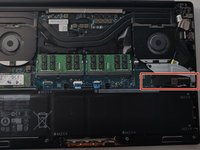
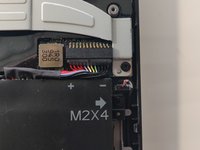
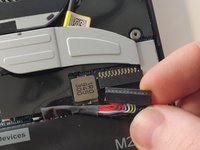
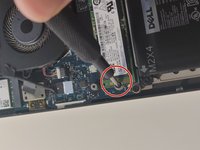
    5. Dell XPS 7590 SSD Replacement, Unplug Battery: step 5, image 1 of 3 Dell XPS 7590 SSD Replacement, Unplug Battery: step 5, image 2 of 3 Dell XPS 7590 SSD Replacement, Unplug Battery: step 5, image 3 of 3
      • Locate the battery connection to the mainboard

      • Unplug the battery before doing anything else

      • You can use a pry tool to make this easier

      Ask FixBot

      Add Comment

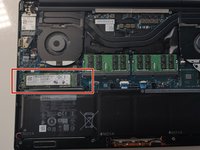
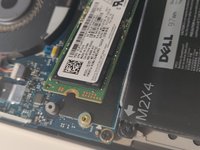
    6. Dell XPS 7590 SSD Replacement, Locate and remove SDD: step 6, image 1 of 3 Dell XPS 7590 SSD Replacement, Locate and remove SDD: step 6, image 2 of 3 Dell XPS 7590 SSD Replacement, Locate and remove SDD: step 6, image 3 of 3
      • Locate the SDD on the mainboard

      • Use a Philips 0 to remove the screw of the SDD

      • Slide the SSD out of its socket.

      • Try not to lift the SSD any more than necessary

      • During reassembly, make sure the slot in the SSD lines up with the slot in its socket. Do not touch the gold-colored contacts with your fingers.

      • Reconnect the battery and reassemble

      Ask FixBot

      Add Comment

Conclusion

To reassemble your device, follow these instructions in reverse order.

Cancel: I did not complete this guide.

4 other people completed this guide.

Max Lembke

Member since: 09/14/19

951 Reputation

3 Guides authored

0 Guide Comments

Add Comment

View Statistics:

Past 24 Hours: 2

Past 7 Days: 14

Past 30 Days: 69

All Time: 4,397