Free Shipping on Domestic Orders $75+

Dell XPS 18 Support Feet Replacement

What you need

    1. Dell XPS 18 Support Feet Replacement, Back Cover: step 1, image 1 of 1
      • Turn the device on its screen.

      • Remove the ten 4mm screws using a T8 Torx screwdriver.

      Ask FixBot

      Add Comment

    2. Dell XPS 18 Support Feet Replacement: step 2, image 1 of 1
      • Gently flip out support feet located near the bottom of device.

      Ask FixBot

      Add Comment

    3. Dell XPS 18 Support Feet Replacement: step 3, image 1 of 1
      • Gently lift the back cover off the device. The back cover should come off easily.

      Ask FixBot

      Add Comment

    1. Dell XPS 18 Support Feet Replacement, Support Feet: step 4, image 1 of 1
      • Fold down the support foot.

      Ask FixBot

      Add Comment

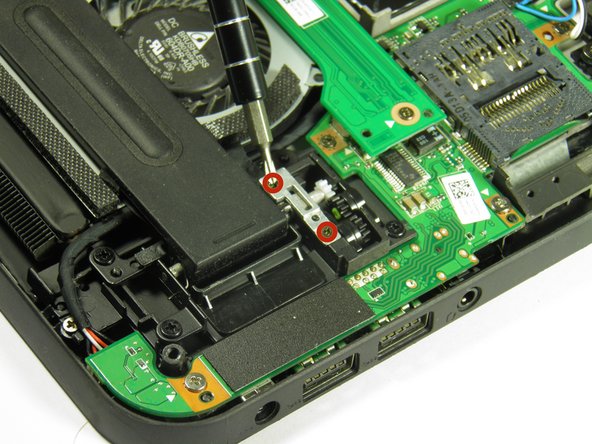
    2. Dell XPS 18 Support Feet Replacement: step 5, image 1 of 1
      • Remove the two silver 3mm screws with a Phillips 00 screwdriver.

      Ask FixBot

      Add Comment

    3. Dell XPS 18 Support Feet Replacement: step 6, image 1 of 1
      • Remove the silver metal piece holding the support feet down.

      Ask FixBot

      Add Comment

    4. Dell XPS 18 Support Feet Replacement: step 7, image 1 of 1
      • Remove the support foot.

      • Follow these same steps for the remaining support foot.

      Ask FixBot

      Add Comment

Conclusion

To reassemble your device, follow these instructions in reverse order.

Cancel: I did not complete this guide.

Austin Weir

Member since: 01/31/15

1,308 Reputation

8 Guides authored

Team

Cal Poly, Team 6-29, Amido Winter 2015 Member of Cal Poly, Team 6-29, Amido Winter 2015

CPSU-AMIDO-W15S6G29

4 Members

96 Guides authored

0 Guide Comments

Add Comment

View Statistics:

Past 24 Hours: 1

Past 7 Days: 6

Past 30 Days: 26

All Time: 2,352