
Dell XPS 15 9575 Trackpad Replacement

Andre Williams and 3 other contributors
Last updated on May 7, 2024
Views: 3.4K
View statistics:
- Past 24 Hours:
- 1
- Past 7 Days:
- 20
- Past 30 Days:
- 77
- All Time:
- 3,423
Comments: 17
17 comments on steps.
Completed: 2 3
2 people have marked this guide "completed." Will you be next?
3 people have marked this guide "completed." Including you — great job!
Favorites: 0 1
No one has favorited (and subscribed to) this guide. Will you be the first?
1 person has favorited (and subscribed to) this guide — and that's you!
Introduction
Go to step 1 ↓This guide will provide instructions on how to remove and replace the Trackpad for the Dell XPS 15 9575. The trackpad is responsible for controlling the cursor on screen and is a major form of input for the laptop. Issues with the trackpad include erroneous click input, unresponsive clicks, cursor drift, and any other input that doesn’t match what’s intended by the user.
Though issues with the trackpad can be fairly obvious, check out the Dell XPS 9575 Troubleshooting Page for some additional information on potential issues pertaining to this component.
What you need
Parts
Tools


-
-
-
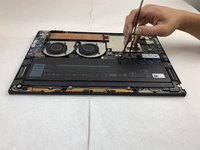
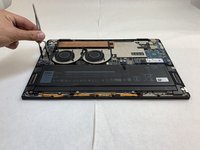
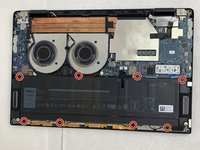
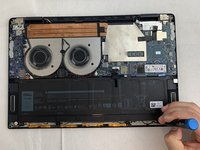
Use your T5 Torx driver to remove all eight 3.2 mm screws holding down the back panel.
-
Wedge an opening pick between the back cover and the base of the board, then slightly lift the tool to pop the clips on the back cover off.
 Ask FixBot
-
-
-
-
-
Use the Phillips #0 screwdriver to remove all four silver 3.2 mm screws fastening the interconnect cable.
-
-
-
Carefully wedge the plastic opening pick between the fan and the interconnect cable.
-
Remove the interconnect cable.
-
-
-
Use the nylon tweezers to remove the interconnect pins from each of the circuit boards.
-
-
-
-
-
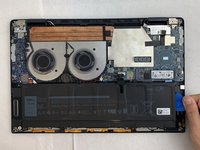
Use the Phillips #0 screwdriver to remove all eight 6.4 mm screws from the battery.
-
-
-
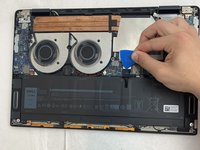
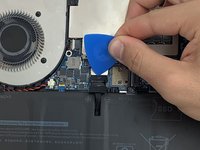
Use a plastic opening pick to pry the black battery cable away from its silver adapter.
-
-
-
Use a plastic opening pick to separate the battery from the device.
-
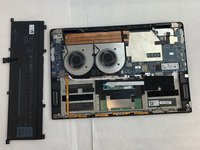
Lift the battery straight up and remove it when it is completely separated.
-
-
-
-
-
-
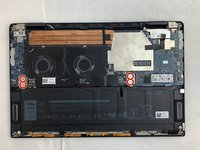
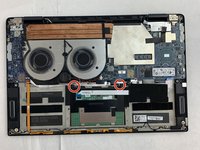
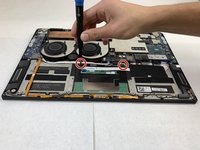
Use the Phillips #0 screwdriver to remove the two silver 3.2mm screws located in the two top corners of the trackpad.
-
-
Tool used on this step:Tweezers$4.99
-
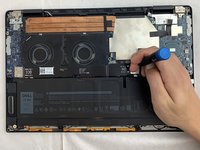
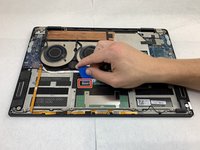
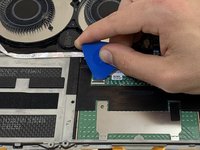
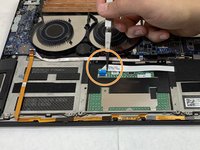
Flip the locking tab of the trackpad ZIF connector upwards with an opening pick, allowing the ribbon strip to be pulled forward.
-
Gently remove the ribbon cable with a set of tweezers.
-
-
-
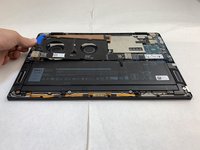
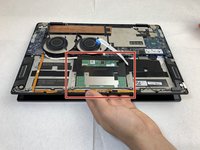
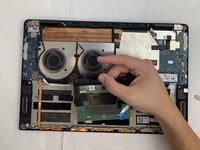
Open the laptop slightly and place your hand underneath the trackpad, gently popping the trackpad up from the case.
-
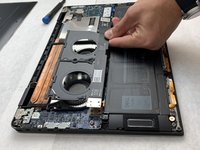
Once the trackpad is popped up, slide it outwards in order to remove it from the holder.
-
-


















To reassemble your device, follow these instructions in reverse order.
Cancel: I did not complete this guide.
2 other people completed this guide.

Team

Embry-Riddle Aeronautical University, Team S1-G1, Watkins Fall 2019 Member of Embry-Riddle Aeronautical University, Team S1-G1, Watkins Fall 2019
ERAU-WATKINS-F19S1G1
4 Members
96 Guides authored
