Free Shipping on Domestic Orders $75+

Dell XPS 15 9510 Touchpad Replacement

What you need

    1. Dell XPS 15 9510 Touchpad Replacement, Lower Case: step 1, image 1 of 1
      • Make sure the laptop is powered off and unplug all cables before beginning any repair.

      • Remove eight 3 mm screws from the underside of the case using a T5 Torx screwdriver.

      Ask FixBot

      Add Comment

    2. Dell XPS 15 9510 Touchpad Replacement: step 2, image 1 of 1
      • The metal case of the XPS 15 9510 is extremely sharp, so be careful not to run your fingers along the edge when disassembling the laptop.

      • Wedge the case apart with a nylon spudger.

      • If the plastic one isn't possible to insert, use the metal spudger to carefully create a small gap first.

      • Slide spudger along each side of the laptop

      Ask FixBot

      Add Comment

    3. Dell XPS 15 9510 Touchpad Replacement: step 3, image 1 of 1
      • The metal case of the XPS 15 9510 is extremely sharp, so be careful not to run your fingers along the edge when disassembling the laptop.

      • Lift the back panel of the laptop off and set it aside.

      Ask FixBot

      Add Comment

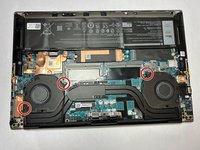
    1. Dell XPS 15 9510 Touchpad Replacement, Fan: step 4, image 1 of 2 Dell XPS 15 9510 Touchpad Replacement, Fan: step 4, image 2 of 2
      • Remove two 4.3 mm screws from the left fan and one 4.3 mm screw from the right fan using a JIS #000 screwdriver.

      Ask FixBot

      Add Comment

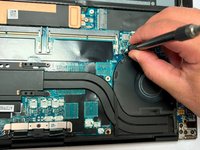
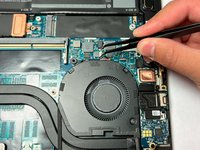
    2. Dell XPS 15 9510 Touchpad Replacement: step 5, image 1 of 2 Dell XPS 15 9510 Touchpad Replacement: step 5, image 2 of 2
      Tool used on this step:
      Tweezers
      $4.99
      Buy
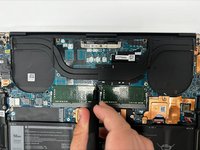
      • Gently unplug the motherboard fan connector using a pair of tweezers.

      Ask FixBot

      Add Comment

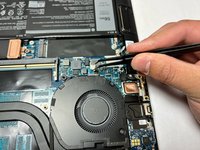
    3. Dell XPS 15 9510 Touchpad Replacement: step 6, image 1 of 1
      • Unplug the motherboard connector on the other fan using a pair of tweezers.

      Ask FixBot

      Add Comment

    4. Dell XPS 15 9510 Touchpad Replacement: step 7, image 1 of 2 Dell XPS 15 9510 Touchpad Replacement: step 7, image 2 of 2
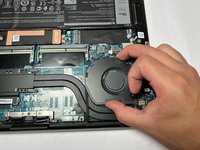
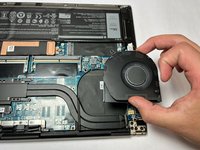
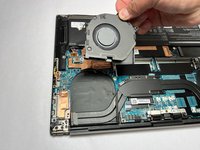
      • Gently slide and then lift the fans out of their positions.

      Ask FixBot

      Add Comment

    5. Dell XPS 15 9510 Touchpad Replacement: step 8, image 1 of 3 Dell XPS 15 9510 Touchpad Replacement: step 8, image 2 of 3 Dell XPS 15 9510 Touchpad Replacement: step 8, image 3 of 3
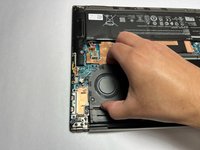
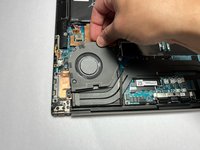
      • Repeat the previous step and remove the other fan.

      Ask FixBot

      Add Comment

    1. Dell XPS 15 9510 Touchpad Replacement, Battery: step 9, image 1 of 2 Dell XPS 15 9510 Touchpad Replacement, Battery: step 9, image 2 of 2
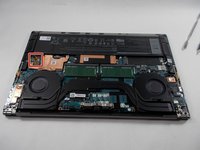
      • Using the small battery pull tab, disconnect the battery connector from the motherboard.

      Ask FixBot

      Add Comment

    2. Dell XPS 15 9510 Touchpad Replacement: step 10, image 1 of 1
      • Remove eight 2.5 mm from around the perimeter of the battery using a Phillips #0 screwdriver.

      Ask FixBot

      Add Comment

    3. Dell XPS 15 9510 Touchpad Replacement: step 11, image 1 of 1
      • There are many delicate components in the vicinity of the battery, so be extremely careful removing it

      • Remove the old battery from the laptop.

      • Replacement batteries for this model usually don't come with battery cables, so be sure to switch the cable from your retired battery to your new battery.

      Ask FixBot

      Add Comment

    1. Dell XPS 15 9510 Touchpad Replacement, Heat Sink: step 12, image 1 of 2 Dell XPS 15 9510 Touchpad Replacement, Heat Sink: step 12, image 2 of 2
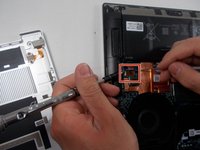
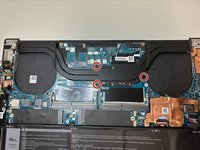
      • Remove the three 4.6 mm screws that secure the heat sink with a Phillips #1 screwdriver.

      Ask FixBot

      Add Comment

    2. Dell XPS 15 9510 Touchpad Replacement: step 13, image 1 of 1
      Ask FixBot

      Add Comment

    1. Dell XPS 15 9510 Touchpad Replacement, Touchpad: step 14, image 1 of 1
      • Remove the six 3 mm screws securing the touch pad with a Phillips #00 screw driver.

      Ask FixBot

      Add Comment

    2. Dell XPS 15 9510 Touchpad Replacement: step 15, image 1 of 3 Dell XPS 15 9510 Touchpad Replacement: step 15, image 2 of 3 Dell XPS 15 9510 Touchpad Replacement: step 15, image 3 of 3
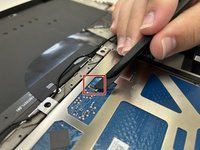
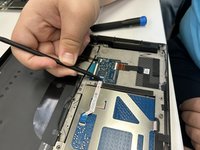
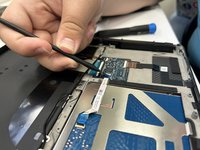
      • Flip up the black ZIF locking flap that secures the touchpad ribbon cable.

      • Disconnect the touch pad ribbon cable.

      Ask FixBot

      Add Comment

    3. Dell XPS 15 9510 Touchpad Replacement: step 16, image 1 of 2 Dell XPS 15 9510 Touchpad Replacement: step 16, image 2 of 2
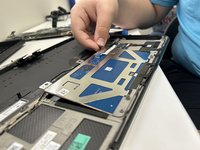
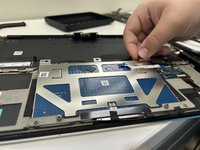
      • Lift the touch pad up and out of the chassis.

      Ask FixBot

      Add Comment

Conclusion

To reassemble your device, follow the above steps in reverse order.
Take your e-waste to an R2 or e-Stewards certified recycler.
Repair didn’t go as planned? Try some basic troubleshooting or ask our Answers community for help.

Cancel: I did not complete this guide.

2 other people completed this guide.

Esmie

Member since: 09/23/24

145 Reputation

1 Guide authored

1 Guide Comment

This guide is incomplete. Step 13 shows removing the heatsink, then step 14 is removing the touchpad, but it's a missing a HUGE series of steps in between which is removing the motherboard to access the touchpad. As-is this guide is not usable.

Derek Selby - Reply Share

Add Comment

View Statistics:

Past 24 Hours: 4

Past 7 Days: 31

Past 30 Days: 114

All Time: 1,974