Free Shipping on Domestic Orders $75+

Dell XPS 15 9510 Hinges Replacement

What you need

    1. Dell XPS 15 9510 Hinges Replacement, Lower Case: step 1, image 1 of 1
      • Make sure the laptop is powered off and unplug all cables before beginning any repair.

      • Remove eight 3 mm screws from the underside of the case using a T5 Torx screwdriver.

      Ask FixBot

      Add Comment

    2. Dell XPS 15 9510 Hinges Replacement: step 2, image 1 of 1
      • The metal case of the XPS 15 9510 is extremely sharp, so be careful not to run your fingers along the edge when disassembling the laptop.

      • Wedge the case apart with a nylon spudger.

      • If the plastic one isn't possible to insert, use the metal spudger to carefully create a small gap first.

      • Slide spudger along each side of the laptop

      Ask FixBot

      Add Comment

    3. Dell XPS 15 9510 Hinges Replacement: step 3, image 1 of 1
      • The metal case of the XPS 15 9510 is extremely sharp, so be careful not to run your fingers along the edge when disassembling the laptop.

      • Lift the back panel of the laptop off and set it aside.

      Ask FixBot

      Add Comment

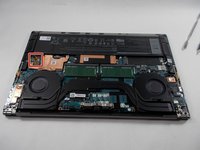
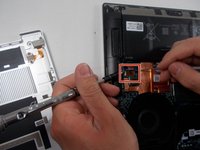
    1. Dell XPS 15 9510 Hinges Replacement, Battery: step 4, image 1 of 2 Dell XPS 15 9510 Hinges Replacement, Battery: step 4, image 2 of 2
      • Using the small battery pull tab, disconnect the battery connector from the motherboard.

      Ask FixBot

      Add Comment

    2. Dell XPS 15 9510 Hinges Replacement: step 5, image 1 of 1
      • Remove eight 2.5 mm from around the perimeter of the battery using a Phillips #0 screwdriver.

      Ask FixBot

      Add Comment

    3. Dell XPS 15 9510 Hinges Replacement: step 6, image 1 of 1
      • There are many delicate components in the vicinity of the battery, so be extremely careful removing it

      • Remove the old battery from the laptop.

      • Replacement batteries for this model usually don't come with battery cables, so be sure to switch the cable from your retired battery to your new battery.

      Ask FixBot

      Add Comment

    1. Dell XPS 15 9510 Hinges Replacement, Display Assembly: step 7, image 1 of 1
      • Remove the four screws (eight total) from each display hinge using a Phillips #00 screwdriver.

      Ask FixBot

      Add Comment

    2. Dell XPS 15 9510 Hinges Replacement: step 8, image 1 of 1
      • Remove five screws that connect the display using a Phillips #00 screwdriver.

      Ask FixBot

      Add Comment

    3. Dell XPS 15 9510 Hinges Replacement: step 9, image 1 of 1
      • Carefully remove the display from the Dell XPS 15 9510.

      Ask FixBot

      Add Comment

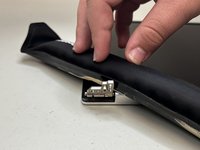
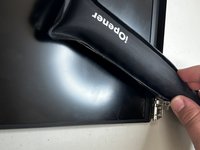
    1. Dell XPS 15 9510 Hinges Replacement, Hinges: step 10, image 1 of 2 Dell XPS 15 9510 Hinges Replacement, Hinges: step 10, image 2 of 2
      • Heat the iOpener in the microwave for 30 seconds.

      • Place the iOpener on top of the laptop where the hinge is connected. Leave it there until the glue holding it in place melts.

      Ask FixBot

      Add Comment

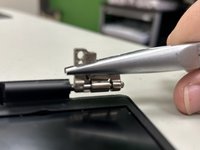
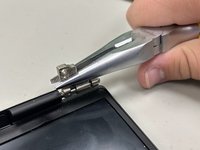
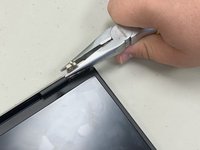
    2. Dell XPS 15 9510 Hinges Replacement: step 11, image 1 of 3 Dell XPS 15 9510 Hinges Replacement: step 11, image 2 of 3 Dell XPS 15 9510 Hinges Replacement: step 11, image 3 of 3
      • Pull out the hinges using a pair of needle nose pliers.

      Ask FixBot

      Add Comment

Conclusion

To reassemble your device, follow these instructions in reverse order.

Cancel: I did not complete this guide.

0 Guide Comments

Add Comment

View Statistics:

Past 24 Hours: 0

Past 7 Days: 14

Past 30 Days: 53

All Time: 698