
Dell XPS 15 9510 Fan Replacement

Bethany Wright and 6 other contributors
Last updated on May 7, 2024
Views: 2.9K
View statistics:
- Past 24 Hours:
- 4
- Past 7 Days:
- 30
- Past 30 Days:
- 129
- All Time:
- 2,920
Comments: 5
4 comments on steps, 1 guide comment.
Go to guide commentsCompleted: 3 4
3 people have marked this guide "completed." Will you be next?
4 people have marked this guide "completed." Including you — great job!
Favorites: 0 1
No one has favorited (and subscribed to) this guide. Will you be the first?
1 person has favorited (and subscribed to) this guide — and that's you!
Needs More Images
A few more images would make this guide's procedures crystal clear.
Featured Student Guide
This guide has been the hard work of our awesome students and is found to be exceptionally cool by the iFixit staff.
Introduction
Go to step 1 ↓Failure of fans to turn on automatically can lead to devices overheating. This guide shows how to replace the two fans located within the Dell XPS 15 9510 laptop. Be sure to remove small parts carefully.
Before using this guide, make sure to review the Dell XPS 15 9510 troubleshooting page to review if it isn't a BIOS issue or anything else.
Your fans might also be dirty; you can use these steps to locate your fans before cleaning them using a DataVac. If that is the case, you won't need to replace your fans.
Make sure to power off your laptop completely and disconnect from any external power source before beginning the process.
What you need


-
-
-
Remove eight 3 mm screws from the underside of the case using a T5 Torx screwdriver.
 Ask FixBot
-
-
-
Wedge the case apart with a nylon spudger.
-
Slide spudger along each side of the laptop
-
-
-
-
-
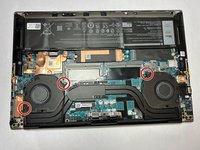
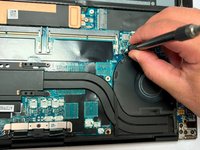
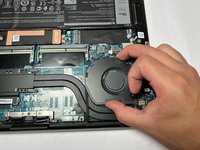
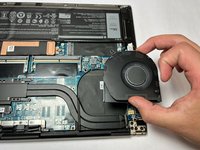
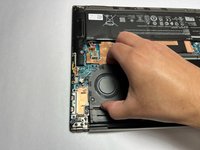
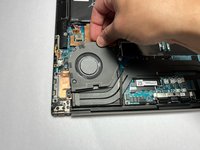
Remove two 4.3 mm screws from the left fan and one 4.3 mm screw from the right fan using a JIS #000 screwdriver.
-
-
Tool used on this step:Tweezers$4.99
-
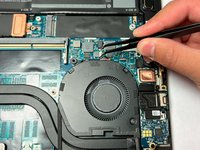
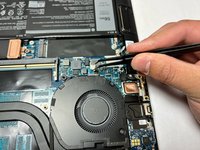
Gently unplug the motherboard fan connector using a pair of tweezers.
-
-
-








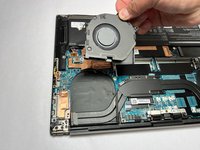
To reassemble your device, follow these instructions in reverse order.
Cancel: I did not complete this guide.
3 other people completed this guide.

Team

IUPUI, Team 2-1, Harley Summer 2023 Member of IUPUI, Team 2-1, Harley Summer 2023
IUPUI-HARLEY-SU23S2G1
4 Members
36 Guides authored
