Introduction
The cooling fan is the main source of cooling for the device. It prevents overheating which can cause internal damage to the device such as the hard drive. It is highly important to have a clean and functioning cooling fan. Much of the cabling is delicate in this part of the computer. Be careful not to destroy connections to the motherboard. This guide will show you how to replace a cooling fan. You will need tweezers, a Phillips #0 screwdriver, and a plastic opening tool.
What you need
-
-
-
Remove the back cover of the laptop by unscrewing eight 3.5mm screws using a Phillips #0 screwdriver.
 Ask FixBot
-
-
-
-
-
-
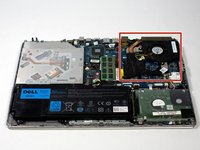
The fan is located on the upper right hand side of the laptop.
-
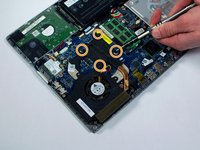
Unscrew the four 4.5mm Phillips #0 screws along the fan.
-
-
Tool used on this step:Tweezers$4.99
-
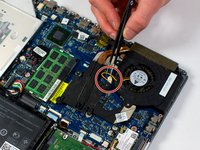
Disconnect the fan connection by using the metal tweezers.
-
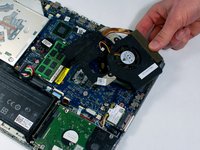
Then, plug in the new or cleaned fan back into the connection.
-
-




To reassemble your device, follow these instructions in reverse order.

Team

UW Stout, Team S8-G3, Ogden Spring 2018 Member of UW Stout, Team S8-G3, Ogden Spring 2018
UWSTOUT-OGDEN-S18S8G3
4 Members
72 Guides authored
