Introduction
If your Dell XPS 13 9370 does not turn on, experiences frequent crashes, or has any damaged ports or connectors, you may need to replace the motherboard. The motherboard is the vital component that connects all hardware parts including the CPU, RAM, and storage devices. Replacing it can resolve power and connection issues. Keep in mind the replacing the motherboard may require reinstalling your operating system and drivers.
What you need
-
-
-
Using a Torx #5 screwdriver, remove the eight 3mm screws along the edges of the back panel.
 Ask FixBot
-
-
-
Insert a spudger into the seam between the back panel and the computer frame.
-
Pop the back panel out of place and remove it.
-
-
-
-
-
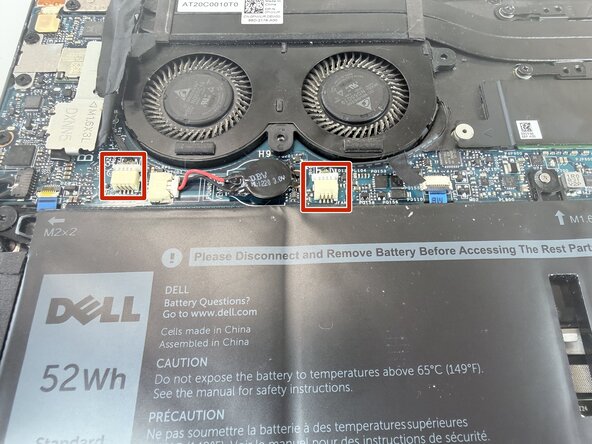
Grab the battery connector cable plug on both sides, pinch it and pull it out.
-
-
-
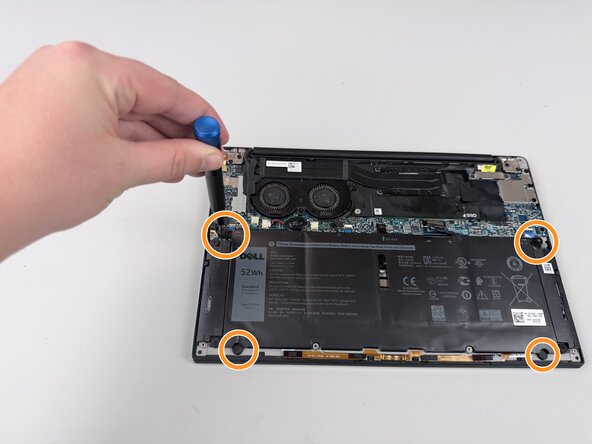
Remove the silver 4 mm screw from the top of the battery using a Phillips #000 screwdriver.
-
Remove the four black 2 mm screws holding in the battery along the edges using a Phillips #1 screwdriver.
-
Lift the battery out of the laptop.
-
-
-
-
-
-
Remove the 3.4 mm screw from the SSD cover plate using a Phillips #000 screwdriver.
-
Grab the SSD cover plate and slide it off of the retention post.
-
Remove the SSD cover plate to expose the SSD.
-
-
-
The SSD is plugged into the M.2 connector slot.
-
Grab the SSD on both sides and pull it out of the slot.
-
-
-
-
-
Lift the screw cover flap to expose the cooling fan assembly.
-
Remove the three 3.4 mm retention screws using a Phillips #1 screwdriver.
-
-
-
Unplug the two black cables from the motherboard assembly.
-
Move the cables out of the way and lift the cooling fan assembly out of the frame.
-
-
-
-
-
Remove the four 3.4 mm screws using a Phillips #000 screwdriver.
-
Slide the heat sink out and remove it from the frame.
-
-
-
-
-
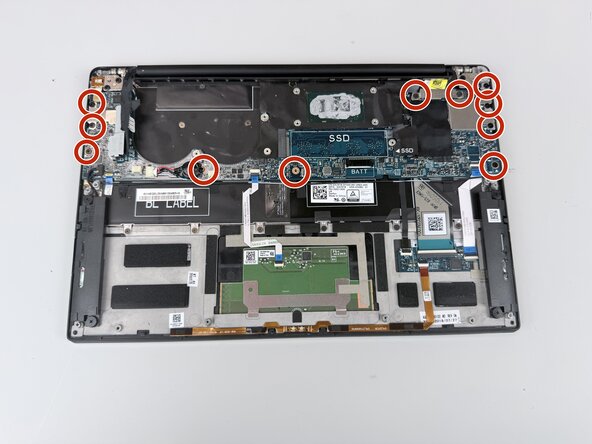
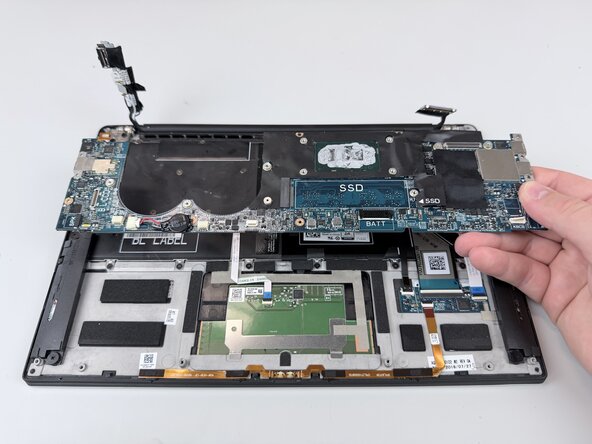
Remove the eleven 3.4 mm screws holding the motherboard in place using a Phillips #1 screwdriver.
-
-
-
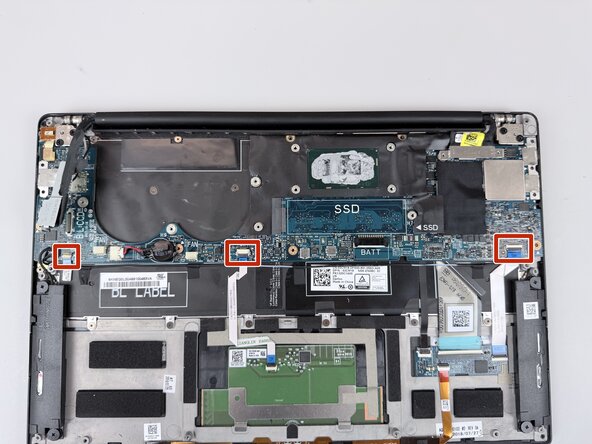
Unplug the three white ribbon cable connectors.
-
Gently pry the motherboard loose and lift the assembly out of the frame.
-
-










To reassemble your device, follow these instructions in reverse order.
Cancel: I did not complete this guide.
One other person completed this guide.

Team

Texas Tech, Team 46-1, Johansen Fall 2025 Member of Texas Tech, Team 46-1, Johansen Fall 2025
TTU-JOHANSEN-F25S46G1
5 Members
72 Guides authored
