
Dell XPS 13 9315 Lower Case Replacement

Jessica Flores and 2 other contributors
Last updated on May 20, 2026
Views: 252
View statistics:
- Past 24 Hours:
- 1
- Past 7 Days:
- 15
- Past 30 Days:
- 87
- All Time:
- 252
Comments: 0
No one has left comments on this guide. Will you be first?
Go to guide commentsCompleted: 0 1
No one has marked this guide "completed." Will you be the first?
1 person has marked this guide "completed." It's you — great job!
Favorites: 0 1
No one has favorited (and subscribed to) this guide. Will you be the first?
1 person has favorited (and subscribed to) this guide — and that's you!
Introduction
Go to step 1 ↓Use this replacement guide to remove the back cover of a Dell XPS 13 9315 laptop. The back cover is the component responsible for protecting the inner components of the laptop that are delicate and prone to direct damage. In this device, the back cover includes 8 back cover Torx screws 3.2 mm by 3.4 mm and 13 retention clips.
Disconnect all external power sources prior to beginning this guide. Make sure to power off your laptop completely before proceeding with any steps involving the inner components of the laptop.
There are no special skills or tools required to complete this guide.
What you need
Tools


-
-
-
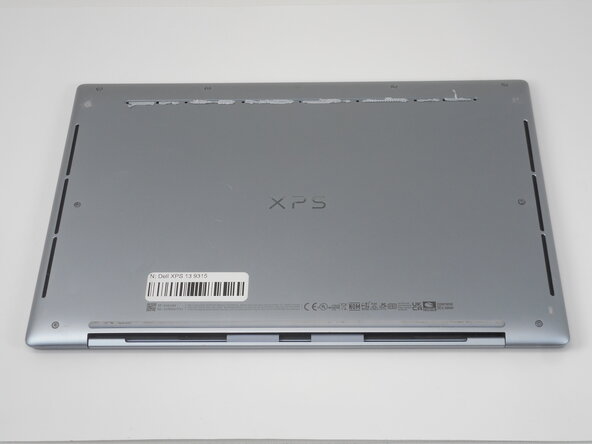
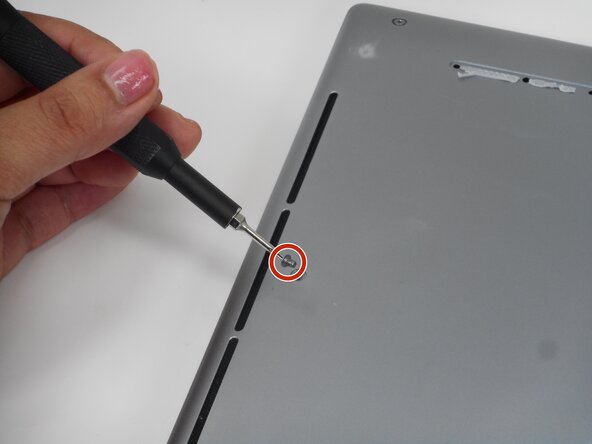
Use a T5 Torx screwdriver to remove the eight 3.2 mm-long screws securing the lower case.
 Ask FixBot
-
-
-
Insert an opening pick into the seam between the lower case and chassis.
-
Slide the pick around the entire perimeter while prying to disengage the retaining clips.
-
-
-



To reassemble your device, follow the above steps in reverse order.
Repair didn’t go as planned? Try some basic troubleshooting or ask our Answers community for help.

Team

University of Memphis, Team 1-2, Sneed Spring 2026 Member of University of Memphis, Team 1-2, Sneed Spring 2026
UM-SNEED-S26S1G2
3 Members
72 Guides authored
