Introduction
Use the previous guide to open the back cover of a Dell XPS 13 9315 laptop and use this guide to remove and locate the battery. The battery is responsible for allowing the laptop to be powered without any external power sources while also enabling convenience and portability. In this device, the battery only includes 8 M2x3 screws.
Disconnect all external power sources prior to beginning this guide. Make sure to power off your laptop completely before proceeding with any steps involving the inner components of the laptop.
There are no special skills or tools required to complete this guide.
What you need
-
-
-
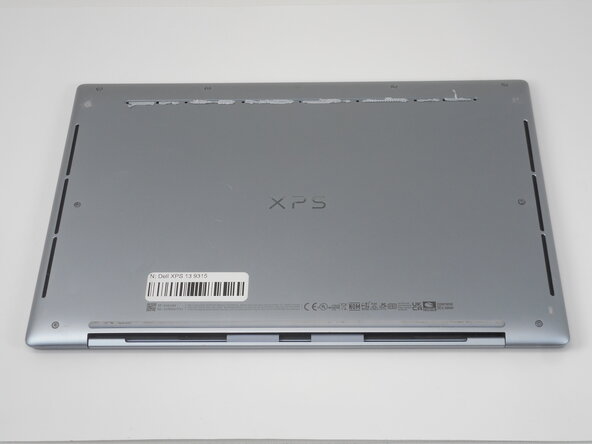
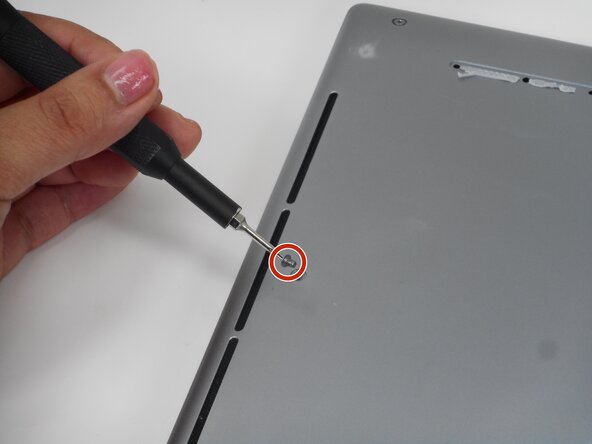
Use a T5 Torx screwdriver to remove the eight 3.2 mm-long screws securing the lower case.
 Ask FixBot
-
-
-
Insert an opening pick into the seam between the lower case and chassis.
-
Slide the pick around the entire perimeter while prying to disengage the retaining clips.
-
-
-
-
-
-
Gently walk the battery connector directly out of its socket.
-
-
-
-
-
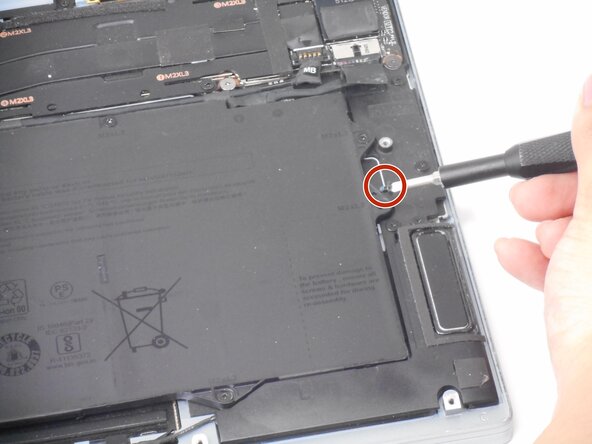
Use a Phillips #0 screwdriver to remove the eight M2x3 screws securing the battery.
-
-





To reassemble your device, follow the above steps in reverse order.
For optimal performance, after completing this guide, calibrate your newly installed battery.
Take your e-waste to an R2 or e-Stewards certified recycler.
Repair didn’t go as planned? Try some basic troubleshooting or ask our Answers community for help.

Team

University of Memphis, Team 1-2, Sneed Spring 2026 Member of University of Memphis, Team 1-2, Sneed Spring 2026
UM-SNEED-S26S1G2
3 Members
72 Guides authored
