Free Shipping on Domestic Orders $75+

Dell XPS 13 9310 Lower Case Replacement

What you need

    1. Dell XPS 13 9310 Lower Case Replacement, Unfasten the lower case: step 1, image 1 of 2 Dell XPS 13 9310 Lower Case Replacement, Unfasten the lower case: step 1, image 2 of 2
      • Use a T5 Torx screwdriver to remove the eight 3.3 mm screws securing the case.

      Ask FixBot

      Add Comment

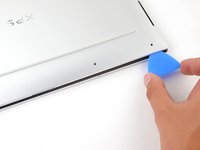
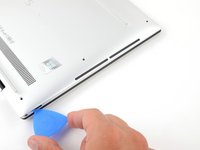
    2. Dell XPS 13 9310 Lower Case Replacement, Insert an opening pick: step 2, image 1 of 2 Dell XPS 13 9310 Lower Case Replacement, Insert an opening pick: step 2, image 2 of 2
      • Insert an opening pick between the lower case and the chassis on the front right edge.

      Ask FixBot

      Add Comment

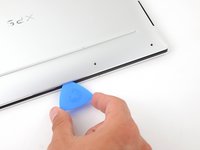
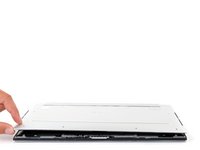
    3. Dell XPS 13 9310 Lower Case Replacement, Release the case's front clips: step 3, image 1 of 2 Dell XPS 13 9310 Lower Case Replacement, Release the case's front clips: step 3, image 2 of 2
      • Slide the pick along the front edge to release the clips securing the lower case.

      Ask FixBot

      Add Comment

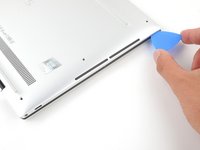
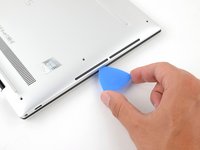
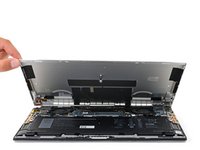
    4. Dell XPS 13 9310 Lower Case Replacement, Release the remaining clips: step 4, image 1 of 3 Dell XPS 13 9310 Lower Case Replacement, Release the remaining clips: step 4, image 2 of 3 Dell XPS 13 9310 Lower Case Replacement, Release the remaining clips: step 4, image 3 of 3
      • Continue sliding the opening pick along the perimeter of the lower case to release the remaining clips.

      Ask FixBot

      Add Comment

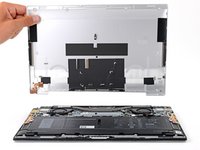
    5. Dell XPS 13 9310 Lower Case Replacement: step 5, image 1 of 3 Dell XPS 13 9310 Lower Case Replacement: step 5, image 2 of 3 Dell XPS 13 9310 Lower Case Replacement: step 5, image 3 of 3
      • Lift the lower case from the chassis and remove it.

      • During reassembly, this is a good point to power on your laptop and test all functions before sealing it up. Be sure to power your laptop back down before you continue working.

      Ask FixBot

      Add Comment

Conclusion

To reassemble your device, follow these instructions in reverse order.

Take your e-waste to an R2 or e-stewards certified recycler.

Repair didn't go as planned? Try some basic troubleshooting, or ask our Dell XPS answers community for help.

Cancel: I did not complete this guide.

16 other people completed this guide.

Spencer Day

Member since: 09/14/22

199,853 Reputation

1,243 Guides authored

Team

iFixit Member of iFixit

Staff

123 Members

78,044 Guides authored

0 Guide Comments

Add Comment

View Statistics:

Past 24 Hours: 10

Past 7 Days: 63

Past 30 Days: 234

All Time: 6,483