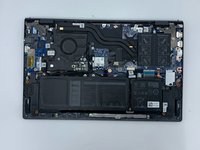
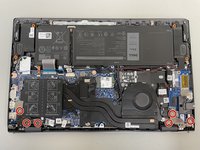
Free Shipping on Domestic Orders $75+

Dell Vostro 5510 Display LCD Replacement

What you need

  1. Dell Vostro 5510 Display LCD Replacement, Back Cover: step 1, image 1 of 1
    • Power off your laptop before beginning disassembly.

    • Place the laptop so the bottom cover is facing upwards.

  2. Dell Vostro 5510 Display LCD Replacement: step 2, image 1 of 1
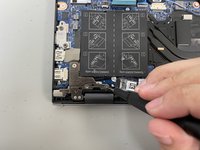
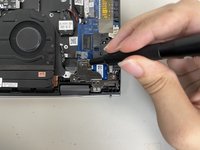
    • Remove the remaining (M2x4mm) screws with the screwdriver.

    • Loosen the two captive (M2x7.5mm) corner screws with the screwdriver.

  3. Dell Vostro 5510 Display LCD Replacement: step 3, image 1 of 3 Dell Vostro 5510 Display LCD Replacement: step 3, image 2 of 3 Dell Vostro 5510 Display LCD Replacement: step 3, image 3 of 3
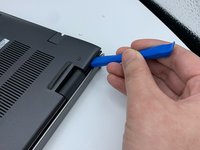
    • Pry open the top left corner of the cover with the opening tool.

    • Pry open the top right corner of the cover with the opening tool.

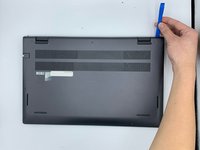
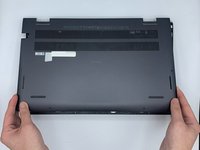
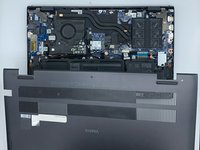
    • Pry the rest of the cover with the opening tool, working in a clockwise motion until it is completely loosened.

  4. Dell Vostro 5510 Display LCD Replacement: step 4, image 1 of 3 Dell Vostro 5510 Display LCD Replacement: step 4, image 2 of 3 Dell Vostro 5510 Display LCD Replacement: step 4, image 3 of 3
    • Lift the cover to remove it from the rest of the laptop.

  5. Dell Vostro 5510 Display LCD Replacement, Display Assembly: step 5, image 1 of 3 Dell Vostro 5510 Display LCD Replacement, Display Assembly: step 5, image 2 of 3 Dell Vostro 5510 Display LCD Replacement, Display Assembly: step 5, image 3 of 3
    • Remove the six 4 mm hinge screws using the Phillips #0 screwdriver.

  6. Dell Vostro 5510 Display LCD Replacement: step 6, image 1 of 2 Dell Vostro 5510 Display LCD Replacement: step 6, image 2 of 2
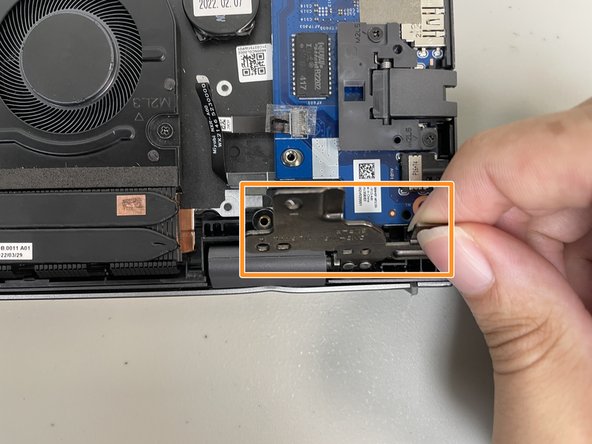
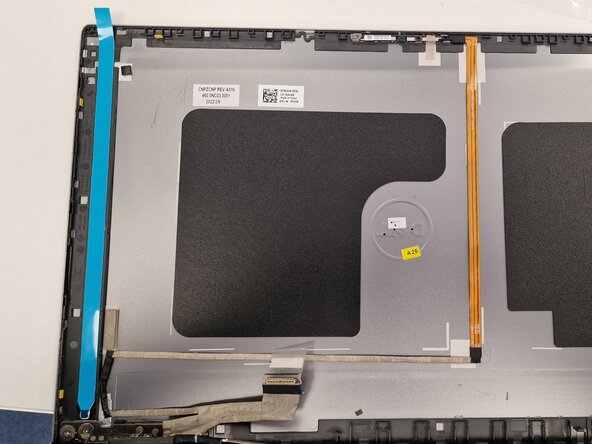
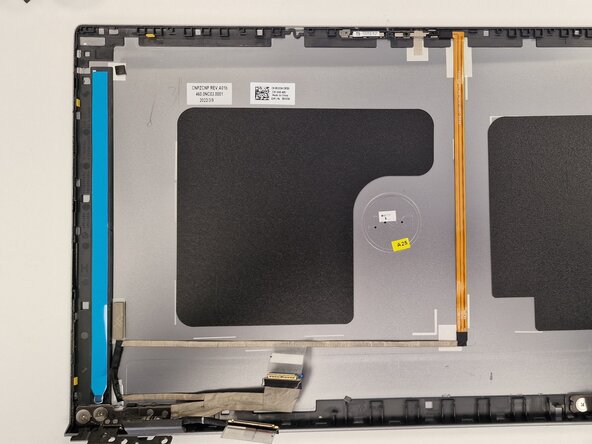
    • Flip up the hinge panel for the left side of the laptop.

    • Flip up the hinge panel for the right side of the laptop.

  7. Dell Vostro 5510 Display LCD Replacement: step 7, image 1 of 2 Dell Vostro 5510 Display LCD Replacement: step 7, image 2 of 2
    • Disconnect the display cable with your hands.

  8. Dell Vostro 5510 Display LCD Replacement: step 8, image 1 of 1
    • Lift up the laptop with your hands to detach it from the display assembly.

  9. Dell Vostro 5510 Display LCD Replacement, Bezel Removal: step 9, image 1 of 2 Dell Vostro 5510 Display LCD Replacement, Bezel Removal: step 9, image 2 of 2
    • Once screen is removed gently pry away the bezel.

    • if the screen is damaged and being replaced then it can be helpful to pry from the inside against the screen but this will cause damage to the LCD.

  10. Dell Vostro 5510 Display LCD Replacement, Bezel Removal: step 10, image 1 of 3 Dell Vostro 5510 Display LCD Replacement, Bezel Removal: step 10, image 2 of 3 Dell Vostro 5510 Display LCD Replacement, Bezel Removal: step 10, image 3 of 3
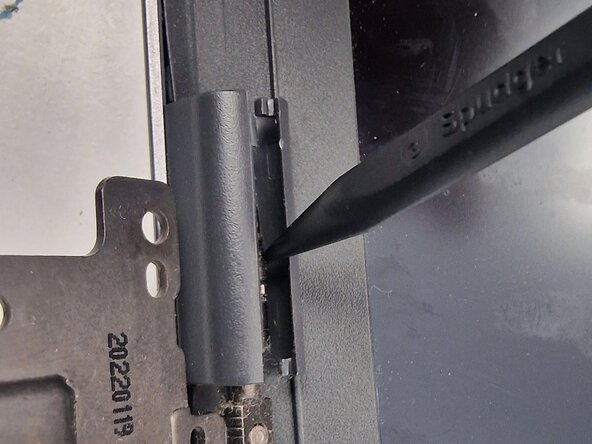
    • Use a Splurge or pick to separate the hinge plastics

    • Take care around the display connector as to not damage it.

  11. Dell Vostro 5510 Display LCD Replacement, Bezel Removal: step 11, image 1 of 1
    • once separated the Webcam privacy cover will come loose and can be removed. Be careful not to loose it.

  12. Dell Vostro 5510 Display LCD Replacement, Bezel Removal: step 12, image 1 of 1
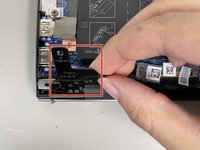
    • once the bezle is removed peel off any damaged or loose adicive

    • it is sometimes possible to save and reuse the addictive but often needs replacment.

  13. Dell Vostro 5510 Display LCD Replacement, LCD Removal: step 13, image 1 of 2 Dell Vostro 5510 Display LCD Replacement, LCD Removal: step 13, image 2 of 2
    • Set the bezle to one side and attack the screen next

    • There are 2x addisive strips holding the screen in

    • Locate the pull tabs and gently pull on them to release the adicive

    • Take care not the break the strips when removing as they are fragile and screen is difficult to remove with these in place.

    • Gently lifting one side of the screen can help release any strip that couldn't be pulled out with the tabs.

  14. Dell Vostro 5510 Display LCD Replacement, LCD Removal: step 14, image 1 of 1
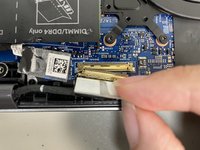
    • Once released from adhesive strips carefully flip the screen over and disconnect the display cable on the rear.

  15. Dell Vostro 5510 Display LCD Replacement, LCD Install: step 15, image 1 of 3 Dell Vostro 5510 Display LCD Replacement, LCD Install: step 15, image 2 of 3 Dell Vostro 5510 Display LCD Replacement, LCD Install: step 15, image 3 of 3
    • Replace the strips ensuring the new pull tabs are aligned at the bottom.

    • Some strips come supplied too long and will require trimming.

  16. Dell Vostro 5510 Display LCD Replacement, LCD Install: step 16, image 1 of 2 Dell Vostro 5510 Display LCD Replacement, LCD Install: step 16, image 2 of 2
    • Connect the display cable to the new screen and ensure the cables are positioned correctly running through the hindge

    • Align the display with he top of the lid first

    • Gently lower the screen on to the new strips ensuring display cable remains in correct position.

  17. Dell Vostro 5510 Display LCD Replacement: step 17, image 1 of 2 Dell Vostro 5510 Display LCD Replacement: step 17, image 2 of 2
    • Before refitting the bezel ensure that the webcam privacy cover is refitted and any screen protectors have been removed.

  18. Dell Vostro 5510 Display LCD Replacement, Bezel Install: step 18, image 1 of 1
    • Apply new adhesive to the bezel if needed and snap it back in to location

    • Follow reverse of dissemble instructions to refit display.

Conclusion

To reassemble your device, follow these instructions in reverse order. Replacing Additive Strips behind display and on Bezel

One other person completed this guide.

Philip Lloyd

Member since: 02/25/26

1 Reputation

1 Guide authored

0 Guide Comments

Add Comment

View Statistics:

Past 24 Hours: 0

Past 7 Days: 2

Past 30 Days: 5

All Time: 24