Free Shipping on Domestic Orders $75+

Dell Vostro 3560 Back Panel Removal

What you need

    1. Dell Vostro 3560 Back Panel Removal, Identify your laptop: step 1, image 1 of 2 Dell Vostro 3560 Back Panel Removal, Identify your laptop: step 1, image 2 of 2
      • Make sure you have the right laptop by checking the sticker.

      Ask FixBot

      Add Comment

    2. Dell Vostro 3560 Back Panel Removal, Remove Battery: step 2, image 1 of 2 Dell Vostro 3560 Back Panel Removal, Remove Battery: step 2, image 2 of 2
      • Start with your PC shut off and upside down.

      • Pull out tabs.

      • Pull up on rail to remove battery.

      Ask FixBot

      Add Comment

    1. Dell Vostro 3560 Back Panel Removal, Remove Back Panel: step 3, image 1 of 1
      • Remove the two screws:

      • One M2 Phillips screw (Fixed)

      • One 5-mm M2 Phillips screw

      Ask FixBot

      Add Comment

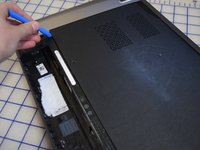
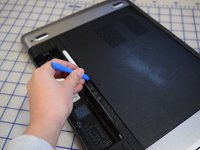
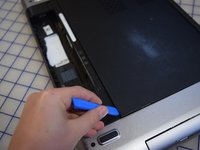
    2. Dell Vostro 3560 Back Panel Removal: step 4, image 1 of 3 Dell Vostro 3560 Back Panel Removal: step 4, image 2 of 3 Dell Vostro 3560 Back Panel Removal: step 4, image 3 of 3
      • Use a iFixit opening tool to remove the back panel.

      Ask FixBot

      Add Comment

    3. Dell Vostro 3560 Back Panel Removal: step 5, image 1 of 1
      • From here you can access:

      • The hard drive

      • The RAM.

      • The CD Drive.

      Ask FixBot

      Add Comment

Conclusion

To reassemble your device, follow these instructions in reverse order.

Cancel: I did not complete this guide.

4 other people completed this guide.

Max Bareilles

Member since: 02/24/20

703 Reputation

5 Guides authored

0 Guide Comments

Add Comment

View Statistics:

Past 24 Hours: 1

Past 7 Days: 7

Past 30 Days: 42

All Time: 1,604