
Dell Vostro 3550 CMOS Battery Replacement

Dylan J. Souza and 3 other contributors
Last updated on Jul 14, 2019
Views: 15K
View statistics:
- Past 24 Hours:
- 2
- Past 7 Days:
- 35
- Past 30 Days:
- 227
- All Time:
- 14,643
Comments: 18
13 comments on steps, 5 guide comments.
Go to guide commentsCompleted: 4 5
4 people have marked this guide "completed." Will you be next?
5 people have marked this guide "completed." Including you — great job!
Favorites: 1 2
1 person has favorited (and subscribed to) this guide. Will you be next?
2 people have favorited (and subscribed to) this guide — including you!
Community-Contributed Guide
An awesome member of our community made this guide. It was not created by iFixit staff.
Introduction
Go to step 1 ↓This guide will explain in detail how to replace the CMOS battery in the Dell Vostro 3550. An easy way to tell whether the CMOS battery on your device needs to be changed is if your computer suddenly forgets the current day and time.
What you need
Tools

-
-
-
-
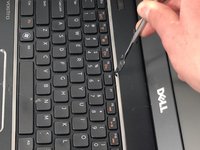
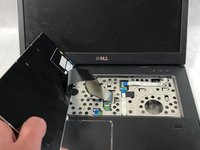
Turn the laptop right side up. Open the display to reveal the keyboard.
-
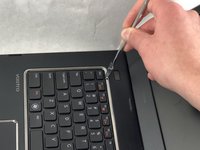
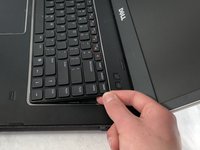
Use the metal spudger to pry the keyboard upward from the base. Make sure to pop each of the three clips keeping the keyboard in place.
-
-
-
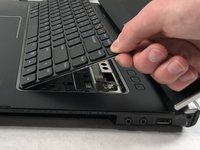
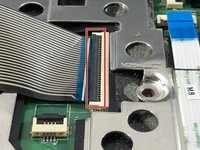
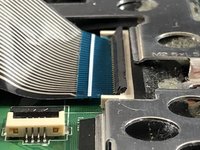
Lift the black tab on the keyboard cable connector upwards to release the cable.
-
-
-
-
-
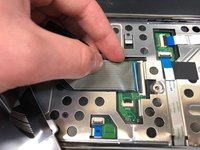
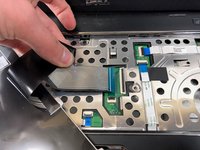
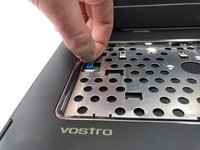
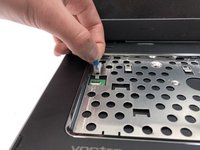
Remove the small cable connected to the left side of the casing.
-
Repeat this step for the three remaining cables on the casing.
-
-
-
-
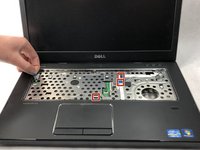
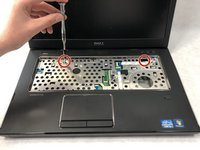
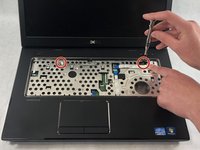
Remove the two 5mm Phillips #0 screws to the far right and far left of the motherboard casing.
-
-
-
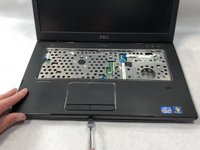
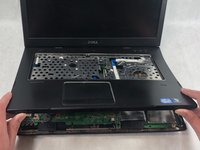
Using the metal spudger, pry the palmrest assembly from the lower case.
-
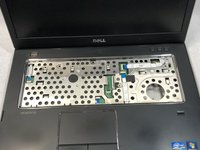
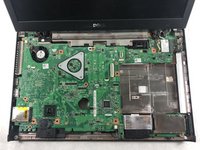
Lift off the palmrest assembly to reveal the motherboard.
-
-
-
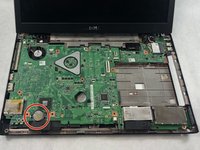
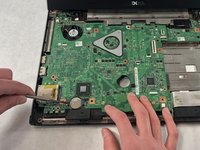
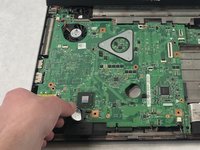
Use a nylon spudger to pry the CMOS battery from the motherboard.
-
Remove the CMOS battery.
-
-

 Ask FixBot
















To reassemble your device, follow these instructions in reverse order.
Cancel: I did not complete this guide.
4 other people completed this guide.

Team

UMass Dartmouth, Team S8-G6, Bailey Spring 2019 Member of UMass Dartmouth, Team S8-G6, Bailey Spring 2019
UMASSD-BAILEY-S19S8G6
3 Members
84 Guides authored
5 Guide Comments
Thank you, this saved my day.
Two small things:
- In step 7 I needed to remove four screws (visible in the picture).
- In order to perform step 9, I needed to remove seven screws from the bottom case.
Glad you found it helpful!
Note: before step 9, we need to remove all the screws from bottom before open the cover!
Thanks for all, it´s helped me A LOT!!!!!
Thank you for the documentation. I have a Vostro 3450, and the keyboard removal process is identical. Then the CD drive has to be removed to access the circuit board, and the battery is located on the back of the board, so you have to remove it. It took me two hours. You should replace the battery very quickly, otherwise, settings might be corrupted. In my case, the bootloader was damaged afterward, and the MBR had to be rebuilt.
In step 8, there are a total of 4 screws that need to be removed.
You also need to remove the bottom case screws, including two underneath the rubber circles in the corners, before you can separate the palmrest from the bottom case.
