Free Shipping on Domestic Orders $75+

Dell VRC100-R Motherboard Replacement

What you need

  1. Dell VRC100-R Motherboard Replacement, Battery: step 1, image 1 of 3 Dell VRC100-R Motherboard Replacement, Battery: step 1, image 2 of 3 Dell VRC100-R Motherboard Replacement, Battery: step 1, image 3 of 3
    • Orient your controller so that the black ring is on the bottom and the buttons are facing away from yourself.

    • Place your thumb on the small arrow that is on the controller's battery cover and firmly push upwards.

    • Slide the cover off and separate it from the controller.

    Ask FixBot

    Add Comment

  2. Dell VRC100-R Motherboard Replacement: step 2, image 1 of 2 Dell VRC100-R Motherboard Replacement: step 2, image 2 of 2
    • Remove the right battery by pushing the positive end down and pulling the battery out toward yourself.

    • Repeat the procedure for the left battery.

    Ask FixBot

    Add Comment

  3. Dell VRC100-R Motherboard Replacement, Joystick: step 3, image 1 of 3 Dell VRC100-R Motherboard Replacement, Joystick: step 3, image 2 of 3 Dell VRC100-R Motherboard Replacement, Joystick: step 3, image 3 of 3
    • Hold the joystick down with your left thumb to make space for the plastic opening tool.

    • Insert the plastic opening tool into the circle above the joystick and pry upwards to lift the front panel.

    • Slide the plastic opening tool around the perimeter until you can lift the front panel.

    • You may hear a popping noise when you pry off the front panel.

    Ask FixBot

    Add Comment

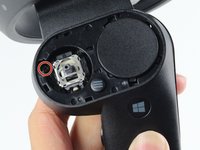
  4. Dell VRC100-R Motherboard Replacement: step 4, image 1 of 2 Dell VRC100-R Motherboard Replacement: step 4, image 2 of 2
    • Grab the joystick and pull away from the controller to remove it.

    Ask FixBot

    Add Comment

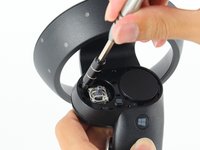
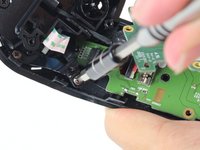
  5. Dell VRC100-R Motherboard Replacement, Daughterboard: step 5, image 1 of 2 Dell VRC100-R Motherboard Replacement, Daughterboard: step 5, image 2 of 2
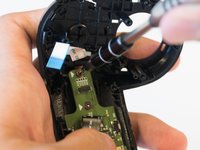
    • Remove one 6mm Phillips #0 screw.

    Ask FixBot

    Add Comment

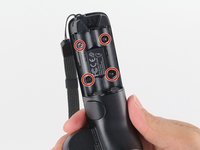
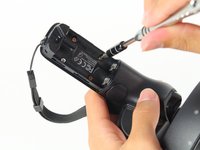
  6. Dell VRC100-R Motherboard Replacement: step 6, image 1 of 2 Dell VRC100-R Motherboard Replacement: step 6, image 2 of 2
    • Turn your controller over and orient it so that the thin side is on the top.

    • Remove four 4mm Phillips #0 screws.

    Ask FixBot

    Add Comment

  7. Dell VRC100-R Motherboard Replacement: step 7, image 1 of 2 Dell VRC100-R Motherboard Replacement: step 7, image 2 of 2
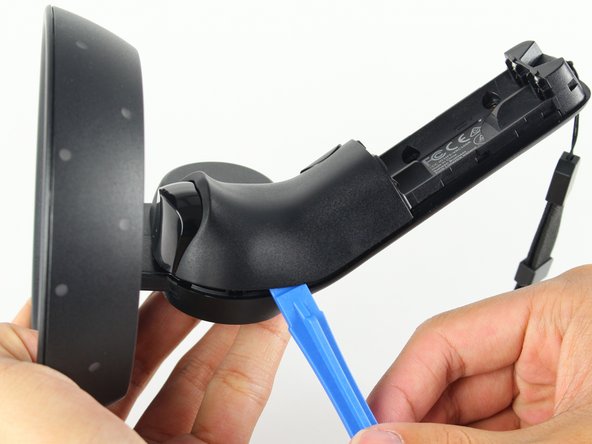
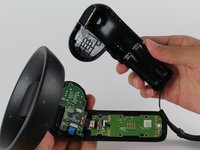
    • Turn your controller 90 degrees clockwise and insert a blue plastic opening tool into the crease of the back panel.

    • Push down on the end of the plastic opening tool closest to you to lift the panel up.

    • Slide the plastic opening tool around the perimeter of the back panel until you can remove it.

    • You may hear loud popping noises as the back panel separates from the controller.

    Ask FixBot

    Add Comment

  8. Dell VRC100-R Motherboard Replacement: step 8, image 1 of 2 Dell VRC100-R Motherboard Replacement: step 8, image 2 of 2
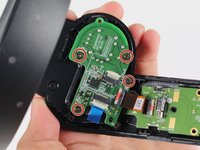
    • Remove four 4mm Phillips #0 screws.

    Ask FixBot

    Add Comment

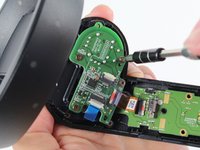
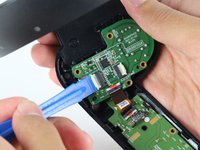
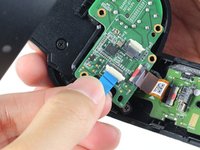
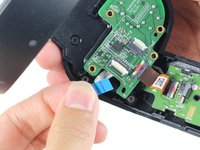
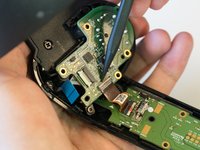
  9. Dell VRC100-R Motherboard Replacement: step 9, image 1 of 3 Dell VRC100-R Motherboard Replacement: step 9, image 2 of 3 Dell VRC100-R Motherboard Replacement: step 9, image 3 of 3
    • Use the tip of the blue plastic opening tool or your fingernail to gently flip-up the white locking flap.

    • Make sure to only lift the flap and not the connector socket because the socket easily breaks off.

    • Grab the blue cable and pull away from the socket.

    • To reinstall, insert the blue cable into the connector and close the flap on the black line.

    Ask FixBot

    Add Comment

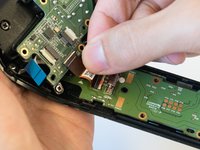
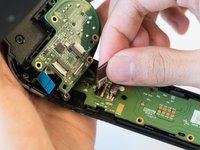
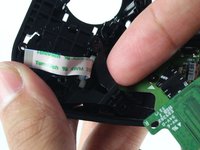
  10. Dell VRC100-R Motherboard Replacement: step 10, image 1 of 3 Dell VRC100-R Motherboard Replacement: step 10, image 2 of 3 Dell VRC100-R Motherboard Replacement: step 10, image 3 of 3
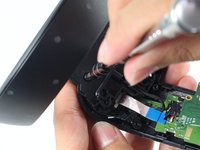
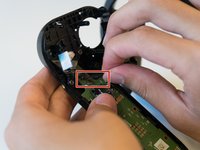
    • Use the tip of a spudger or your fingernail to gently flip-up the small white flap holding the orange ribbon cable.

    • Make sure to only lift the flap and not the connector socket because the socket easily breaks off.

    • Grab the orange cable and pull away from the socket.

    • To reinstall, insert the orange cable into the connector and close the flap on the white line.

    Ask FixBot

    Add Comment

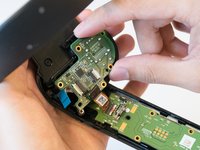
  11. Dell VRC100-R Motherboard Replacement: step 11, image 1 of 2 Dell VRC100-R Motherboard Replacement: step 11, image 2 of 2
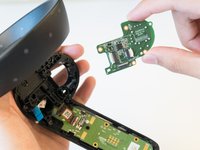
    • Place two fingers on the perimeter of the daughterboard and lift it away from the controller.

    Ask FixBot

    Add Comment

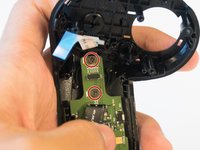
  12. Dell VRC100-R Motherboard Replacement, Motherboard: step 12, image 1 of 2 Dell VRC100-R Motherboard Replacement, Motherboard: step 12, image 2 of 2
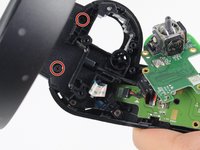
    • Remove two black 6mm Phillips #0 screws.

    Ask FixBot

    Add Comment

  13. Dell VRC100-R Motherboard Replacement: step 13, image 1 of 2 Dell VRC100-R Motherboard Replacement: step 13, image 2 of 2
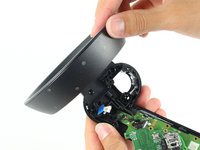
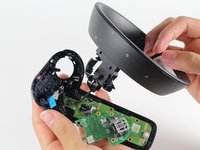
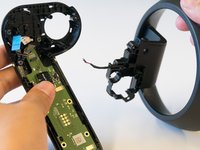
    • Pinch the black ring on the top of your controller and pull toward yourself to disconnect it.

    • The ring may slightly pop as it disconnects from the controller body.

    Ask FixBot

    Add Comment

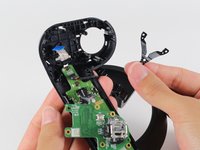
  14. Dell VRC100-R Motherboard Replacement: step 14, image 1 of 2 Dell VRC100-R Motherboard Replacement: step 14, image 2 of 2
    • Grab the black and red wires attached to the motherboard and wiggle the connector out of the socket.

    Ask FixBot

    Add Comment

  15. Dell VRC100-R Motherboard Replacement: step 15, image 1 of 2 Dell VRC100-R Motherboard Replacement: step 15, image 2 of 2
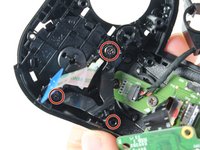
    • Remove three 3mm Phillips #0 screws.

    Ask FixBot

    Add Comment

  16. Dell VRC100-R Motherboard Replacement: step 16, image 1 of 2 Dell VRC100-R Motherboard Replacement: step 16, image 2 of 2
    • Insert your finger underneath the black plastic "V" and scoop up to remove it.

    Ask FixBot

    Add Comment

  17. Dell VRC100-R Motherboard Replacement: step 17, image 1 of 2 Dell VRC100-R Motherboard Replacement: step 17, image 2 of 2
    • Remove two 4mm Phillips #0 screws.

    Ask FixBot

    Add Comment

  18. Dell VRC100-R Motherboard Replacement: step 18, image 1 of 1
    • Pinch the orange ribbon cable and pull toward yourself to remove the motherboard.

    Ask FixBot

    Add Comment

Conclusion

To reassemble your device, follow these instructions in reverse order.

Cancel: I did not complete this guide.

One other person completed this guide.

Steven Pineda

Member since: 04/16/18

1,049 Reputation

3 Guides authored

Team

Cal Poly, Team S18-G3, Livingston Spring 2018 Member of Cal Poly, Team S18-G3, Livingston Spring 2018

CPSU-LIVINGSTON-S18S18G3

4 Members

5 Guides authored

4 Guide Comments

Thanks, using this as a tear down guide.

Gamerz Crafted - Reply Share

Hi, do anyone know where this motherboard can be purchased?

John Franco - Reply Share

does anybody know where I can buy the ribbon cable, between the two boards. in Step 10

Tim Bury - Reply Share

where can i buy the motherboard?

José Yoctán Leyva Román - Reply Share

Add Comment

View Statistics:

Past 24 Hours: 4

Past 7 Days: 6

Past 30 Days: 35

All Time: 1,889